Print
New York Cheesecake In The Instant Pot
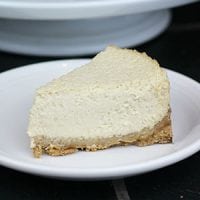
The classic New York cheesecake is a great jumping off place for all other Instant Pot cheesecake recipes, and couldn't be more delicious. Rich and satisfying, perfect in its simplicity. Makes crust and filling for (1) 7" cheesecake.
Prep Time 25 minutes
Cook Time 34 minutes
Release Time plus Chilling 6 hours 30 minutes
Total Time 7 hours 29 minutes
Servings 8 servings
Calories 481 kcal
Ingredients
For the crust:
- 3/4 cup cassava flour
- 1/4 cup grass-fed butter or lard
- 1/4 cup coconut sugar
- 1 pinch sea salt
- 1/4 teaspoon baking soda sifted
For the filling:
- 16 ounces organic cream cheese room temperature
- 2 organic or pastured eggs
- 3/4 cup maple syrup
- 2 teaspoons sustainably-sourced gelatin (certified glyphosate-free)
- 2 teaspoons vanilla extract
- 3/4 cup heavy cream
Instructions
To make the crust:
-
Preheat oven to 350 degrees Fahrenheit.
-
Combine flour, coconut sugar, sea salt, and baking soda in food processor.
-
Pulse briefly to blend.
-
Then add lard and pulse again until flour begins to come together, darkening slightly and absorbing the fat (about 2 minutes).
-
Press mixture into 7-inch springform pan.
-
Bake for 9 minutes.
-
Finally, remove from oven and turn off.
To make the filling:
-
Blend cream cheese, eggs, maple syrup, gelatin, and vanilla in blender until smooth.
-
Add the heavy cream and blend again briefly (about 5 seconds).
-
Put 2 cups of water and trivet in pressure cooker.
-
Then cover with a glass lid or plate to prevent evaporation.
-
If using an electric cooker (such as the Instant Pot), put it on sauté so it can begin pre-heating.
-
If using a stovetop cooker, turn on the burner to medium to begin pre-heating.
-
Then, pour filling into 7-inch springform pan with crust (see above recipe). It's best not to overfill the pan -- so if you have any leftover it keeps for about 5 days in the fridge, until you're ready to make muffins, quick bread, or cake. It makes the most delicious swirl. Just pour over and into your other batter before baking!
-
Cover pan with a piece of parchment paper followed by a piece of aluminum foil.
-
Crimp down loosely.
-
Then, use sling to transfer (carefully) to pressure cooker.
-
Cover the pot, checking the seal and components to make sure all is well.
-
If using an electric cooker, set to high for 25 minutes.
-
If using a stovetop cooker, bring to low pressure and maintain for 35 minutes.
-
When cooking time is over, if using an electric cooker, hit the Cancel button to turn off the heat, and also unplug it.
-
With a stovetop cooker, remove from heat.
-
Then let pressure release naturally.
-
When pressure is released, transfer the cheesecake carefully out of pressure cooker and put on cooling rack.
-
Then remove the covers.
-
If any water is pooled in the center, siphon off with a spoon.
-
Use a butter knife to separate cheesecake from sides of pan. My pan is non-stick, so I like to use a wooden knife to protect the pan's integrity.
-
Replace covers.
-
Then refrigerate to chill thoroughly.
-
Remove from springform pan as desired for presentation.
-
Finally, slice, serve, and enjoy!
Recipe Notes
- For the crust, I use my favorite allergy-friendly, grain-free white flour: cassava. No one even knows they're eating a Paleo, gluten-free flour alternative! And, cassava is so versatile -- my family enjoys it in our muffins, pancakes, hashbrowns, and more.
- If cassava doesn't appeal to you, feel free to try out the crust recipe from this Orange Dark Chocolate Cheesecake.
Nutrition Facts
New York Cheesecake In The Instant Pot
Amount Per Serving
Calories 481
Calories from Fat 315
% Daily Value*
Fat 35g54%
Saturated Fat 20g125%
Cholesterol 149mg50%
Sodium 311mg14%
Potassium 178mg5%
Carbohydrates 37g12%
Fiber 1g4%
Sugar 24g27%
Protein 6g12%
Vitamin A 1326IU27%
Vitamin C 1mg1%
Calcium 128mg13%
Iron 1mg6%
* Percent Daily Values are based on a 2000 calorie diet.