
If you’re serious about gardening, the growing season never really comes to an end. Something always needs to be done, even in the dead of winter or early spring. On our homestead, once the holidays are over, it is time to turn our attention to the upcoming spring planting season, which actually starts several weeks in advance of spring. The first item on my agenda is to start my own transplants from seed.
When I was a new gardener, this task intimidated me. It seemed complicated and unnecessary, considering the fact I could just go out and buy them. But then I got more interested in heirloom varieties and organic practices, and found that starting my own plants gave more variety than anything I could find at the local nursery. Not to mention how I have complete control over using fertilizers and pest control — or not.
Do you want to start your own transplants? Here are my best tips.
You will need:
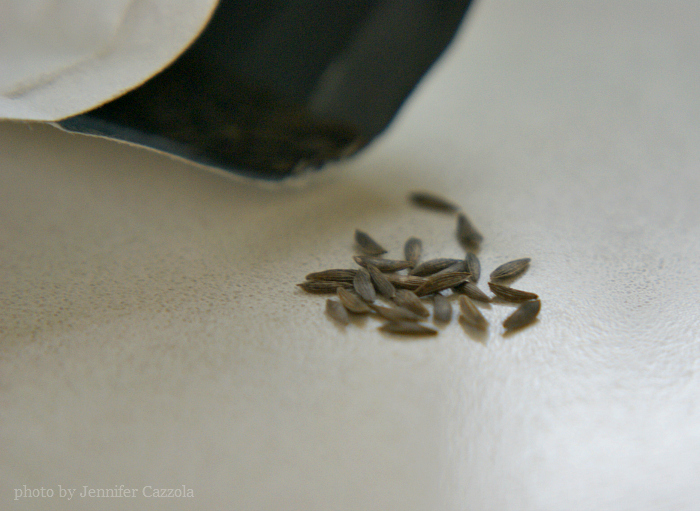
- Seeds of your choice. We recommend organic heirloom seeds from Peaceful Valley’s Grow Organic or Seeds for Generations.
- Plastic containers with a clear lid of some sort, such as empty yogurt containers, solo cups, or even the Jiffy mini greenhouses. You can also reuse the black square planters from previously purchased transplants, but make sure they have been disinfected. Peat pots are also a popular choice because they can be set directly into the ground. Plastic, in my opinion, does a better job of conserving moisture and can be reused.
- Growing medium. This can be a standard potting mix, a seed starting mix, or Jiffy pellets.
- A light source. If you have grow lights, wonderful! If you don’t, a south-facing window is fine.
Choose what you are going to grow.
Consider what you and your family like to eat, as well as what will grow best in your zone. For example, I love brussels sprouts but have yet to get them to grow successfully since we don’t always have a cold enough spring for them. If you have questions about what will and won’t work for your zone, contact your county extension office or a gardening friend for advice.
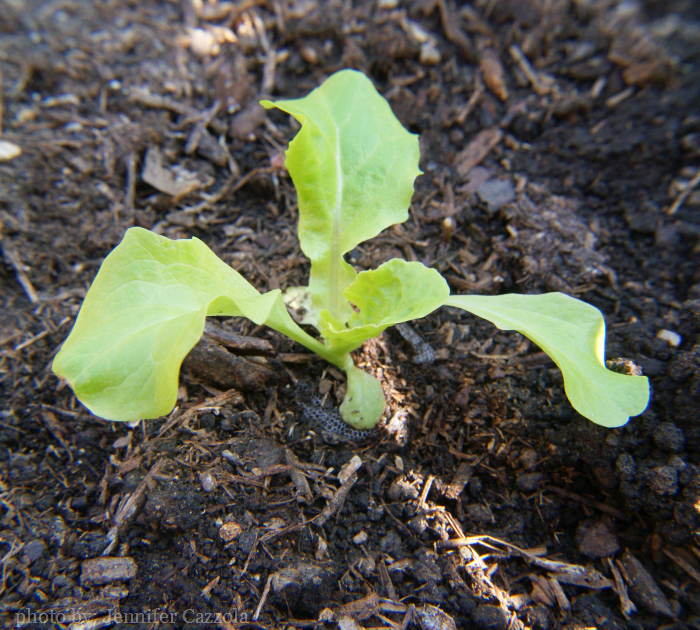
Additionally, choose crops that will transplant well or need a head start indoors. This includes lettuces, kale, Swiss chard, peppers, tomatoes, and broccoli. However, root vegetables and climbers such as beets, peas, and beans grow better sown directly in the garden. They don’t like to be moved once they get started.
Plant your seeds.
Decide on a time frame during which you plant your seeds. If you start too soon, they will outgrow your plants and won’t be as healthy. Alternatively, you don’t want to start them too late and miss your window entirely. Again, if you have questions about the proper planting times, contact your local extension office for help and advice.
The planting process itself can be messy so select an area that is easy to clean and set aside a time when you can give the task your full attention. Fill your pots, cups, or pellet trays. Make sure your medium is damp, and then plant your seeds! A general rule of thumb for depth is typically 4x the size of the seed. Always plant 2 to 3 seeds to ensure germination and gently cover with the medium. If all three sprout, you can select the healthiest one and pinch back the rest.
Cover your containers loosely with some sort of transparent lid that will conserve moisture and allow light. I have even used plastic wrap with great success. The objective is to create a moist greenhouse effect.
Now make sure that each crop is labeled, and write down the date they were planted for future reference. While you can write directly on the container, I prefer to use the little garage sale stickers since they are easily removed for a quick clean-up.
Set the seedlings under your light source.
If you have grow lights, set them directly under the light and lower it so that it is almost touching the top of the pot. As soon as the sprouts emerge remove the plastic cover and raise the light periodically so that it is always about one inch above the top of your plant. Any leaves that touch the bulb will burn, so make sure to keep the light far enough away.
If you are using a window as your light source, set the pots in a windowsill or on a TV tray as close to the window as possible. While a south-facing window is the best situation, any window that gets the most light will work. Again, once the sprouts emerge, remove the plastic cover. Every so often, give the pots a turn to keep the seedlings from “leaning” towards the light source.
While grow lights are the ideal tool for growing your own transplants, don’t be discouraged if you don’t have them. I grew my own seedlings on a windowsill for several years before I finally received a set from my husband as an anniversary gift. In fact, I would not recommend purchasing any unless you decide this is something you really want to do. They are bulky, take up space, and don’t blend into decor very well. 😉
Feed your plants.
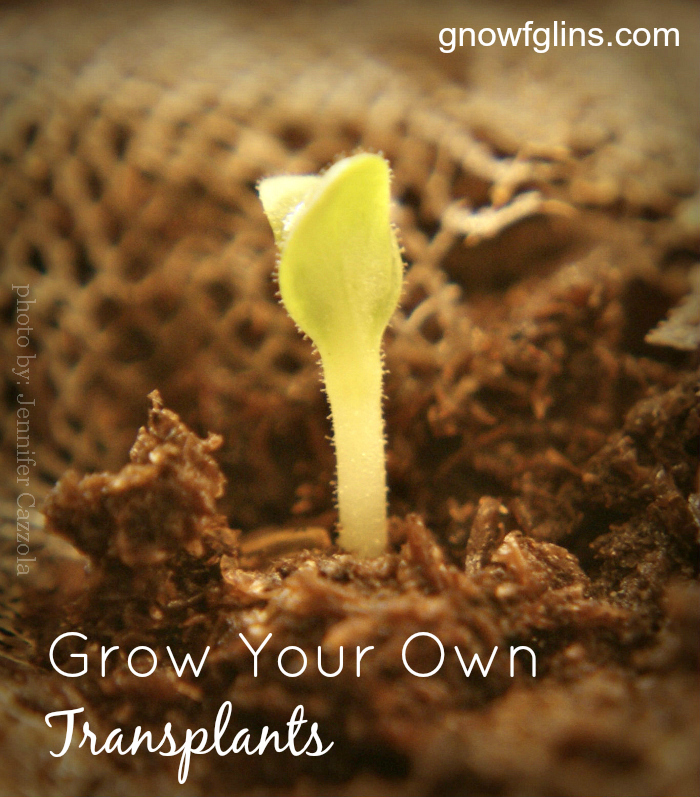
The first set of leaves to emerge are called the cotyledon. These are a very tender, small pair that don’t resemble the adult plant at all. The “true leaves” emerge from the center of the cotyledons, and while they will also be small, they will actually look like the adult plant. Once the true leaves emerge you can feed your plants. I prefer to use a very diluted mixture of organic fish emulsion fertilizer similar to what I use in my garden, and I only use it once or twice before setting them out into the garden. Over-feeding a plant can cause as many problems as underfeeding.
Harden off your seedlings.
Once your plants grow to be within 2 to 6 inches high, it’s time to condition them to outside life. Start on a cloudy day with little wind and set them in a protected place for a short amount of time. Over the course of a few weeks, increase exposure to the elements (sunlight and wind) for longer and longer periods of time until your plant can withstand full sun (or whatever exposure is required to thrive) without showing signs of stress such as wilting and flagging. You can read here for further tips on hardening off your plants.
After your seedlings have hardened off sufficiently, plant them in your garden. Dig a small hole slightly wider but no deeper than the pot, gently work the seedling out of the pot, place it in the hole, and pack the soil around it. Fertilize with the solution of your choice to give them a head start.
Additional tips.
Check on your seeds every day to monitor for moisture, signs of stress, damping off, or pests. The soil should be kept moist, but not wet. Overly wet soil causes a condition called damping off — where the base of the stem rots and causes the seedling to topple over. Once this happens, you can’t do anything to save your seedling(s).
Keep pests to a minimum by using yellow sticky traps. Pest sprays, even organic ones, are not advisable for young plants at this stage.
Use a small fan to gently blow on the plants and help develop strong stems.
Grow one crop at a time. Don’t try growing all of your garden transplants at once.
Some crops such as tomatoes and peppers will need heat in order to germinate. You can use a heat mat specifically for germinating seeds. I have success by simply setting the pots on top of my hot water heater. Once they germinate, they can be moved underneath the light source.
Do you grow your own transplants? What’s been most successful or what works best for you?
...without giving up the foods you love or spending all day in the kitchen!

2 free books:
Eat God's Way
Ditch the Standard American Diet, get healthier & happier, and save money on groceries...
We only recommend products and services we wholeheartedly endorse. This post may contain special links through which we earn a small commission if you make a purchase (though your price is the same).

Thank you for this thorough and inspiring post!
Great tips, Jenny! Now I am even more eager to get started!! My favorite windowsill starting containers are upside down clear plastic shoe boxes (around $1 each at lots of stores). I have used them with little pots, sections of starting trays, and soil blocks. When used as bases, the lids don’t hold much water, so I put towels down under them to catch overflow and protect the window sill. The clear box part can also be set over another type of tray to create a mini greenhouse.
Marie that is such a great idea! I have several of those containers because they are such a great size and like you said, I can get them for just $1 and our local store. Thanks for sharing your tips.
Jenny, what do you recommend for starters and transplants in a greenhouse? We are buying an acreage that has a greenhouse on it, and I can’t wait to (hopefully) grow something successfully. We live in the Texas Panhandle, and the wind here can be fierce. Do you start them inside and them move them to the greenhouse, then harden off before planting in raised beds outside? Start them in the greenhouse? The one garden I planted was during the summer of 2010–the summer from hell here. We had not a drop of rain for over four months and the wind blew out of the south almost everyday. Our transplants were shriveled and dead within a week of putting them outside at the beginning of May! So, my gardening skills are very under-developed. Any advice you can give for what to do in and out of a greenhouse would be appreciated!
Hi Lindsey,
I do not have any experience (yet) with greenhouse growing but I would imagine that much of the principles would be pretty much the same.
What you could start in an outdoor greenhouse would depend on the time of year and the inside temperature. Your cold weather crops such as lettuces, kale, cabbages, Swiss chard, and the like would do fine in cooler temperatures.
The warmer weather crops however such as tomatoes and peppers need heat to germinate, and like a warmer temperature. I usually start these a full 6-8 weeks in advance so I’m thinking those you’d probably want to start where it is warmer (inside), and then move to your greenhouse when they get to be a bit larger.
I totally get your wind situation. 🙁 We have to deal with that a lot down here. It sounds to me like transplants that are dead and shriveled within a week have maybe not been hardened off long enough and perhaps the wind is the issue as it can have a drying effect especially on new growth.
I would start your plants well enough in advance that you could give them a bit extra hardening off time before putting them in your garden. Before you plant them make sure they can go for a whole day, fully exposed, without showing signs of stress.
After planting, maybe give them extra mulch, or even use some hay piled up around the seedling to act as a buffer. When you know a windy day is coming, give them some extra water as added protection. I’ve also used the clear plastic solar bells (empty plastic milk container would work too) as a cloche to protect them in those early days in the garden.
Good luck with them. I hope you have great success!
These are some great tips, Jenny! I love the heat mat under the tomatoes,too…that’s what we’ve been doing wrong I bet !
We’re doing experiments with starting transplants in the house, in a hoop house (with extra plastic stretched around a corner of the hoop house), and a sun room. I find that if I brush my hand across the transplants ever so often, it makes their stems all the more stronger for when you do plant them out in the wind.
Yes! That helps too. We have also just used a magazine or a sheet of paper, or taken the trays of transplants into a room with a ceiling fan. Set them on the floor and turn the fan on high. We leave them there for an hour or so.
Love this! Thanks for sharing these great ideas. I’m bookmarking this for later 🙂
I learned a little trick I’d like to share with everyone to make your seedlings REALLY take off. I had 2 old florescent box shaped ceiling fixtures (12″ X 20″) that I had taken out of our house. I stacked one on top of the other and in the bottom rectangle I put christmas lights for heat, instead of buying a 38$ heating “mat”. It worked AMAZING. Then I got ambitious. I had some old windows that I was going to build a greenhouse with, but thought I could do the same thing with two windows and again, it worked amazing. The windows were probably 1.5 feet wide by 4 feet long. Sandwiched in between I had 3 or 4 strands of christmas lights. It was such a God idea, and my seedlings LOVED it and grew very strong! I wish I’d put a fan in the greenhouse, as I dealt with mold and didn’t put two and two together before they were all ready to plant, but other than that, last year was stellar because of that christmas light trick.
Connie thank you for sharing that! I have seen that done with the Christmas lights but never thought to give it a try myself. I’m glad to know that it worked for you. Those heat mats can be pricey.
I use dog kennel heating mats. They get a little too warm so I put a towel between the mat and the planting container. I’ve used jiffy pots to start but find I must tear off the plastic mesh before planting the seedlings. I put the seedlings in old, used 6 packs and put the six packs in the organic lettuce containers from Costco…. Taylor farms is one. They fit for a while until the seedlings get some size to them. You’ve shared lots of good ideas!!! Thanks, Kathleen
I’ve had to tear off the plastic mesh too. In fact, when I start my tomatoes, I often have to transfer the pellet to a solo cup or larger container before setting them out in the garden. Great tip about the kennel heating mats!
Started the cole crops and onion seeds today. I have a small heat mat and use a tray over that and put my pots of seeds in the tray. I use a shop light fixture with 1 warm light bulb and 1 cool light bulb – works great. Since the setup is in my unheated garage, I use old towels and blankets as a tent over the shop light if it gets too cold for the emerging sprouts. Hubby put together my Christmas present – a cold frame – and it is out in the garden, closed and heating the soil. After the little cole seedlings are transplanted to individual pots and doing well, I’ll put them out in the cold frame. Great to get my hands in the dirt again, even if it was only seed starter!
Good luck with your seedlings! I’d be interested to know how your onion seeds do or if you have any tips. I’ve done ok with bunching onions but leeks, and bulb onions not so much. I love leeks and would really like to grow my own.
I’m wanting to move my grow lights to our garage because they are so bulky even in a back hall and try as I might to keep things tidy they attract dust and frequently look cluttered. I was concerned though about our garage being too cold. It sounds like it hasn’t been a problem for you though?
Best wishes on your upcoming growing season! 🙂
Putting the seeds on top of the fridge, hot water heater, etc is a great idea and has worked for me in the past, but what about when you have some sprouted and some not yet? They can get spindly so fast if you wait to move them closer to a light source but the one safe room for them here is mostly unheated. 🙁
S, I plant more than I need and try to treat them all the same. So if a few sprout early, or if a few don’t sprout at all, I just let them go and wait until the majority are ready for light. Also, if you need to move them to a light source but the room is cold, try using a heat mat.