There’s so much to love about dehydrating!
And you’re convinced, right? (If not, check out 14 Reasons To Love Dehydrating.)
So what supplies do you need to get started? We’ll start with the basics — the absolute must-haves. And we’ll work our way from there.
Taking my Dehydrating eCourse? You might want to put some of these things on your wish list. 🙂
The Essential Tools
#1 — A Dehydrator
There are 2 types of food dehydrators. It all has to do with airflow — either vertical (fan on top or bottom of unit) or horizontal.
Horizontal airflow is preferred by most people, as you get even heating and less mixing of flavors. However, vertical (with the fan on bottom) is more in line with nature, as heat rises. So either will do the job!
The Excalibur dehydrator is an example of a horizontal airflow unit. It, along with L’Equip, has square/rectangular trays for more efficient usage of space.
The Nesco / American Harvest and L’Equip dehydrators with stackable trays use vertical airflow. A downside to the Nesco / American Harvest is that food drips down right onto the fan at the bottom, and that’s not so fun to clean. Nesco also has circular trays.
My Experience
I started out using an American Harvest and got lots of use out of it. However, I was happy to move to the Excalibur for several reasons:
- No more dripping on the fan
- Square trays
- Versatility
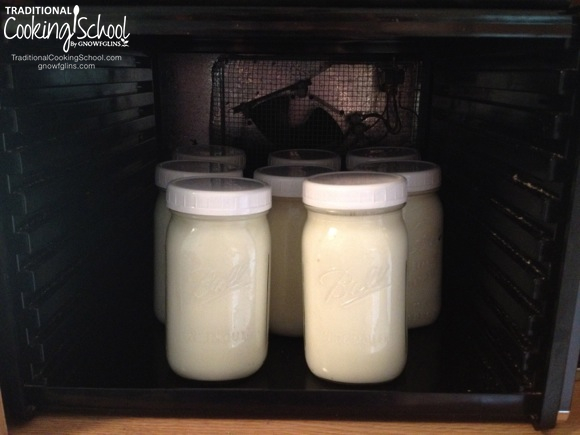
Its versatility allows me to remove the trays and use the cube + temperature control for other things — such as proofing dough, a sourdough sponge, making yogurt (pictured), or making natto or tempeh.
If you’re off the grid or want to use nature for drying, you definitely have options. The web offers lots of plans for solar dehydrators. Some I just pulled up are here, here, and here. (The last link is to a video featuring 3 passive solar dehydrators.)
#2 — Dehydrator Tray Liners
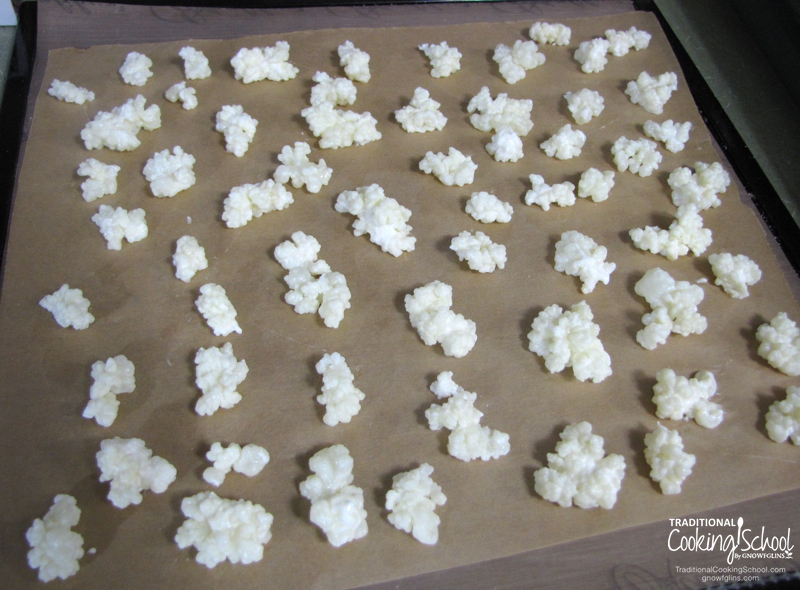
When drying food in small pieces, or when drying wet foods, you need to line your dehydrator trays. Believe me, it is necessary!
Dehydrator manufacturers provide liner options. For instance, you can choose to get ParaFlexx sheets with your Excalibur dehydrator. And the Nesco / American Harvest dehydrators offer plastic fruit leather accessory trays.
If ready-made liners aren’t included with your package or not in your budget, you can use unbleached parchment paper to line your trays. Very wet things (like pureed fruits) can wet the paper to the point it is saturated and tears, but if you’re careful you can probably work around that.
#3 — Cutting Board & Sharp Knife
I’m going to assume you have these.
Personally, I like to use a wood or bamboo cutting board. I also love my Victorinox serrated knife, paring knife, and vegetable knife.
#5 — Other Miscellaneous Items
I know everyone’s got these in various forms and type, but I will mention them to make sure this guide is complete.
You’ll need various pots/pans, bowls, utensils, measuring cups, measuring spoons, and mason jars (preferably wide-mouth for ease of use). You know, your basic kitchen equipment you use for everyday cooking. They’ll come in handy on your dehydrating adventures, too.
That’s it for the essentials — now let’s talk helpful!
The Helpful Dehydrating Tools
#1 — Food Processor (Or Blender)
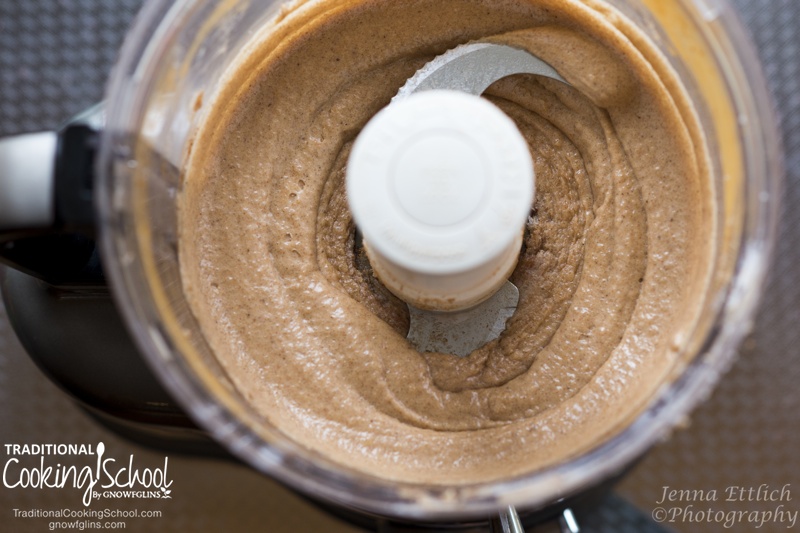
A food processor or blender is almost essential — but you can do without.
Here’s why I consider them helpful: 1) chopping/pureeing and 2) powdering.
For chopping, a hand chopper can take care of most tasks (so would a knife and cutting board). If the foods are very soft, mashing can substitute for pureeing in a pinch.
However, a food processor / blender can’t be beat if you want to powder something you’ve dried. Powdering helps in 2 ways.
First, it makes the food more uniform so you can reconstitute it consistently. Second, it reduces the amount of space you need to store the dried food.
And actually, there’s a third reason you might want to powder something (like dried eggs, dried yogurt, dried tomatoes). If you’re going to vac-seal a food, some foods come off the dehydrator in pokey sheets that can puncture your vacuum-seal bag, causing you to lose the seal. Powdering removes the pokies so you can keep your seal.
I’ve got an 8-cup Cuisinart food processor that I love. I got it for $25 at a thrift store, years ago. It is old and it is a workhorse. I also hear good things about the Kitchenaid food processors.
If you’re in the market for either a food processor or blender, I recommend a food processor over a blender — at least for dehydrating purposes. It chops better, circulates the food better, and can puree most foods you’re going to dry. My biggest beef with blenders is they don’t circulate as well and if you want to chop something, you end up pulverizing it. So. My two cents. 🙂
#2 — Mandolin Slicer
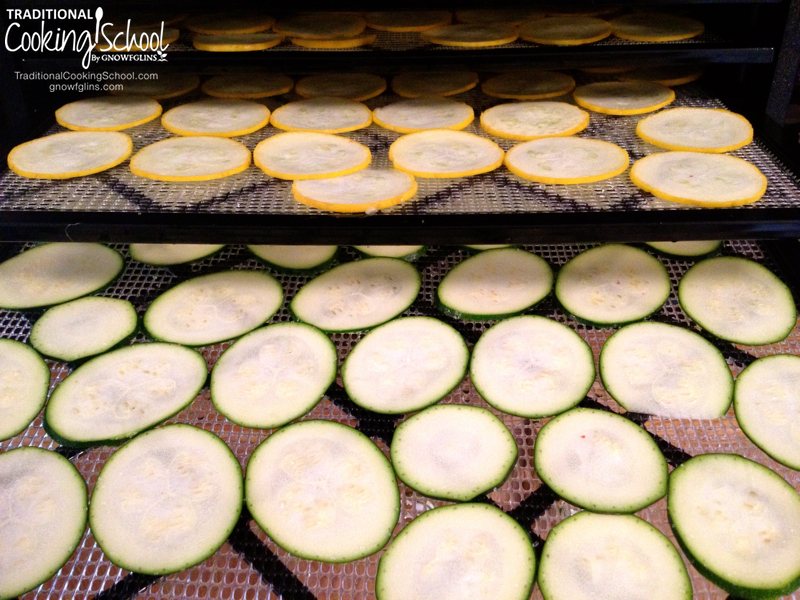
When someone really gets into dehydrating, it’s hard not to view their mandolin as essential. And yet, it isn’t quite. 😉
It’s still super nice to have! You can thinly slice or julienne foods sooooo fast and evenly.
Hand chopping can achieve almost everything the mandolin does, except that it is very difficult — near impossible — to hand slice foods thinly enough for chips (like the zucchini chips pictured). I think fine julienne strips would be difficult, too, but someone with good knife skills can probably do that.
So, ask yourself — do I want to make “chips” out of dehydrated foods? That’s the defining question here. If no, you don’t need a mandolin. If yes, you should get one.
I splurged and got this Bron mandolin slicer awhile back because I wanted 3 things:
- a mandolin with good reviews
- no plastic parts
- the built-in stainless steel pusher to keep my hands off the blade
I’m very happy with it!
Cultures for Health carries this entry-level Norpro mandolin slicer for $24.99. It also offers a hand-protection pusher.
#3 — Vacuum Sealer
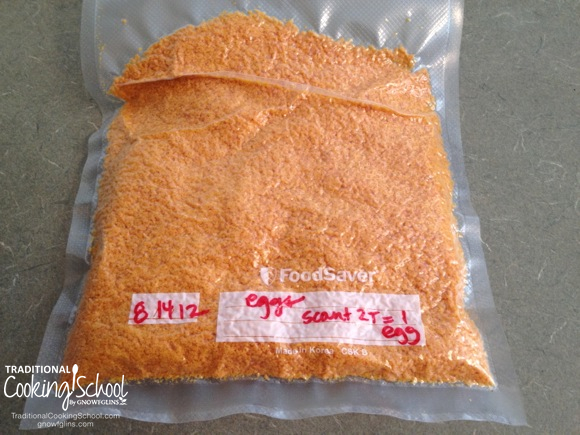
Last summer, we purchased a vacuum sealer. The reason for this? To extend the shelf life of our dried foods.
I get the idea that vac-seal machines can be temperamental. Like they won’t seal if things aren’t just right. So I’ve figured out a few tricks while working with mine, and I’ll be sharing them in the Dehydrating eCourse.
If you’re looking into a vacuum sealer, you might want to get on the mailing list at FoodSaver. Their deals are quite frequent — both on machines and accessories (bags and rolls). At least today (when I’m posting this), they’re offering 15% off your first purchase if you’re a first time subscriber.
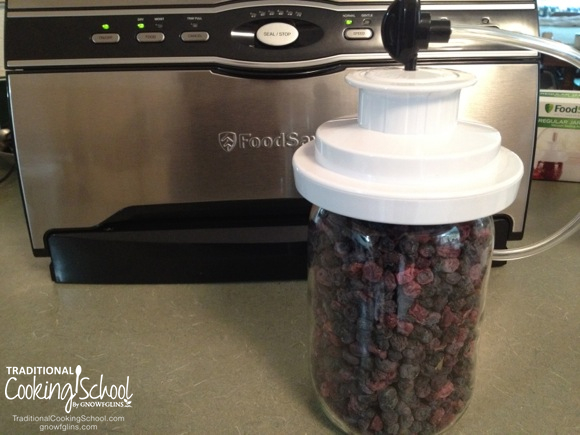
One more thing: get the jar-sealer accessories — both wide and regular mouth! You’ll find you want to vac-seal foods in jars more often than not. Like, foods you get in and out of frequently and don’t want to waste a whole bag or piece of roll. Or, foods you want to munch on but keep crisp, like the zucchini chips. Or, foods that are poky and would puncture a plastic vac-seal bag. Or — this is my last example, I promise — foods that are “dusty” like spices and would prevent the machine making a good seal with a plastic bag or roll.
And that’s it — a handful of both essential and helpful dehydrating tools to get you started!
All that’s left now is to invite you to join me and other Traditional Cooking School members in the Dehydrating eCourse. You’ll discover how to use these dehydrating tools to create all kinds of delicious, healthy, and frugal dried foods.
So, tell me — do you have most, if not all, you need to begin the dehydrating journey? If not, what items are going on your wish list? If you’re an expert dehydrator, what would you add to this list?
...without giving up the foods you love or spending all day in the kitchen!

2 free books:
Eat God's Way
Ditch the Standard American Diet, get healthier & happier, and save money on groceries...
We only recommend products and services we wholeheartedly endorse. This post may contain special links through which we earn a small commission if you make a purchase (though your price is the same).


Can’t wait for the class to start!!
What is the starting date for this class? I can’t wait!
Deb — We start on Tues, Jan 8. 🙂
I have most of the items. I don’t have a food processor but I do have a blender. I’m sure that would work good enough. The only thing that I would need to get is the vacuum sealer.
Very thorough list of great tools to have! I am happy to report I have most of these, and definitely agree that the FoodSaver Vacuum Sealer is a MUST! I’ve stocked up on enough bags and rolls for a lifetime – as you said, they have really great deals for email subscribers. I caught a sale once for 50% off, which also applied to their bulk discount pricing…so needless to say, I may never have to buy another role again. 🙂
The excalibur is on my wish list! I don’t have a good mandolin or food saver either. Guess I will have to wait for this course but i am excited about it!
I’m just getting started. I purchased a L’Equip dehydrator and so far we really like it. I haven’t done that much with it yet: dried mushrooms, zucchini and apple chips; some green onion that I didn’t want to go to waste. I’m anxious to learn more. I don’t have a vacuum sealer (yet) but I do have a very good set of knives and a small cutting board.
dehydrator and food processor top on my list! …. maybe not in that order
I have all of the basics with the exception of the mandolin. However, my rather cheap dehydrator is about ten years old and the trays are falling apart! I hope to upgrade to an Excalibur soon. (Preferably before mine decides not to start up when I have it loaded with fresh food to dehydrate..) How important do you think the metal trays are? I’m sure they’re better, but the price difference is a bit painful! I’m so glad your next class will be on dehydration. I have so much to learn!
Laura — Personally I don’t think it is that important to get the metal trays. Sure it would be nice, but at the temps we’re drying, I don’t think the plastic is really that big a deal (ie. it isn’t hot enough).
Really looking forward to this class!
For daily in-and-out of containers that I vacu-seal I like the Food Savor round containers and the marinating container. The jar sealing attachment creates such a strong seal that I was bending up all my jar lids trying to get the darn things off when I wanted into the coffee and nuts. They are plastic but they only hold dry, room temp foods so I don’t worry about them at all. I like the flat marinating container for crackers.
Thanks, Andrea! That’s a great point! 🙂
Two things to add:
1. If a Foodsaver is too dear for your budget, you can buy a hand held vacuum sealer also made by Foodsaver for less than $20. And use it to seal jars using the same wide and regular mouth jar adapters Wardeh shows above–it works, really!
2. One of my favorite tools this summer was an Egg Slicer–you know, those things with the wires to slice eggs evenly. They work great on small soft fruits like strawberries to make uniform slices. I dried a LOT of strawberries this year and they are so yummy they didn’t last to winter (we ate them all). I use unbleached parchment to line the trays of my ancient Excalibur 4 tray dehydrator, and the strawberries left red stains that look like kisses all over the parchment.
BTW, I like using parchment because if the things you’re drying are not too wet it can be reused, and if I make Fruit Leather I just cut up and roll up the parchment with the fruit leather so it doesn’t clump in a sticky mess.
I cannot wait for this class, Wardeh! I’m so happy you’re taking the time to do this. You never dissappoint!
Just one one word though on the Excalibur. It can run higher than 118 degrees, which you obviously don’t want if want raw foods. If you don’t care about that, then the Excalibur is great (especially more so for beef jerky). If you have an Excalibur, test your unit to see how hot it actually gets at its peak heat fluctuations and consider setting the temp. to 105 (per the gentleman’s recommendations) because sometimes there’s a difference of 10 degrees during these fluctuations.
The Sedona is designed specifically for raw foods and will not exceed 118 degrees. It takes a little longer to dry (and is therefore more expensive to run) and the trays I think are a little smaller, but for any raw foodie, the enzymes will remain intact after dehydrations.
Watch this video as it’s an interesting comparison video on the two models: http://www.youtube.com/watch?v=MCYpBWZLFlY. He made a great analogy saying that the Excalibur dehydrates faster and is more like sun drying, while the Sedona acts more like sun drying (his words) unit.
He’s done several other comparison videos on these two models that can be looked up on youtube. I luckily have a nice oven with the dehydrating option, but I still want a dehydrating unit at some point. I was totally for the Excalibur, but I think Sedona may be the way to go (for me anyway) after seeing this guy’s videos.
Hi, your review of dehydrators is wonderful, but your information on the Sedona is INCORRECT. The MAXIMUM temperature of the Sedona is 80 degrees Celcius, or 176 degrees Farenheit, not the 118 degrees you mention in your article…
I LOVE my Sedona, I have had it for about a year and a half now. My favorite use for it is making Greek style yogurt. If you haven’t yet gotten a dehydrator, I cannot recommend the Sedona enough.
Thank you for your articles.
Regards,
~madeline
I’m sorry, I was reading too fast. 163 is the maximum safe temperature for the Sedona, but the maximum temperature you can set the Sedona for is 155 degrees Farenheit. Sorry for the confusion.
~madeline
My heart almost stopped beating (for joy — good reasons!) when I saw you used plastic lids on your yogurt. We go through quite a few canning jar lids a day because we use mason jars to store everything. But my Achilles heel are metal YOGURT LIDS. They tend to accumulate for days (weeks? months?) before I get around to washing them. It’s pretty much awful. We make 8 quarts of yogurt a week, so it definitely adds up.
Do you find that the plastic lids work well when incubating yogurt in the dehydrator?
Do you have any problems with them? (thinking air flow, sealing, difficulty opening them afterward, etc)
You have just made my morning.
-Bethany
Jerkey gun!! Can also use a cookie press for the same thing!. Easiest way to do jerkey
Yes! I’m so glad you mentioned that! Thanks, Michelle!
I’m excited for this summer’s garden bounty. I have dehydrated for years (really, I got my big American Harvest when my oldest was 5 and she helped put the veggies on the trays – she will be 39 this march!) I am ready for a new Excalibur to help with yogurt and proofing a sourdough sponge and give us lots more room to do jerky. I know there are many new things to learn from this eCourse.
If you are wondering about how much you would use the Food Saver let me say that it is about the most used “extra” in our appliance pantry. We live in southern New Mexico and grow pecans. Without the FS our Hatch Chile (red sauce and green roasted pods) and pecans would freezer burn. You will find dozens of uses for it.
Thanks, Wardee for such comprehensive lessons. I learn so much every time I log in.
If you keep an eye out at thrift stores you can score the vacuum sealers, containers and jar sealers pretty cheaply. Now if only I could come across an Excalibur!
Hey, now, let’s play fair here! Nesco dehydrators are NOT vertical dryers. The fan is in the lid, and it works extremely well. I’ve been using mine, which is SQUARE, for nearly a year, and it does a beautiful job for a lot less money than the Excalibur. For those of us on a budget and who don’t have room for the gigantic Excalibur, dehydrating well is still within reach. With my Nesco and the hand held Fresh Saver vacuum and the two canning jar lid covers, I have filled two shelves of a three shelf cupboard with jars of dried food. I also make ready-to-eat meals in vacuum bags that Ziploc makes and keep several in a backpack as my go bag for hurricane evacuation emergencies and to give to our local food bank. Hurricanes can leave us without power for a week or longer, but all I need to do is heat water to make a meal. I have a Solo camp stove to do that. My Nesco has done all this for me just beautifully.
Is there a fee for ur e-classes?
Hi Laura,
You can learn more about the eCourse here. 🙂
Millie
GNOWFGLINS Support Team
Nesco just came out with a square dehydrator with the fan on top!
I dehydrate a lot of apples every year. My apple corer-peeler-slicer gizmo is a great time saver. I dehydrate the peels and powder them to use in breads, desserts and smoothies.
This is timely! Thank you:)
I knew I needed a food saver but did not know enough about them, even passed up a few at the thrift store but will keep my eyes peeled now. I purchased a 5 tray Excalibur at a garage sale a couple of years ago. It was missing the door so I scored it for $5. The replacement door is $25! I just use a piece foil and and a towel and have successfully made yogurt in it. I’ve been intimidated by dehydrating but this year I plan to change that. I’ve got sliced strawberries in it as I write this (The house smells heavenly( and we will be going cherry picking in a couple of weeks. My kitchen is pretty well stocked (mostly found at garage sales and thrift stores) A friend gave me a nice Madeline a while back and I love my Cuisinart food processor. Thank you Janknitz, for the egg slicer suggestion. Wish I had seed that before I sliced all those strawberries by hand…
Keep the great articles coming Wardee
i have a food dehydrator, and i usually make a beef jerky at home. yummy
I love my hand held slicer – Kyocera Advanced Ceramic Double-edged Mandolin Slicer With Guard – on Amazon. $19.99 although I found mine at Marshalls for less. I see you can buy a set of 4 (different slice) for $59.99 – but I have years of happiness with my one!! My husband bought a pair of the cut resistant gloves inexpensive on Amazon too – he’s less focused!!