As every gardener knows, once you taste your own homegrown tomatoes, you’ll never go back to store-bought. While these favorite garden vegetables are pretty easy to grow, here are a few tips designed to help you have a successful harvest.
1. Select the right variety for your climate.
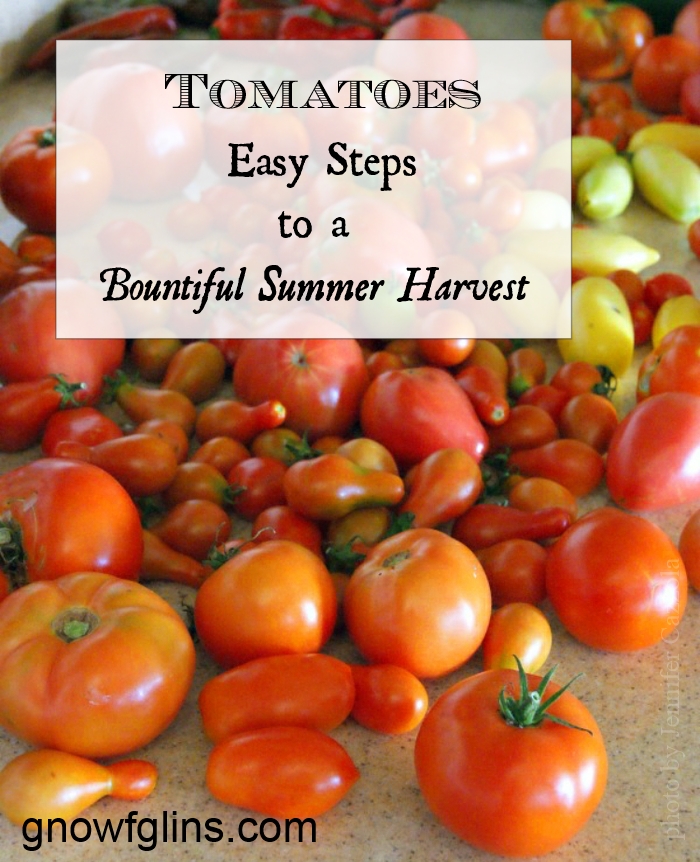
Not every tomato variety will grow well in your climate. Since I live in an area with long, cool springs followed by intense summers that last until August, I’ve successfully grown tomatoes like Cherokee Purples, Cream Sausage, Bonnie Best, and the smaller Austin’s Pears. Heirloom tomatoes come in a wide variety of shapes and colors, so feel free to experiment — try something new! Just remember to take notes so you can remember what worked and what didn’t for your next planting season.
If you have questions on what to plant, visit with an experienced gardening friend, contact your local extension office, or shop at a nursery or plant sale where the transplants have been locally grown. However, if you shop at a nursery, don’t to set your tomatoes out too soon. Transplants often show up in the nurseries weeks before it is really safe for planting. Unless you are able to offer some sort of protection such as a Wall O Water type structure, wait to plant until the warm weather is there to stay, and temperatures are consistently above 50 degrees Fahrenheit.
2. Plant more tomatoes than you think you’ll need.
Always buy and plant (or start from seed) a few more tomatoes than you think you will need, since several may die before harvest. It’s better to have plenty of tomatoes to share (who doesn’t love free tomatoes?) than end up settling for a meager harvest.
3. Provide them with the proper support.
As you start shopping for the right tomato varieties, you’ll see plants marked either as determinate, or indeterminate. But what does that mean?
Determinate tomatoes ripen all at once, making them a great choice for canning or preserving. They typically grow as a bush and only require minimal (if any) support.
Indeterminate tomatoes bear fruit throughout the season and grow as a vine. These require a stake or some other means of support keep their foliage off the ground in order to avoid pests and disease. Every gardener has their favorite technique for this, but browse the internet and experiment until you find what works best for you. I personally prefer to use strong tomato cages that my husband build for me using cattle guard.
To help contain your indeterminate tomatoes, consider pruning them. As the plant grows, small shoots called “suckers” emerge from the crotch of larger branches. To help the plant grow more tidily and keep it from taking over your garden, just pinch the suckers off using clean garden shears or your fingers. However, one gardener I know chooses not to prune because the more leaves her tomato plants grow, the more photosynthesis they’re able to perform, and the healthier they’ll be. The choice is really up to you. If you choose to let them grow unpruned, give them plenty of space.
4. Plant them deep.
Most transplants should not be planted deeper than the depth of their plastic pot, but tomatoes are an exception. When it’s time to plant my tomatoes, I pinch off the bottom set of branches and set the root ball deep into the soil, almost up to the next remaining set of leaves. The buried stem will send out new roots and give your plant a nice, deep root system.
After planting, water your new tomato plants well and then cover them with a generous amount of mulch to keep the soil consistently moist. However, do not allow the mulch to touch the stem of the plant. Pull it back a few inches to form a donut around the base of the stem. Again, this helps to reduce the risk of pests and disease. My favorite ways to mulch tomatoes are with wood chips or hay.
5. Don’t overfeed your tomatoes.
Believe it or not, tomatoes don’t require a lot of feeding. Over-fertilization resultst in beautiful green foliage but very little fruit. I give mine a shot of diluted fish emulsion fertilizer when first planted, and top dress with a small amount of compost. Mid-season I might fertilize again, but that’s it.
6. Know your potential pests and problems.
Be prepared for any pests and problems so you’re ready when and if you have to face them. Here are a few of the most common tomato pests.
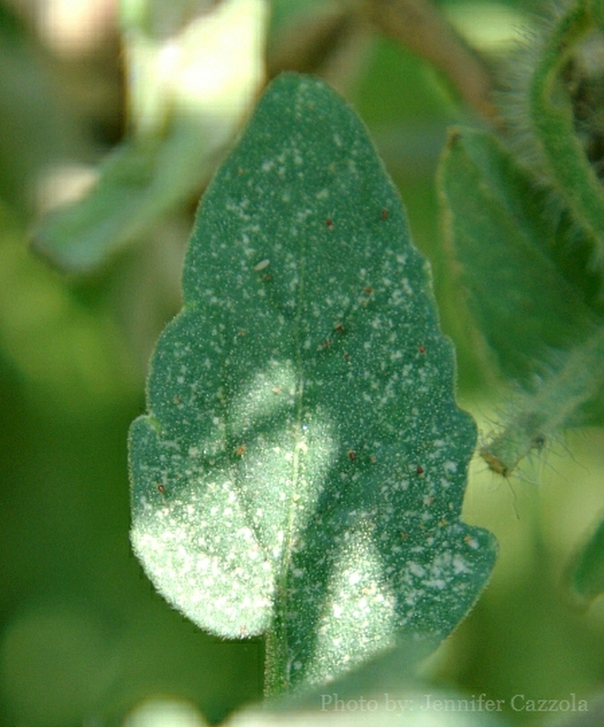
Spider mites. Evidence of these will be webbing and tiny brown spots on the leaves of the plant. To dislodge the mites, simply direct a gentle but forceful stream of water on the plant. While some gardeners use marigolds as a favorite companion plant, I find that they attract spider mites and for that reason, I’ve banned them from my garden.

Tomato hornworms. These start out as an unusual-looking hummingbird moth but grow into a large green caterpillar. He will eat his way through your plant, defoliating and thereby killing it. I manually remove them and feed them to my chickens for a nice snack. 😉
Birds. There is nothing more frustrating than watching your tomatoes ripen all the way to harvest time, and then discovering some bird has sampled a few of them. To protect your tomatoes from the birds, try covering them with knee-high pantyhose. Simply work the hose up around a cluster and loosely knot off at the top. It is transparent enough to allow for sunlight, and elastic enough to allow for growth.
Here are a few of the most common problems to afflict your tomatoes.
Blossom drop. This is when the plant begins to drop blossoms before they (the blossoms) can mature. It can be caused excessive wind, unhealthy soil, or high temperatures, among other things. While it can be controlled to some extent by ensuring your plants get the proper nutrients, I still see a certain amount of blossom drop in my garden every year.
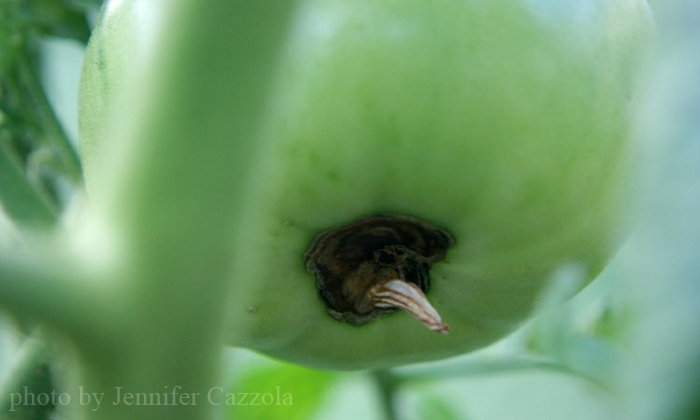
Blossom end rot. As the fruit matures, a small rotting spot, caused by a lack of calcium, can develop on the end of the fruit. You can prevent this by making sure the soil is kept consistently moist. Don’t allow it to dry out between waterings since this prevents the root system from taking nutrients all the way up the plant. Also, put a few crushed egg shells in the bottom of each hole to give it a calcium boost.

Final thoughts.
If at first you don’t succeed, try, try again. Properly cared for, most tomatoes will produce through the summer until the first frost. However, if they succumb to spider mites or disease mid-season, or you go on summer vacation and come home to discover your neighbor forgot to water, try again. If you are blessed with a long growing season, you may be able to plant and harvest a fall crop. As long as your temperatures are still within range you should have another shot. Locate some transplants, set them in the ground, and try again.
While all of the above may seem like an overwhelming amount of information, tomatoes are a fun, easy, and very rewarding crop to grow. What are some of your favorite varieties? Do you have any tomato-growing tips to share?
...without giving up the foods you love or spending all day in the kitchen!

2 free books:
Eat God's Way
Ditch the Standard American Diet, get healthier & happier, and save money on groceries...
We only recommend products and services we wholeheartedly endorse. This post may contain special links through which we earn a small commission if you make a purchase (though your price is the same).


We live 1/4 off the north Puget Sound, tomatoes do not do well in our raised bed garden or on our property. So last year we bought several large pots and placed them along the south side of our house. Success! Instant solar energy!
That’s wonderful Jo Anne! Are you planning on trying them again this year?
what about sun exposure? i live in a hot climate and about to try tomatoes out in pots. Should they be in half-shade/full sun…?? what do you think?
Poppy, I would use a thick cover of mulch on the top and check daily for moisture. You want to be able to stick your finger down in as far as you can and still feel moist soil. I would also try them in plastic gallon buckets if you can as the terra cotta pots tend to dry out faster. I would plant them in full sun but also see if you can find some sort of shade cloth and drape it over during very hot days or the hottest part of the day.
Tomato roots like to be close to the surface of the soil. Try planting them horizontally in a trench, instead of really deep. You still pull off the bottom set of leaves and bury most of the plant. In a few days, the part that’s exposed to sun will be growing vertically again.
Just be careful not to walk on the area above the roots, since they take up a larger footprint, this way.
I know this is not a recent post, but as I read it, I wondered if there is a caterpillar that behaves in the opposite way of most caterpillars, that being caterpillar changing to insect with wings. Jenny, you wrote, ” These (tomato hornworms) start out as an unusual-looking hummingbird moth but grow into a large green caterpillar.” I am confused. Does the moth really change into a caterpillar? Thanks for your answer.
M. I apologize that sentence reads so unclear. The moth lays her eggs in the leaves, the eggs then hatch and grow into the caterpillar which becomes the moth, and so on…It would have been more accurate for me to say that the presence of the hummingbird both will usually indicate the eventual presence of tomato hornworms.