In part, this method comes from Ann Wigmore’s book “Sprouting.” I have added modifications of my own.
Please note that microgreens different than sprouts. Sprouts are grown in water, while microgreens are grown in soil. We eat the entire sprout – roots, stems and leaves; of microgreens, we eat only the stem and leaves, leaving the root behind in the soil. Sprouts are grown with little light and high moisture; microgreens are grown in sunnier and drier conditions. Sprouts are eaten shortly after seeds/beans/grains are germinated; microgreens are eaten when the young plant is more mature. Finally, when we eat sprouts, the cotelydon leaves may or may not be exposed, while the microgreens will have matured cotelydons and at least a first pair of true leaves.
1. For each tray of microgreens, use 1-1/2 cups seeds (sunflower or buckwheat). Use dry seeds still in their hulls. Unlike sprouting, soaking is not only not necessary – the seeds get watered in the tray and will start growing then – but soaking may degrade the quality of the microgreens. Here are the reasons: damage may result from handling the germinated seed, causing distorted and uneven growth in the tray; roots may be compromised from their exposure to the air rather than first starting out growing into the soil; and you may experience difficulty in evenly spreading the soaked seeds compared to dry seed. (Source) Note: this step is updated from when I first posted these directions (calling for soaking, which I now do not advise).
2. Fill a tray with a mix of soil and compost, such as 2/3 dirt and 1/3 compost. Moisten the soil. Don’t over-moisten, as typically, these trays do not have drainage holes. (I am using plastic trays. Someday I would like to use an alternative material for my trays.)
3. Spread the seeds out in a layer over the soil. Basically, spread the seeds everywhere in a single layer. Optional: cover the seed with a light layer of soil.
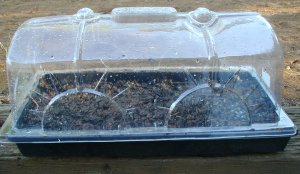
4. Place trays in an indirectly or directly sunny spot, which can even be indoors. Whether or not you cover the tray with a plastic cover depends on the weather conditions. Covered trays in hot weather will result in sanitized seeds. 😉 Water as needed, once again taking care not to over-water, as the trays do not drain.

Microgreen tray with cover
5. Within 5 days, you should be able to harvest the first microgreens. Snip them off individually, or in clumps, with kitchen shears. Snip at the base and try not to bring any dirt with them. Avoid snipping off the younger greens so they will continue growing to be harvested later.

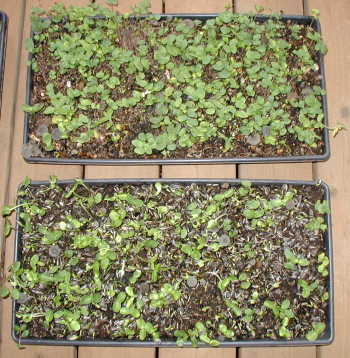
The microgreens are coming in (and some have already been harvested from these trays)
Above: Buckwheat Greens, Below: Sunflower “Sunny” Greens
6. Harvest daily, using kitchen shears, until no more greens emerge. To wash, put greens in a basin full of cool water. Let them soak for about 5 minutes with a bit of gentle hand agitation. Dirt will sink to the bottom, which makes the job easier. Go through the greens and pull out the hulls and other sticks or bits of dirt. Then transfer the greens to a bowl, drain the water, and fill the basin again with cool water for another rinse. Usually, 2 or 3 of these rinses should do the trick. The greens are clean when the water is clear. Transfer the greens to the salad spinner to spin them dry. Eat!

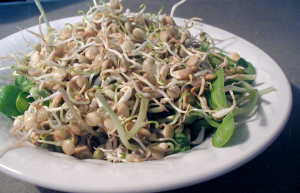
Sunny Greens with Lentil & Mung Bean Sprouts
7. Chop up the soil and roots in the finished-growing tray. Or, pull out the roots and let them compost separately. I prefer to let them decompose in the soil while another crop is growing. Spread another set of seeds and lay it in a single layer in this now-ready-to-grow-again tray. As needed, add compost or start over with a fresh soil/compost mix in the tray. Try to rotate crops –> in each tray, plant a different kind of microgreen than was grown prior.
© Copyright 2008-2009 by Wardee Harmon.
We only recommend products and services we wholeheartedly endorse. This post may contain special links through which we earn a small commission if you make a purchase (though your price is the same).


Leave a Reply