
Previously, I shared 4 Easy Raw Cheese Recipes — the cheeses I make over and over, and the Benefits of Raw Cheese.
Continuing the series, today I’ll share what basic cheesemaking supplies I use and recommend. My goal during all this time of learning cheesemaking has not only been to produce fantastic cheese, but to whittle down the processes and supplies until they’re as simple as can be. However, I know that I will probably learn more as time goes on.
Notes: I’m only including general supplies and equipment; special ingredients that would be recipe-dependent won’t be included. Such items would be wax (to protect cheese while it ages) or calf lipase (for feta). Also, I’m dealing with raw cheeses here — cheeses that not only start with raw milk, but whose temperature doesn’t exceed 118 degrees Fahrenheit. This precludes the inclusion of thermophilic starter cultures, which are cultures that proliferate at high temperatures.
The Cultures and/or Food Ingredients
All of these can be found in the Cultures section of my Resources page. The rennet coagulates the milk curds into cheese.
- All-purpose mesophilic culture (MA or MM) – all the raw cheeses I make are cultured with this group of bacteria which culture at middle (meso) temperatures, most often (for me) at room temperature or 86 degrees.
- Rennet tablets – according to Jerry at Homesteader Supply, vegetarian rennet dissolves more easily, so that’s what I’ve always purchased; used for harder cheeses that require a larger quantity of rennet.
- Double-strength liquid vegetable rennet – used by the drop; 1/2 teaspoon of this is equal to 1 rennet tablet. (note: this is double-strength, so adjust recipes accordingly)
- Unrefined sea salt
The Supplies & Equipment
Once again, you’ll find links to some of these on my Resources page.
- 90-count cheesecloth (2) – I use two layers of this for dripping out chevre, kefir cheese, or ricotta
- 3 x 3 foot square cotton cloth or butter muslin – from a clean, fairly-high thread count bedsheet; used to line a cheesepress or to hold hanging cheese
- *stainless steel colander(s) – sometimes I find it helpful to use 2 for one recipe
- *large (10 to 13 quart) stainless steel stockpot(s) – again, sometimes 2 is helpful, and particularly one that nests inside the other to create a double boiler to maintain temperature in cooler weather
- *stainless steel utensils – stirring spoon and slotted spoon
- basic kitchen thermometer (0 to 220 degrees Fahrenheit range) – 2 if making a double-boiler, one for each pot
- long knife – for cutting curds; I use a long, serrated bread knife
- cheese press (see below)
- a way to hang a bag of cheese (see below)
Update 2011: Cultures for Health and Homesteader Supply sell basic cheesemaking kits for my online Cultured Dairy & Basic Cheese eCourse — at a savings over retail!
*Note on the stainless steel: In April 2009, the Weston A Price Foundation came out with updated information regarding cookware, suggesting that stainless steel may not be the best. 🙁 Read more here (scroll down to “Cookware” under “Reducing Enviromental Exposure”). Other choices would be glass, or high-end lead-free enamel pans such as from Le Crueset.
The Press
This is my homemade DIY cheesepress, which has its drawbacks. (Update: Now I use this cheese press.) Namely, that it can be dangerous. So if you use something like this, be very, very careful.

The base is a rectangular baking tray to catch the whey. A sturdy baking rack balances on that. Then the press and follower sit on the rack, lined with cheesecloth. Now here’s the dangerous part. Free weights sit on the follower and weight down the cheese. If the cheese takes a not-level shape, the weights will start tipping and could slide off, hurting someone or breaking something. To prevent an accident, I build up to using maximum weights, and I watch how the cheese is pressing down and adjust the position of the weights accordingly to facilitate it being level.
Edit: Check out my cheesepress reviews. Also see, Do You Need A Cheese Press?
The Hanging

I no longer hang my chevre or kefir, as I wrote in my notes for those recipes (part 1 of this series). However, some cheeses do need to be hung, such as the feta I make. Here’s where I’d love to hear from others of you who’ve rigged ways to hang cheese in your kitchens.
This is how I hang my cheese. I put a long, sturdy stick across the top of the two cupboards that are around the sink area. I looped strong paracord around the stick. When I say looped, I mean looped. The bottom end of it is a loop onto which I tie the cheesecloth or cotton cloth that contains the cheese curds. This works well for me. I put a big stainless steel stockpot under the bag to catch the whey.
Now hopefully I haven’t forgotten anything! Please share what you use for supplies and equipment; I’d love to hear how I could do things better or simpler. And if you have questions, please leave them in the comments. Now that you have this down, here are 15 more raw cheese recipes for you to try!
What are your favorite cheese making supplies and cultures?
Want to learn more about raw cheesemaking? Check out a Traditional Cooking School membership which includes access to a complete Cultured Dairy & Basic Cheese eCourse, including dozens of videos and print tutorials for everything from sour cream and yogurt to a variety of simple cheeses.
...without giving up the foods you love or spending all day in the kitchen!

2 free books:
Eat God's Way
Ditch the Standard American Diet, get healthier & happier, and save money on groceries...
We only recommend products and services we wholeheartedly endorse. This post may contain special links through which we earn a small commission if you make a purchase (though your price is the same).

Wardee, this is such a great series. Your bar across the kitchen sink just gave me a great idea for kitchen storage in addition to draining or hanging fermenting sausage!
I have the same mold but I use an overturned bowl and put my weight on top of that which lets me use the 25# bigger weights with a diameter larger than my mold. In that way my stack is not so high. I have also seen folks place a bowl directly on the follower and put a bowling ball in the bowl, or clean rocks of the right weight.
It’s funny all the home rigged presses! Now – which cheese are you pressing?
Also I’ve never used lipase for my feta. Does it really add so much flavor?
Thanks again for this series! I haven’t made cheese since early summer but now is the perfect time of year since it could age in my garage!
.-= Sustainable Eats´s last blog post… Beets =-.
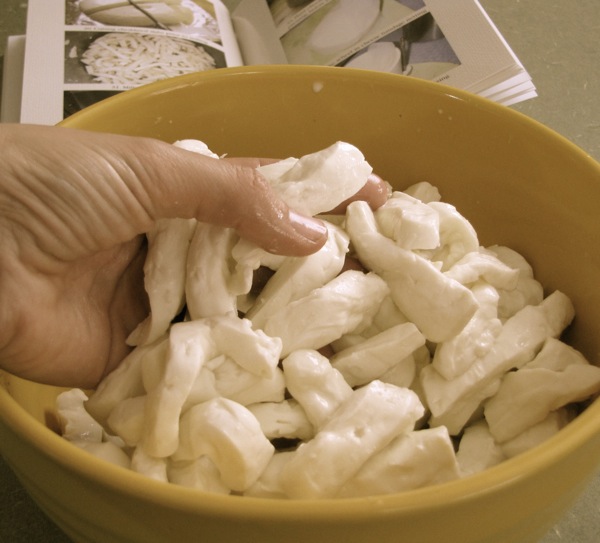
Sustainable Eats – This is the queso fresco in the press. Thank you for the ideas on the press! I have thought of using a plate or tray on the follower – but the trouble is when the follower sinks below the level of the mold, then the pressure is on the mold not the follower and the cheese doesn’t get pressed. See? I don’t know how to get around that. I don’t know if I’m making sense either. 😉 So that plan at Fias Co Farm made me see that if I use a smaller mold on the follower, it will continue to go down into the mold as the cheese compacts BUT it would still be unsteady and dangerous. I don’t know if my husband has any bigger weights – but it would be good if he did. But I still don’t see how they would reach the follower if it is below the lip of the mold. Except, maybe I’m getting it (I’ve read your comment a dozen times already)… is your overturned bowl smaller than the mold? And is the base flat enough to keep the weights balanced on it? Are you going to hang pots and pans from the “stick”? People come here and they immediately notice the “stick” – it is so funny! Great idea to hang sausage.
Wow – I’d never thought of making cheese before, but after your posts & one that Jenny did at Nourished Kitchen, I’m considering giving it a go – but not for a little while. I’ve got some new stuff starting up (like my buttermilk – which is goiong for the first time) that I want to get mixed into the routine.
I also just read a chapter in Animal, Vegetable, Miracle that talks about cheesemaking & it sounds very doable.
Jessie – I think you’ll be hooked! 🙂 It is fun. I’ve not done buttermilk yet, although I have a culture. Will you let me know how it goes for you?
I got a good chuckle out of your cheese press. The first time I made hard cheese I did something similar, only even more crude, and I was so glad my DH was not at home, as from time to time, the weight would crash onto the kitchen floor. Nevertheless, it was excellent cheese! I am blessed with a “real” cheese press now, and it does make life much easier (and safer!)
.-= Yolanda´s last blog post… Snow Ice Cream =-.
Yolanda – Yes, I’m sure you understand. 🙂 What press do you use now? Once I was looking at the stainless steel presses offered on ebay.
Hi Wardee,
Yes the bowl is smaller than the mold so it literally fills the space between the top of the follower and the weight that is too wide to go inside the mold. If you can find a bowl with a non-skid bottom that is the size to fit inside the mold walls then put rocks or bowling ball in that would be much more secure. I can’t justify buying a real cheese mold so I’m happy to keep working with this one. Having to buy the milk to make the cheese means I won’t make cheese as frequently and when I do it will be soft varieties where you get more cheese to milk like chevre.
You are so lucky to have those goats! I’m sure your kids adore them as well.
.-= Sustainable Eats´s last blog post… Beets =-.
So…you don’t use an official Dairy Thermometer? I have an all-purpose one but I thought I’d need specialty thermometer.
Mindy – No, just one of those general use thermometers. They’re circular and have about a 5″ stem and go well past 200 degrees. You need it to show you room temp (72 F) and past 200. Some have a clip for the side of the pot and others don’t. I have one of each – the one that doesn’t have a clip, I use a paper clip to keep it stable.
Wardee, thanks for all the great lessons. I have a question about the milk. I live on a small island and it is pretty impossible to get raw milk. Can pasteurized be used? Unfortunately, it is as close as we get to raw milk. Thanks again
Question for making the Queso Fresco. Do I use the same ingredients and quantities as the Soft raw cheese and do I start the same way and the soft cheese?
Connie – The queso fresco is a different recipe and procedure entirely – click on the link to the recipe to see how it is done.
I will see if I can find you the plans for the one I found for another one that is different from the fias one. It has a handle that goes over and out and you hang weight from the handle utilizing the torch of the length of the handle and gravity. Nifty!
For what you are doing in the pic above i would use a rod of some kind as a follower so they bind on each other in a straight line and cannot slide.?
I am ready to do Lesson 11, but am not sure what kind of mesophilic culture to get. The link says it is not found. Whether I buy it through one of your resources or another source, can you give me more information so I get the correct culture? Thanks so much!
Barbara — Here’s the culture I recommend:
http://www.culturesforhealth.com/Danisco-Mesophilic-DS-Culture.html
Thanks for letting me know about the broken link. 🙂
Thanks, Wardee! I had been stumbling around and thought I had found the right one, but I was wrong, so you just saved the day. Thanks, again.
Wardee, my hubby is making a cheese press following these directions – http://biology.clc.uc.edu/fankhauser/Cheese/Cheese_5_gallons/Cheese_press/PRESS_SETUP_00.htm
Hope it gives you some ideas 🙂
Thanks, Bridie! I will bookmark that. I did actually just purchase a press. My husband says he wants to make one someday, but as he’s quite busy with more pressing projects, I am happy that we finally bought one. I got the one at Cultures for Health: http://www.culturesforhealth.com/Cheese-Press.html
Enjoy the press — and be sure to let me know how you like it when you finish it and use it!
Ooh exciting about the new press!! I’m down in New Zealand so a press similar to that here is about $400USD – quite abit out of our budget! I’ll let you know how we go with our DIY though 🙂
I’ve just started the chevre cheese except with raw cows milk and its set already and I’m so excited! I actually used my own cultured buttermilk since I didn’t have any cheese culture so I’m not sure what difference that’ll make to the final product but am *so* excited lol yep see even repeating myself 😉
Hopefully I’ll have the press ready by next week and I’ll try the queso fresco then 😀
Thank you!
Hey Sara here’s one you won’t try!
I made WONDERFUL yogurt cheese and lacto-fermented carrots yesterday using your method!!! What do you do with lots and lots of whey? I am learning SO MUCH from you!!! THANKS!!
Making fresh cheddar curds and ricotta today, Melinda!
I’ve got the milk, just hoping for the time!!!
Is it easy to make home made hard cheese like cheddar from raw milk?
I’ve wanted to try cheese making, but thought it would be really difficult. This sounds pretty easy, I may just give it a try.
Hi the link to the culture starter is not working. Please update where I can get that. Also I have a 11 strain pro biotic starter that I just got for another project, will that work? Thanks!
Hi, Cherie.
Homesteader’s supply now recommends the following:
LyoPro MDL is the aromatic culture for giving the bit of tartness just like for making chevre with goat milk. https://www.homesteadersupply.com/index.php?main_page=product_info&products_id=2843
The LyoPro MO (similar to Biena Meso II or III), is the main one, can also be used for butter. https://www.homesteadersupply.com/index.php?main_page=product_info&cPath=185_186&products_id=2842
All of our kits sold through Homesteader’s supply now come with LyoPro cultures. They have tested them and they are really the best, in fact, they now have them in all of their cheese making kits. 🙂
~Danielle, TCS Customer Sucess Team