Homemade sprouted spelt crackers are crispy, flavorful, and so easy to make… plus kids love them! Switch up the flavors and toppings for a never boring, healthy snack!
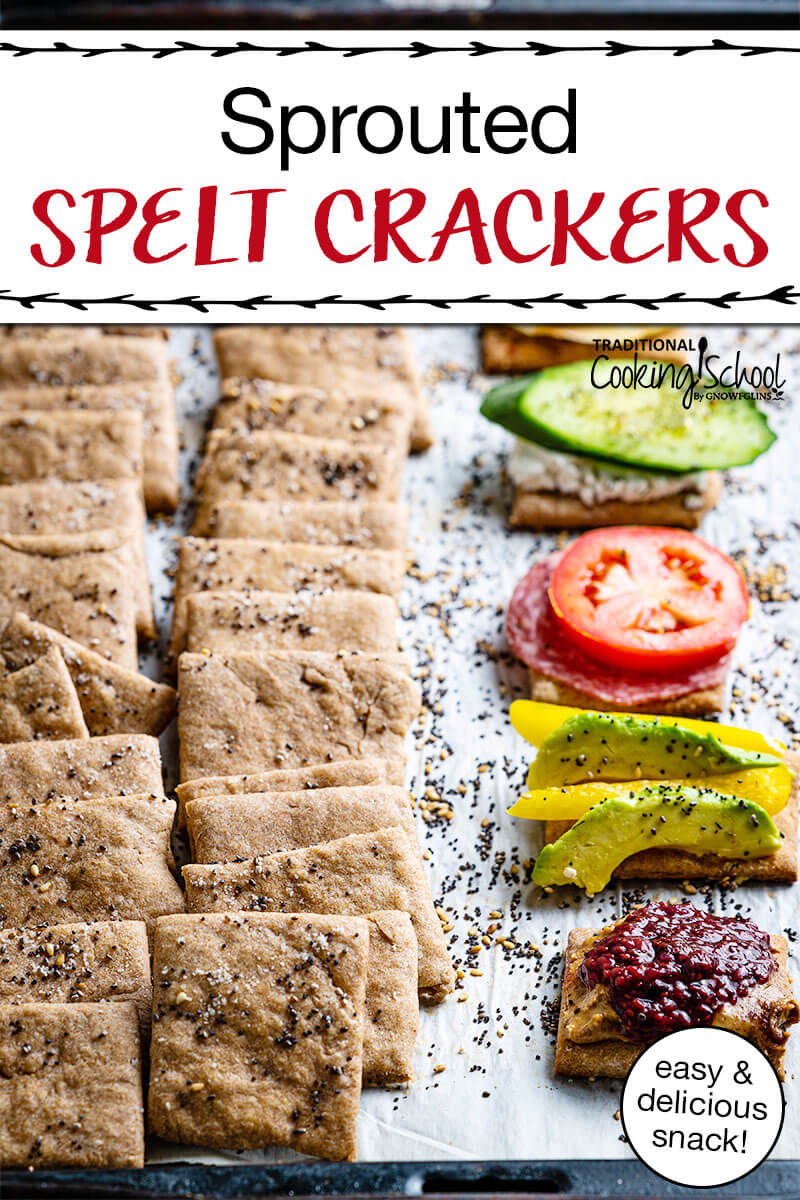
Homemade crackers are a favorite.
We’ve tried our fair share of cracker recipes… but only our favorites have made it to the blog to share with you! Be sure to try every flavor, then let us know your favorite!
The recipes you’ll find on Traditional Cooking School are these Grain-Free Almond Crackers, surprising and prebiotic Green Plantain Crackers, “Cheezy” Gluten-Free Crackers (which actually contain no cheese at all), and… Homemade Graham Crackers.
Sure, that last one is more of a dessert, but we would hate for you to miss out on them!
Back when I originally shared this recipe, my family had vowed to give up sweeteners, both refined and natural, during the month of May. So we needed some other snacks on hand, instead of the cookies and muffins that usually sat on the counter when my kids were younger.
When you’re raising kids, it’s great to have healthier snack alternatives, and these certainly fit the bill.
Plus, I love that I can pair them with fermented cheeses or my homemade cottage cheese spread for a great E meal or snack! For those who don’t know, I used the Trim Healthy Mama plan to lose over 30 pounds in one year!
If you’re looking for more snacks that have zero sugar, check out my growing list of Beyond Sugar Snack Ideas.
Homemade Crackers Ingredients
You’ll need just a few ingredients to make these sprouted spelt flour homemade crackers!
- Sprouted spelt flour (learn how to sprout grains!)
- Whole milk (raw, if you have it)
- Sea salt
- Baking powder
- Coconut oil (or butter)
Do I Need Special Equipment To Make Crackers?
No special equipment is necessary to make these sprouted homemade crackers.
You can mix them up simply in a bowl with a wooden spoon (as pictured), or you can use your stand mixer or food processor. The choice is yours.
You can make things a little easier with parchment paper, but simply greasing the pan will work, too.
We do think a pizza cutter is a very handy tool when it comes to cutting the crackers in uniform sizes, as shown below. But a steady hand and a knife also does the trick.
If you’d like your crackers to have pretty scalloped edges, you can use a pastry wheel/ravioli cutter as well.
How To Make This Homemade Cracker Recipe
At the risk of repeating myself, making crackers at home is SO EASY. Once you taste them, you’ll agree they’re far superior to store-bought!
You just… mix the dough, rest it for a bit, roll it out, cut it up, season to taste, and bake!
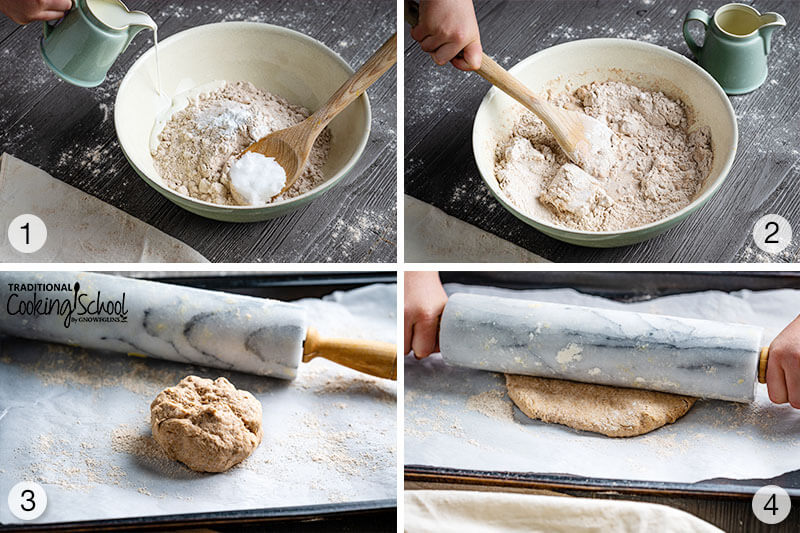
1. Mix all the ingredients in a bowl with a wooden spoon (or stand mixer).
2. Once the dough comes together in a ball, you can rest the cracker dough for 20 minutes or so to make the rolling part a bit easier, but this isn’t necessary.
3. Divide the dough into 4 equal portions and form each quarter into a ball.
4. Roll the dough out, one quarter at a time, on a lightly floured work surface (or parchment-lined baking sheet) to about 1/8th inch thick.
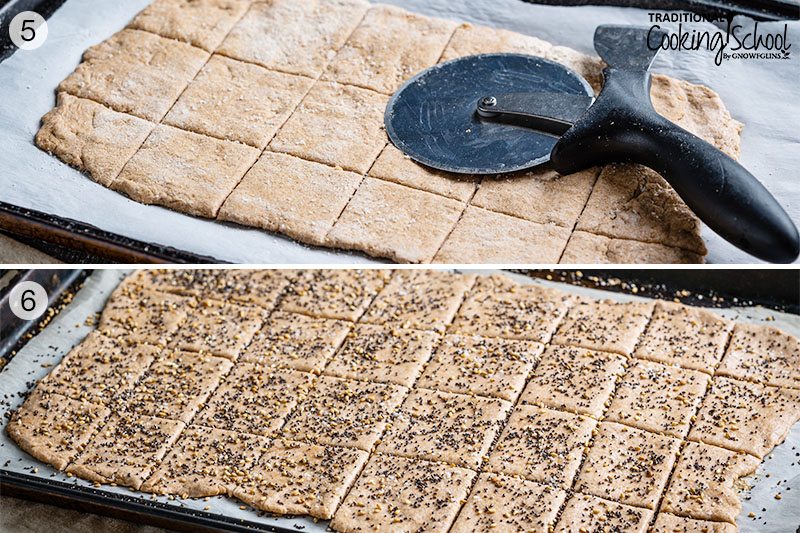
5. Cut into squares with a pizza cutter (or a pastry cutter)
6. Season with your favorite flavors (if your seasonings aren’t wanting to stick to your crackers, you can brush the tops of the crackers with a little olive oil or melted coconut oil or butter).
7. Bake for 8 to 12 minutes until golden brown. You’ll likely need to rotate your baking tray halfway through baking to ensure crackers bake evenly. If the crackers around the edges start browning, you may want to remove them, then continue baking the crackers in the center.
Homemade Crackers Variations
There are many flavor variations when it comes to making homemade crackers. The options are truly as endless as your imagination.
Here are a few cracker flavor variations to try!
- Sea salt & black pepper
- Caraway seeds
- Poppy seeds
- Dehydrated onion flakes
- Everything bagel seasoning
- Garlic powder
- Pizza seasoning
- Herbs de Provence
- Za’atar seasoning
- Cinnamon and sugar (for a sweeter option)
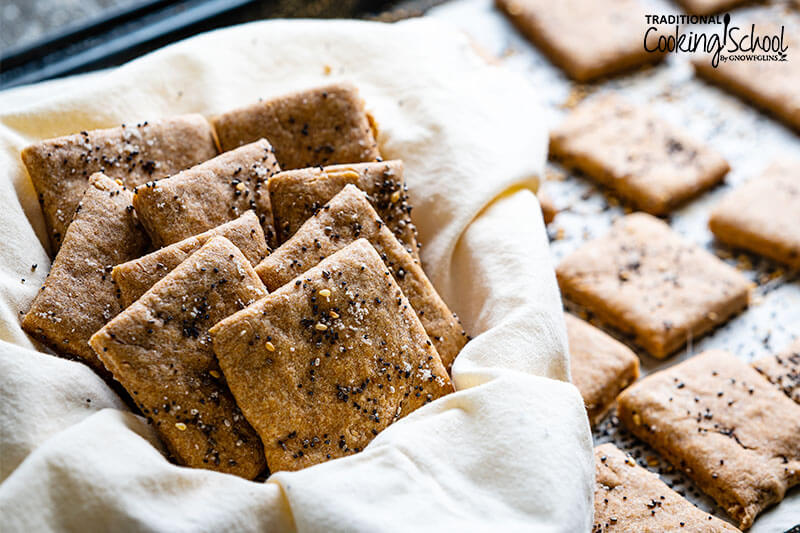
How To Store Homemade Crackers
Store homemade crackers a bit differently than store-bought crackers. Since these delicious homemade treats don’t have preservatives, you can store them at room temperature for approximately one week.
The trick is to store them in a sealable container WITHOUT actually sealing the lid. Just place the lid on top, but allow for a bit of airflow. I also like using something like these glass Anchor Hocking jars.
We like to double or triple this recipe and have a whole big homemade cracker cooking day! Then, once the sprouted spelt crackers are cooled completely, we package them up in quart-sized jars and place them in the freezer.
You could also use zip-top freezer bags. They’ll store very well in the freezer for 3 to 6 months (if they last that long!).
How To Fix Soggy Or Soft Crackers
No one likes to eat soft NON-crispy crackers. Thankfully this cracker recipe is neither of those.
However, if you don’t store them correctly, or perhaps accidentally seal that lid on your airtight container and they aren’t crispy anymore, you can reheat them in the oven for about 15 minutes at 225 degrees.
Once they are crispy and crunchy again, store them in that container without the lid sealed!
How To Serve Homemade Crackers
As mentioned above, some of our favorite ways to serve these homemade crackers are alongside our homemade holiday cheese ball, on a cheese board tray, alongside salmon salad, with sprouted hummus, fermented roasted red pepper hummus or even white bean Instant Pot hummus, or just topped with your favorite crumbly cheeses (like feta or blue cheese!).
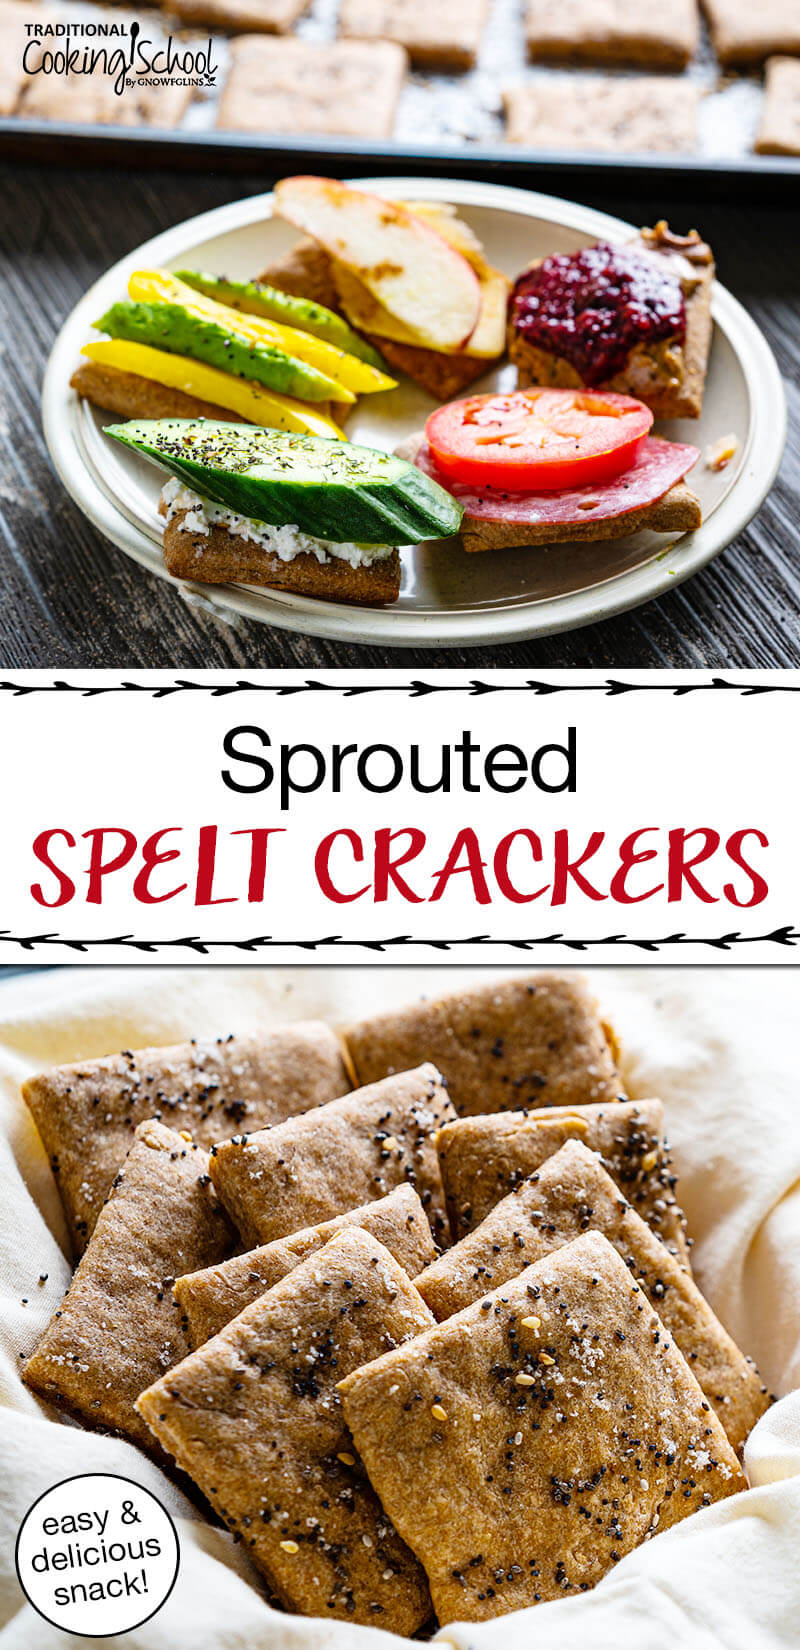
Photographed below we have a few different options for how we like to enjoy these crackers:
- A “peanut butter and jelly” option where we used our homemade soaked almond butter or homemade soaked pumpkin seed butter and homemade Instant Pot mixed berry chia seed jam
- Crackers topped with salami and sliced tomato (so delicious!)
- Homemade flavored cream cheese, sliced cucumber, and a few herbs sprinkled on top
- Topped with sliced yellow peppers and avocado
- Topped with a slice of sharp cheese and an apple wedge

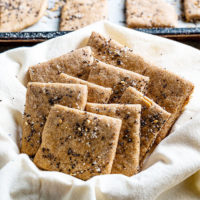
Sprouted Spelt Homemade Crackers
Crispy, crunchy, and perfectly salty, these homemade crackers are made with sprouted spelt flour so they're not only delicious, but healthy, too!
Ingredients
- 2-1/2 to 3 cups sprouted spelt flour
- 1 cup raw whole milk
- 1 teaspoon sea salt + more for sprinkling
- 1-1/2 teaspoons baking powder
- 4 tablespoons coconut oil melted
Instructions
-
Preheat oven to 425 degrees Fahrenheit.
-
Mix all ingredients.
-
Allow dough to rest, covered, for 20 minutes (optional).
-
Divide dough into 4 equal portions.
-
On a greased or parchment-paper lined cookie sheet (or baking stone), roll out one portion of the dough to 1/8" thickness.
-
Cut into squares with pizza cutter, pastry cutter, or sharp knife.
-
Sprinkle with more sea salt (or other flavor options listed in the post).
-
Bake for 8 to 12 minutes, turning the cookie sheet so crackers brown evenly. (If outside crackers brown too quickly, remove them from the pan and continue baking the remaining crackers.)
-
Repeat with the remaining dough. Wait until cookie sheet has fully cooled before placing the next batch of cracker dough onto it.
Recipe Notes
These are similar to the cracker recipe on page 518 of Nourishing Traditions, although that calls for soaking flour in yogurt overnight before making the crackers.
In addition, the Nourishing Traditions recipe calls for dehydrating the crackers (instead of baking them) and brushing them with melted coconut oil.
For a soaked version (using regular whole wheat flour or whole spelt flour), follow these steps:
- Soak flour in 1 cup of yogurt or soured milk in a covered bowl at room temperature overnight.
- The next day, proceed with the rest of the recipe (without using the 1 cup of milk).
For flavor options, see the recipe post.
Will you try these sprouted spelt crackers? What is your favorite flavor combination?
This post was originally published and written by Wardee Harmon on 5/6/09. It was updated and republished on 5/22/20.
We only recommend products and services we wholeheartedly endorse. This post may contain special links through which we earn a small commission if you make a purchase (though your price is the same).


Yummy! We make sprouted crackers here, but only with olive oil and salt and flour. Yours sound like a good variation.
This sounds like a great snack. I’m looking for more recipes using sprouted flour. My first bag was used up very quickly. I re-ordered and am waiting for it to come in at my local food co-op.
Thanks for the post!
Nurturing Wisdom – What flour are you getting? I’m looking into options for a couple friends of mine who are unable to sprout and grind their own.
I just bought a book that was mentioned on another post — Essential Eating: Sprouted Baking — and I’m looking forward to reading and trying some more sprouted grain recipes, too.
I am so thankful for sprouted grain. Otherwise, my daughter and my husband would not be able to eat gluten-grains. I wish I’d gotten on the bandwagon sooner! Well, it is never too late, right?
YUM these look amazing Wardee — thanks for sharing! I stumbled the post.
Wardee – I made these today – did the yogurt & soak option. And used butter.
They turned out well. I ended up not flipping & that was OK.
I rolled them out in 3 batches – the first nothing special; the second – mixed in some dried thyme. The third – sprinkled salt, pepper & dried thyme on top. Those were my favorite.
Thanks! These were the first crackers I’ve ever made.
I loved your carrot cake recipe and this looks just as impressive! Im dso happy I found you!
.-= Legal Bud Review´s last blog post… Legal Weed – Medical Marijuana States =-.
Thank you so much for the recipe! I’ve needed a push to try sprouting grains (the sprouting jar I’ve had for a year hasn’t helped!). We don’t buy crackers, but my son has been asking for them thanks to preschool. After a couple hard weeks of telling him no, a couple hard days of ‘we’ll have crackers in a couple more days,’ we finally made these today. My son helped and is currently finishing off the last three. They were just pulled out of the oven an hour ago and they are almost gone. He told me they are all his, but he’ll share if I want some. They are deliciously perfect.
Thank you!!!!!
Hi, I see that for the soak version you said omit coconut milk. Did you mean milk? or coconut oil?
Thanks!
Good catch — that wasn’t very clear. I meant omit the milk, since you’ve used one cup of soured or cultured milk the night before. 🙂
If one makes crackers from sprouted and dehydrated flour. then why would you have to soak the flour? Isn’t the grain soaking when you sprout it?
thanks
Barb — You don’t need to soak if you sprout. You can, though, if you’d like. 🙂
Do you help EVERYONE eat healthy or only Christians?
Hi, G. W.
We focus on the techniques of preparing real foods using traditional methods that preserve or enhance the nutritional value of the original ingredients.
There is a heavy emphasis on answering the “how” questions. However, there is always a reason for “why” we do things, and it is this “why” that is often more important than the “how.”
Our philosophy: At Traditional Cooking School, we believe that God is our creator and the source of all things good. God is the “why” for all that we do, including the way we cultivate, harvest, prepare and eat foods. That’s why we share our love for God and explain how we can see God’s design in our food.
This resonates with most of our members, though some participate solely for the techniques. We are happy to help you either way.?
~Danielle, TCS Customer Success Team
Nice post