
pepperoni and cheese
On any given day, up to 25% of Americans are eating pizza. That’s a sizable chunk of calories for a single food category!
According to one food blogger’s investigation, the ingredient lists of nearly every major pizza chain contain enough chemicals to fully stock a chemistry lab. Thankfully making pizza at home from scratch is much healthier — plus it’s easy and the whole family can do it together.
It’s especially fun to use your grill. You’ll love the amazing brick oven-crispy-chewy, full-flavored pizza, and you’ll also appreciate not heating up the kitchen in the summer.
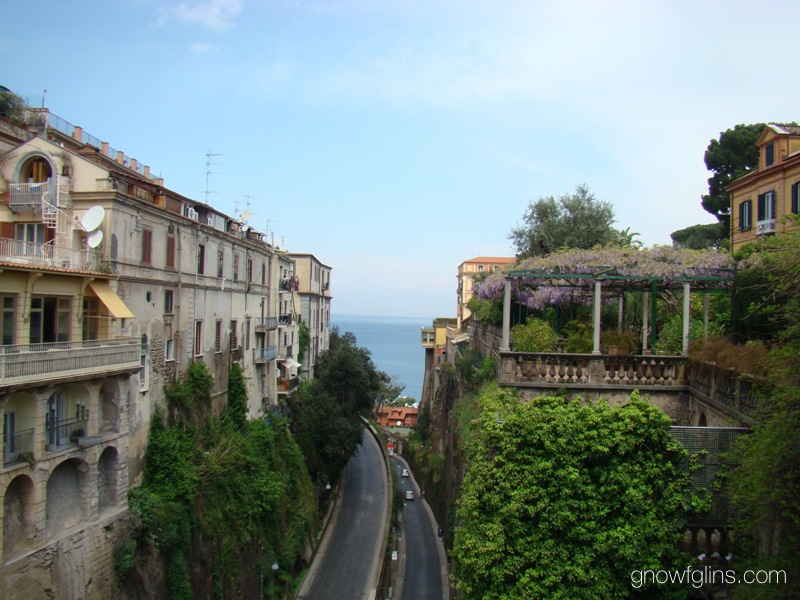
With these techniques, your grill, and my special Italian pizza dough and sauce recipes (some of which I learned while in Italy) expect to be transported across the sea to Naples, the birthplace of pizza.
Homemade pizza crust is a great entry-level baking project. You don’t need special skills or equipment (although having a stand mixer with a dough hook is helpful), and you can make great pizza… easily!
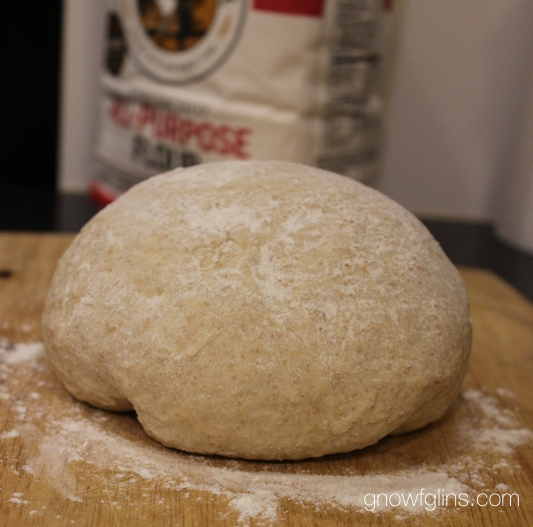
The secret to a great tasting crust is a long, slow rising time; so be sure you schedule enough time for that flavor to develop before you want to eat. I like to start my dough the day before and then let it rise in the refrigerator just like they do at pizzerias in Italy.
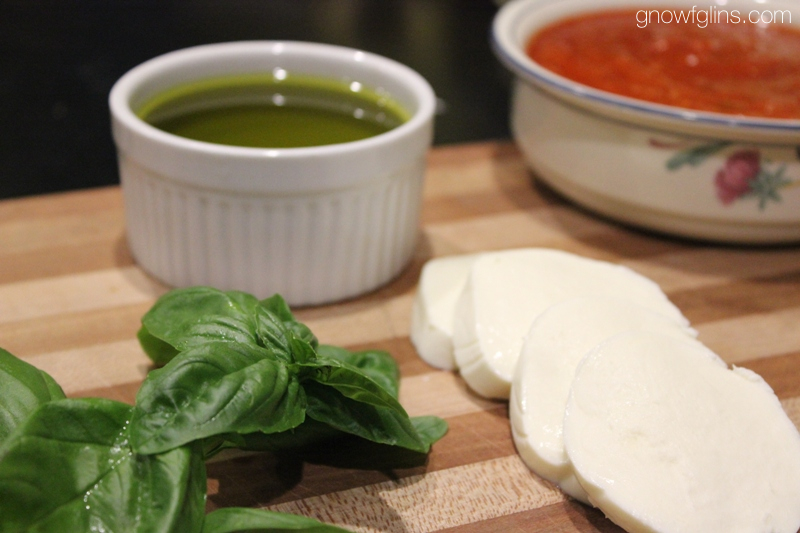
Once you have the crust made the toppings are up to you; read labels and be sure to use mozzarella made without growth hormones, sausage or pepperoni made without modern nitrite processing methods, and olives or pepperoncini without chemical preservatives.
Also, be sure to have all your toppings ready to go on platters or bowls before you start grilling. Cooking goes quickly and you won’t have time to stop and chop, slice, or shred anything.
The technique for grilling pizza is a little different from making it in the oven. You begin by grilling the crust alone — so it is cooked on one side before you flip it, top it, and finish it. The trickiest part of the whole process is getting that circle of raw dough neatly onto the grill. The first time you try this, you might want to make a double batch of the dough — to allow for bloopers!
Now let’s go from start-to-finish, beginning with the crust.
Neapolitan-Style Pizza Crust
Homemade pizza crust is a great entry-level baking project. You don't need special skills or equipment (although having a stand mixer with a dough hook is helpful), and you can make great pizza… easily!
Ingredients
- 1-1/2 cups pure water room temperature
- 1/2 teaspoon instant yeast
- 3 cups unbleached all-purpose flour I like King Arthur brand
- 1 cup whole wheat flour
- 1 tablespoon sea salt
Instructions
-
Combine the yeast, flours, and salt in a mixing bowl.
-
Add the water and mix until well combined.
-
Knead by hand or with the dough hook of a mixer for 15 minutes.
-
The dough will be sticky, but resist the temptation to add more flour unless you absolutely have to.
-
By the end of the kneading the dough will change in texture from shaggy to fairly smooth. Don't worry if it seems a little slack, the long rise time will continue to change the texture and consistency.
-
Place the dough into a container that is about three times larger than the ball of dough, cover and allow it to rise on the counter for at least 8 hours or as long as 16 hours.
-
The longer you let it rise the more flavor will develop.
-
I like to use the Italian technique which is to make it the day before, cover and let rise in the refrigerator for 24 hours or more, then remove it an hour or so before using it to let it come to room temperature.
-
You can also mix in a bread machine and just let it rise in the machine without baking.
Recipe Notes
While the crust is rising, gather together the toppings you want to use. Also, be sure your grill rack is clean and you have plenty of propane or charcoal. Another dough option is our popular Sourdough Pizza Crust, also found in the Sourdough eBook and in our member area.
Easy Homemade Pizza Sauce
Prepare this easy sauce while your pizza dough is rising.
Ingredients
- 1 8- ounce can organic tomato sauce
- 1/4 teaspoon dried oregano
- 1/4 teaspoon dried basil
- 1/4 teaspoon dried rosemary
- 1/4 teaspoon dried marjoram
- 1/2 teaspoon raw honey
- 1/2 teaspoon garlic powder
- 1/8 teaspoon sea salt
Instructions
-
Mix all the ingredients in a medium bowl.
-
Cover.
-
Refrigerate until ready to use.
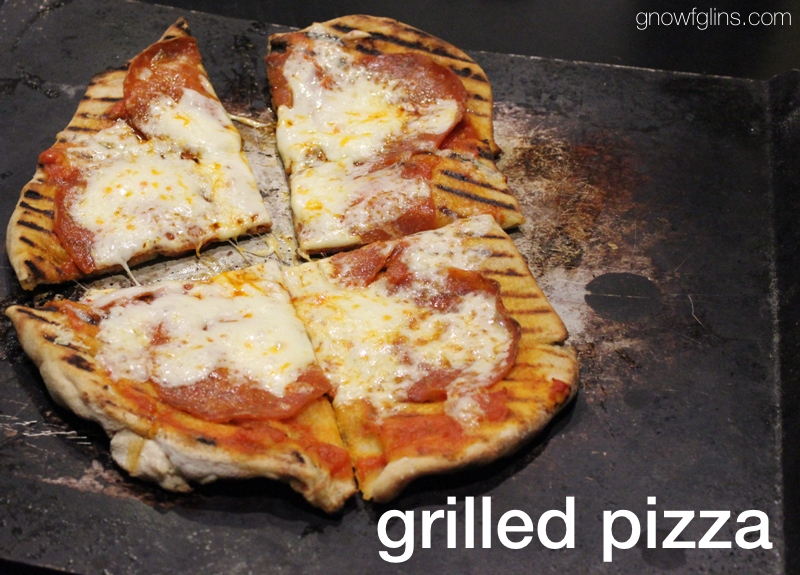
Grilled Pizza
Ingredients
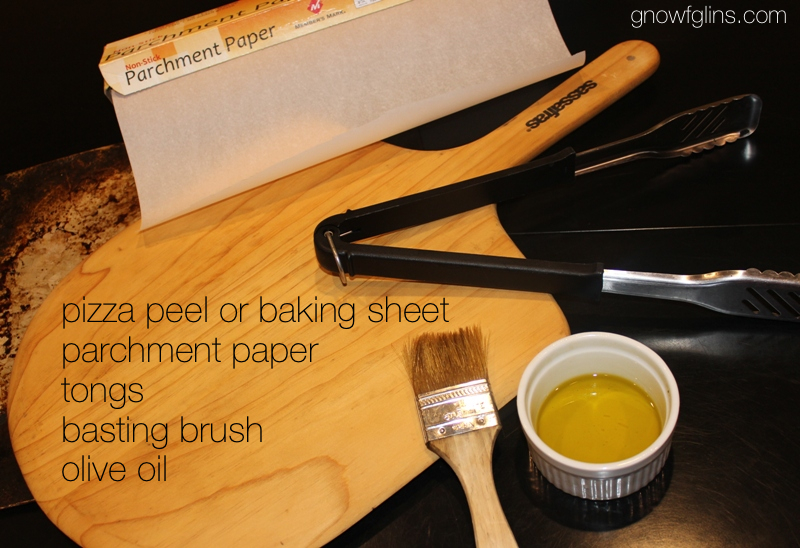
- parchment paper
- pizza peel or rimless baking sheet
- long-handled tongs
- basting brush
- extra virgin olive oil small bowl as needed
- grill charcoal or gas with lid or cover
- pizza dough of choice*
- toppings of choice
Instructions
-
Preheat your grill on high for 10 minutes, or prepare your charcoal fire to a medium-hot temperature. (Medium-hot means you can only hold your hand five inches above the heat for about 2 to 3 seconds.)
-
Enough heat is key to the crust releasing from the grill racks.
-
Remember, a brick oven can get upwards of 900 degrees Fahrenheit -- so don't worry about getting your grill too hot.
-
Have your sauce and toppings prepped and ready at a table near the grill.
-
Divide the dough into four equal balls.
-
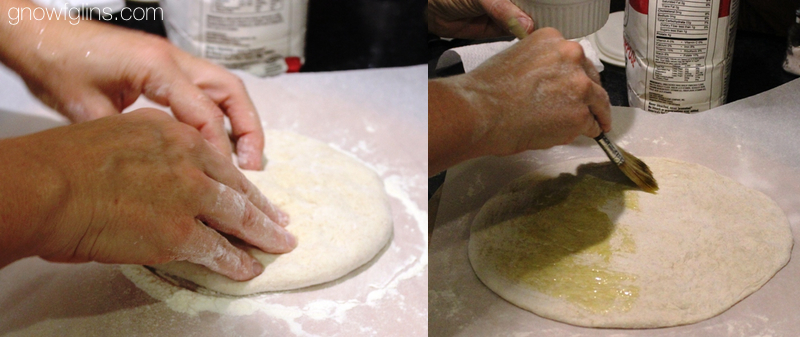
Working with one ball at a time on a floured surface, press it into a flattened disk and then work it into a larger and larger circle by pressing, turning, and stretching as you go.
-
I like to shape my crust on parchment paper.
-
You want the crust to remain loose on the surface, not stick, so you can transfer it easily to the grill.
-
You can use a rolling pin to shape it, or if you are adventurous you can try tossing it.
-
The goal is even thickness to ensure even cooking; a perfect circle is not important.
-
In fact the non-round shapes have a charming, rustic appeal.
-
I find thinner crusts work the best, giving a nice crispy exterior while still yielding open pockets and chewy interior.
-
Too thick and you have foccacia instead of pizza, or it might not cook all the way through before the outside burns.
-
If you have kept your dough loose as you shape it you will be able to slip the shaped crust onto the pizza peel or (floured) rimless baking sheet.
-
Using a basting brush coat the entire top of the crust with the olive oil.
-
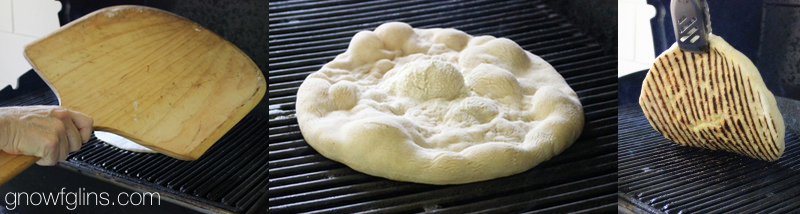
Think of this next step as if you were turning a giant pancake and just flip the crust quickly, oiled side down, onto the grill.
-
This is why I recommend making that double batch of dough, because the first couple of tries may end in a few wrinkles or folds. (Or, you could hold the crust by the edge and drape it across the grill, but be careful not to tear the dough as you are holding it up.)
-
Soon you will get the hang of it and the crust will flip neatly onto the grill with a satisfying sizzle. Shut the lid for about two minutes.
-
When you open the lid you will see the top side of the crust has bubbled up while the underside has magically released somewhat from the grill and now has nice grill marks underneath.
-
Use tongs to slip the crust back onto the pizza peel.
-
Brush the uncooked side with oil.
-
Then flip it over on the peel, so that the uncooked side is down.
-
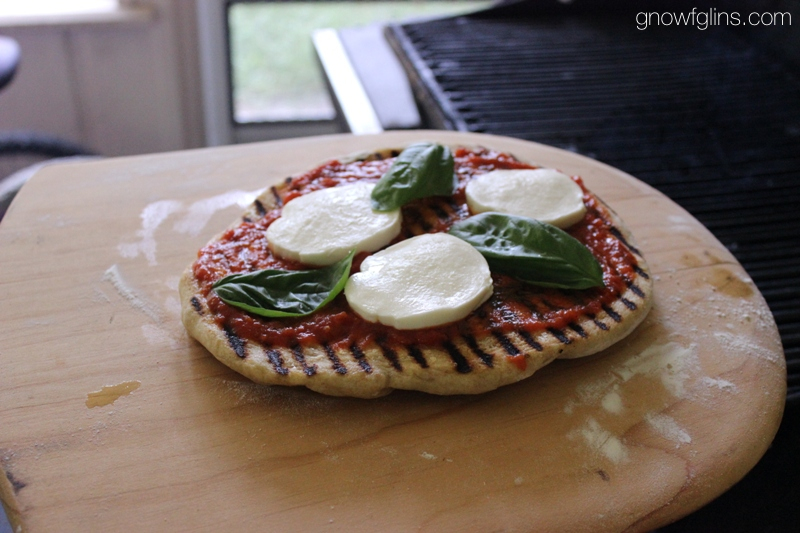
Now it's time to add your toppings to the grilled side.
-
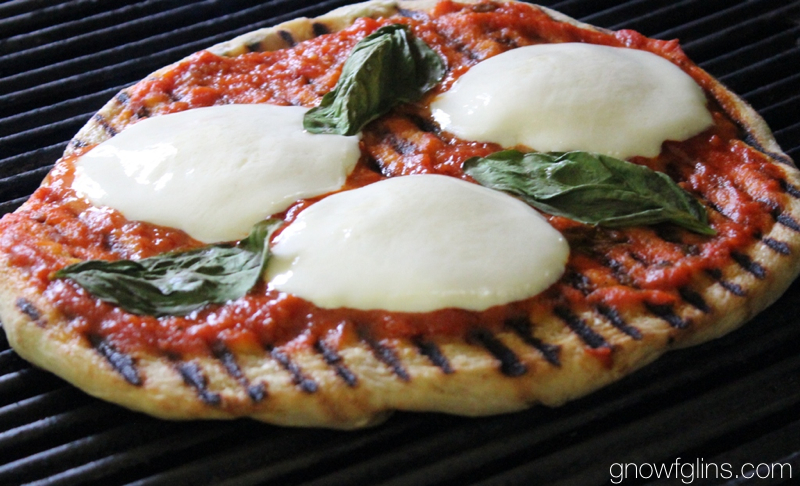
Carefully slide the topped pizza back onto the grill.
-
Cover the grill again and let the toppings cook while the underside of the crust gets grilled (and those beautiful tell-tale grill marks).
-
The amount of time this takes depends on how you topped it.
-
Your grill can get close to that intense brick oven heat, so a simple Margherita pizza of sauce, cheese, and basil leaves will take only 3 to 4 minutes, while a super supreme loaded pizza might take 6 minutes.
-
If the crust bottom is already done but the toppings are not, you can move the pizza away from the direct heat to continue cooking without burning the crust.
-
Slide the finished pizza back onto the peel and then onto a cutting board or cooling rack.
-
Slice and enjoy that crispy, smoky, homemade, authentic Italian pizza!
Recipe Notes
With these easy techniques and my special pizza dough recipe you can have that amazing brick oven crispy, chewy, full-flavored pizza right in your own backyard. Why settle for someone else's idea of "better ingredients" when you can make the best yourself at home!
*Gluten-Free Options
Here's a homemade gluten-free sourdough pizza crust.
Or, I tested the grill technique using Udi's Gluten Free pizza crust. I oiled the premade crust, grilled one side, oiled the other side, added toppings and returned it to the grill to finish. The Udi's crust held up to the grilling without cracking or crumbling and the finished pizza was quite tasty.
Have you made grilled pizza? What are your favorite toppings? Got any tips to share?
...without giving up the foods you love or spending all day in the kitchen!

2 free books:
Eat God's Way
Ditch the Standard American Diet, get healthier & happier, and save money on groceries...
We only recommend products and services we wholeheartedly endorse. This post may contain special links through which we earn a small commission if you make a purchase (though your price is the same).

I am so excited to see this recipe and grilling technique! My family loves the occasional pizza night and we will definitely be giving this a try. Thanks so much!
I can’t wait to try this. Seems like the long rise and using the grill would combine to make a delicious pizza.
yes, it really does! The longer you can let the dough rise before you make it, the better the flavor. As a bonus it also increases the nutrition too!
Looks delicious! This might be the next thing I try on my new grill! Thanks for sharing such a family friendly recipe with simple ingredients. Grilling it should give a little twist to a family favorite that is losing it’s interest lately. We were in definite need of a new recipe and this might just be what we needed. We love anything grilled!
Let us know how it works for you Jan!
I made the dough in my bread machine and it came out great (I just started it in the morning and let it rise in the machine all day). My crusts came out a little thick, but that made getting it on the grill very easy. I topped ours with buffalo mozzarella and basil from the garden. So good!!
thanks for chiming in on the use of a bread machine. It’s always good to know more than one way to get good results with this dough!
This looks so good. I’d love to give it a try. My husband is of Italian origin and is very particular about his crust and what goes on top (no pineapple). I have King Arthur Flour but it is white wheat flour. Would it still work?
Hi Jenny,
The true Neapolitan pizza crust uses a special finely ground white flour called “00”. Unless you live near an Italian market you probably can’t find it, but the King Arthur all-purpose unbleached white flour is a good stand-in. 3 cups of the white flour + 1 cup of whole wheat (either traditional or white wheat) makes for a crust that is sturdy enough for grilling.
Hope that answers your question. Let me know what your husband thinks of the crust once you make it!
Once during a huricane in florida i had to grill my pizza because we had no electricity! I didnt use the good ingredients you did here but I wish I would have, I am sure yours came out much better than the mess I made! Thanks for all the great advice on how to do it BETTER and healthier!
coincidentally Sara it was during a hurricane in Florida that I first tried grilling pizza too! Gotta love those days of forced creativity as we scramble to use up food before it goes bad!
Thank you for this recipe!!! Lee always has great ideas and information, as I follow her on her home website too. Great to see you here also!
Thanks for the love Tabitha!
Thanks for the post and the additional information on gluten free. My niece just found out that she has Celiac Disease, they are looking for and trying new recipes. I will forward this post to her. Grilled pizza is a big hit with company. Providing different toppings and letting everyone make what they like is a good way to meet taste preferences. I put seasoning in the dough for extra flavor and when company is coming I will pre-grill the dough to save time.
great idea to pre-grill the dough! That should speed things up in feeding a crowd.
This looks heavenly! Can’t wait to give it a try!
The photo of the round dough ball at the tope of the page looks like whole grain flour instead of all-purpose. Do my eyes deceive me?
There is 1 cup of whole wheat in the recipe, but the white flour is unbleached which may contribute to the non-white color of the dough.
I am so surprised to see a recipe like this on a traditional foods blog. I know that there is mention of using sourdough crust, but it seems like an afterthought. I was taken aback to see an unsoaked/sprouted/soured recipe promoted. Looks yummy, and a great idea, just not traditional or properly prepared. I was also surprised to see powdered stevia suggested/listed as an ingredient on another post. I’m not trying to critique – these seem out of place for a blog that I and many others come to reference for traditional food ideas.
Thanks for your comments, Lexee. In this case, we were happy to share Lee’s Italian crust recipe because it was just so all about her Italian experience and an authentic (albeit modern) piece of Italian kitchen culture… 🙂 You’re right, there is no soaking, sprouting, or fermenting, which is why it was important to include links to the other more traditionally prepared sourdough crusts.
Regarding the stevia on that other post, if I understand correctly, you prefer the liquid stevia or not at all? You’re right that the liquid is a more natural and better choice, and I appreciate your feedback on that. I’ll keep that in mind. I do mostly use the liquid stevia myself, but I like to give people options, too.
My best effort so far has been on cast iron pre heated on high so I really am going to have to try this soon, dont worry its been so long since I had a genuine Italian pizza I cant compare. My Brother and Dad on the other hand have so fingers crossed ;o)
I tried making this with freshly ground whole wheat pastry flour because it was what I had on hand and when I kneaded it in my stand mixer it didnt’ form into a ball, it just formed under neath the kneader. I am really confused as to why the two flours would make such a difference. And thoughts?