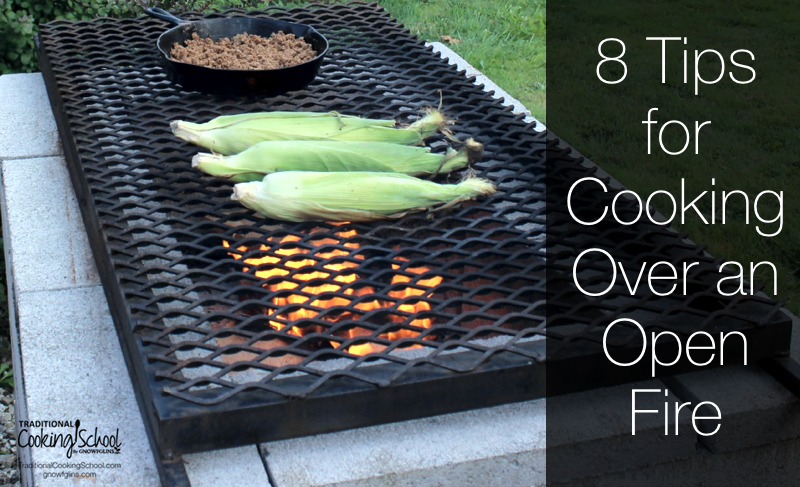
Does anyone else feel like a true pioneer when cooking outdoors over an open fire? I admit, it makes me want to hitch the horses to the wagon or strap on my gear and head into the mountain towering above our home.
Cooking outdoors is a favorite thing activity on our homestead, and it’s a good thing, because quite frequently we lose power — with an electric cooking stove, outdoors is the only way I can get supper on the table and bread baking. Cooking outdoors becomes a way of life when the hot weather comes. Because no one likes a sweaty kitchen, right?
In all my years of cooking outside, I’ve learned a thing or two. Here are my 8 best tips for cooking over an open fire. Whether you’re just getting started or you’re a seasoned off-grid cook, I can’t wait to hear your best tips. Be sure to share in the comments!
1. Realize you’re usually cooking over the coals, not the flame.
Most people assume “cooking over an open fire” means cooking food over a dancing flame of fire. While it can mean this, it usually means your food is actually cooking over the hot coals (either wood or charcoal). This is because the constant reliable heat comes from the coals, not the flames.
2. Create your coals from the right wood or charcoal.
If you choose to use wood, you’ll want dry or seasoned hard wood. Green wood smokes and doesn’t put off much heat. Some good wood choices are maple, alder, and oak. If you’re using charcoal, get the kind that isn’t treated with lighter fluid.
3. Start your fire about 15 minutes before you want to begin cooking.
If you’re just starting out with outdoor cooking, I recommend using charcoal. Yes, wood is more authentic, but if you’re anything like me and get frustrated or fail the first several times you try, you’re less likely to stick with it. Let’s make things easy on ourselves, folks!
4. All you need is a fire pit or ring, flame (or hot coals), a metal grate, and trusty cast iron.
We use wood when cooking over an open flame. All of my skillet meals, pan frying or grilling is done over a wood open flame with a large metal grate on top. I set my cast iron, Dutch ovens, or food on the grate directly over the heat source.
5. Make sure you have extra wood (or charcoal) stacked nearby.
You want to be able to add more easily as needed. And you will need to. 🙂
6. It’s much easier to add wood than take it away.
You can easily add wood to your fire to increase the heat, but if you crank up the heat too much, you’ll be waiting much longer for it cool. However, there is a short cut if you do happen to get your fire too hot — move dishes to the outer edge of your cooking area to “lower” the temperature.
7. Do your prep work inside first.
It’s much easier to chop, dice, rinse, and measure indoors. Put what you’ll need to cook the meal on a tray or in a bag for easy transport to the outdoor cooking area.
8. Bring all your food items and tools outside before you start cooking.
Then you’ll avoid running back and forth from the kitchen to the patio. My family doesn’t like burnt food and I don’t trust our dog not to help himself. 😉 I may also get sidetracked and forget about the food altogether… am I the only one who does that sort of thing?
What are your favorite ways to cook outdoors? What tips would you add?
Dutch oven cooking, smoking cheese, smoking meat, using a tripod, dishes nestled in the coals, and a cast iron skillet are the main ways of cooking over an open fire outside. There are many other ways to cook outdoors without power as well. In fact, we’ve got all of them covered in the Cooking Outside eCourse.
We only recommend products and services we wholeheartedly endorse. This post may contain special links through which we earn a small commission if you make a purchase (though your price is the same).


Your timing is perfect! My (5 year old oven) has broken down…again! With the digital junk it will cost $311.00 just to replace the computer board. The first time it went down was when I used the “self clean” for the first time. I love baking but at what cost? I can “buy” a lot of bread for $311.00! I tried to find a oven that operated with “knobs” like my Mom’s old oven, the kind that rarely broke down, I don’t think they exist any more. So, I’m pulling out my Dutch Oven and going stove top & outdoor Pioneer cooking.
Sheri- I feel your pain. We opted for a used stove off of Craigslist with the nobs on the front so our son could cook without reaching to the back. It cost us less than $100 and has been going strong for years. It isn’t as pretty as the newer models, but that doesn’t matter to us.
You give me hope Tiffany and good for you for figuring out the marketing b.s. When we did our remodel I wanted a stove/oven= 1 unit with the microwave w/vent over the stove, but my husband wanted them separate. I have to remind myself…”The man does not cook” except for bringing home Papa Murphy’s pizza, and our microwave takes up counter space. He’s gonna miss his pizza!
What’s the best way for removing smoke from the outside of the cast iron pans without ruining them?
When I was in Girl Guides, we rubbed dish washing liquid on the outside of our pots, and they cleaned like nothing else. I still do this.
OK, …a little clarification: you have to rub the dish washing liquid on the pots before you cook. Sorry!
Haha! I just reread my first comment, and it looks so silly! “Yes, I actually rub dish washing liquid on my pots to clean them – how ’bout you?”
You don’t want to use dishwashing soap on your cast iron. Use sand if you must on the outside. I use bacon grease or olive oil on the inside and outside of my cast iron to clean it and keep it also like a non-stick pan. You want to heat up the pan over gentle heat with the oil on it. Let it soak in and then let it sit. Once cooled you can wipe off the inside and outside of the pan with a paper towel to clean it up. Repeat again with the oil and heat if necessary but don’t use soap.