
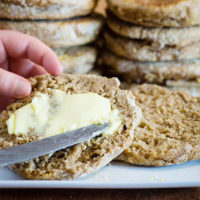
These healthy, homemade sourdough English muffins are the perfect use for your extra sourdough starter. Cooked to perfection in a frying pan and filled with the expected nooks and crannies, these muffins are amazing toasted and topped with butter and jam for breakfast, or filled with your favorite sandwich items for a quick lunch.

Mercy! I cannot express with words how good these sourdough English muffins are!
They’re the perfect use for all my leftover sourdough starter. I love making up a double or triple batch, then freezing them to have on hand throughout the following months.
Whether you simply toast them and top with butter and jam (like this Instant Pot Mixed Berry Chia Seed Jam) for breakfast, or you use them as your daily sandwich bread (like the salmon salad sandwiches photographed below), you really can’t go wrong with this recipe.
One of our favorite, creative ways to use these is to bake up little individual pizzas for a quick and easy (and fun!) dinner.
Sourdough Tips and Tricks
New to using sourdough starter? Read this post (and watch the video) on how to build up an active and healthy sourdough starter,
Not sure if your sourdough starter is strong enough for baking? This post will help guide you!
I would also suggest checking out these sourdough starter troubleshooting tips and tricks, because when we’re working with sourdough starter, there are so many variables that are great to be watching out for to create the healthiest, strongest starter.

How to Get the Best Sourdough English Muffins
- Starting with a healthy, strong and active sourdough starter is key. If you’re not sure the health of your starter, read the linked posts above.
- We all want those classic nooks and crannies in our English muffins. These come because of the little pockets of air that get trapped in the dough when rising. It’s imperative that you don’t rush the resting and rising time for this recipe.
- I’ve let this dough rise as long as 24 hours, but this long isn’t mandatory. Eight hours is the minimum time, so if you prep these in the evening, they’ll be ready for the next step in the morning. Or, if you start this recipe early in the morning, they could be ready by dinner.
- The second rise time will vary based on how warm or cool your home is. Don’t rush this step, it’s where all those amazing nooks and crannies are formed! If your muffins aren’t rising, try finding a warmer spot in your kitchen, or use a seedling mat to help speed the process along.
- Muffins will fluff up a bit during cooking. If they’re not rising after a couple of hours, try cooking one to see if it fluffs up.
- Using milk or a fermented dairy (such as milk kefir) really lends to a lighter and fluffier muffin. You can use water if you’d like, but we recommend using dairy. If you need a dairy-free alternative, try using coconut milk.
- To maintain those well earned nooks and crannies, we recommend “fork splitting” the English muffins by piercing with a fork all around the edge and gently tearing open. If you slice it with a knife you’ll minimize these holes.
- For the classic English muffin texture and that chewy, crispy bite we all crave, toast the muffins before eating.
How To Store Sourdough English Muffins
- English muffins can be stored at room temperature (in an airtight container) for up to three days.
- Store English muffins in the refrigerator for up to one week.
- Wrap in an airtight container and store in the freezer for up to three months.
- Thaw muffins completely before toasting.

Sourdough English Muffin Recipe
To make this recipe you’ll begin by combining sourdough starter, liquid, and flour of choice into a large bowl.
Stir until evenly incorporated and no pockets of flour remain. It’s at this stage I’ll add ground flaxseed, caraway seeds or poppyseeds to allow them to ferment along with the dough.
Cover the bowl with a towel and let sit overnight or up to 24 hours. The longer the dough rests, the more sour it will become.
Once the dough has fully fermented, sprinkle salt and baking soda on top of soured dough. Drizzle honey on (if using) at this point as well.
Using a wooden spoon, gently cut/stir in the ingredients until incorporated.
Dust your counter with flour (or use a small amount of oil if you don’t want to add more flour) and dump the dough onto your lightly floured work surface.
Knead the dough for 2 to 3 minutes to fully incorporate the salt, baking soda, and honey.
Using a pizza cutter, divide the dough into eight equal portions.

Line a baking sheet with parchment paper and dust with a generous amount of cornmeal. Set aside.
Dust your hands with flour and carefully form each portion into English muffin form (I aim for about 1 finger thick and about 2 1/2 inches thick in diameter). Once formed, place onto the cornmeal.
Sprinkle more cornmeal over the tops of the English muffins if you like that classic texture, then cover the muffins with a tea towel and allow them to rest for 45 minutes to 1 hour (and up to 3 hours, if needed).
About 5 minutes prior to baking, preheat your griddle or pan to medium heat. You’ll need to adjust the heat as necessary while cooking to be sure the muffins don’t brown too quickly.
Cook the muffins for about 5 minutes per side until lightly golden brown (flip carefully to avoid deflating your muffins). Use the back of a spatula to gently flatten your muffins if they’re puffing up too much.
If the outside edge of your muffin isn’t as done as you’d like after the 5 minutes on each side, pop the muffins into a 350 degree Fahrenheit oven for 5 to 10 minutes.
When cooked through, transfer English muffins to a cooling rack.
Sourdough English Muffins
These healthy, homemade sourdough English muffins are the perfect use for your extra sourdough starter. Cooked to perfection in a frying pan and filled with the expected nooks and crannies these muffins are amazing toasted and topped with butter and jam for breakfast, or filled with your favorite sandwich items for a quick lunch.
Ingredients
Souring:
- 1/2 cup sourdough starter
- 1 cup liquid such as water, milk, fermented dairy, or coconut milk*; use water or almond, macadamia, or oat milk for Low Vitamin A
- 2 cups flour of choice**; use white wheat, spelt, or einkorn for Low Vitamin A
Finish
- 1 teaspoon baking soda
- 1 tablespoon raw honey or other sweetener, optional
- 3/4 to 1 teaspoon sea salt
- add-ins seeds, dried fruit, chopped nuts, etc. (optional)***
Instructions
Souring:
-
Combine sourdough starter and liquid of choice into medium sized bowl.
-
Stir to combine.
-
If your starter is very stiff, feel free to add an extra 1/4 cup or so of liquid.
-
Once combined, add flour to mixture. Stir well to combine.
-
Add ground flaxseed, poppyseeds or caraway seeds at this point so they can sour along with the rest of the dough.
-
Cover and let dough sit 8-24 hours.
Finish:
-
In the morning, sprinkle salt and baking soda on top of soured dough.
-
Drizzle in honey, if using.
-
Then, use a wooden spoon to push/cut/stir in the newly-added ingredients. It doesn't have to be perfect.
-
Dust work surface with flour, or pour about a tablespoon of olive oil onto the counter, spread it around, and rub your hands together.
-
Dump dough onto the flour or oiled spot, and knead for 2 to 3 minutes. You want to thoroughly incorporate the salt, baking soda and honey.
-
Then separate dough into 8 equal portions with a pizza cutter.
-
Dust hands with flour. Pick up each portion and gently shape it into a muffin. I aim for about 1 finger thick and 2 1/2 inches wide.
-
Place muffins on a lightly floured, cornmeal-ed, or greased sheet of wax paper or parchment paper.
-
Cover with a dish towel and let rest for 45 minutes to 1 hour.
-
About 5 minutes prior to baking muffins, preheat griddle or skillet to medium heat.
-
Carefully transfer muffins to griddle or skillet and cook approximately 5 minutes per side.
-
If the outside edge of your muffin isn't as done as you'd like after the 5 minutes for each side, pop into a 350 degree Fahrenheit oven for 5 to 10 minutes.
-
When cooked through, transfer to a cooling rack.
-
Finally, enjoy topped with butter or even some blueberry jam.
Recipe Notes
- Although the English muffins will turn out if you use water instead of full fat or fermented dairy, you will need to add more flour initially for easier kneading. The finished muffins also won't be as soft and tender. Looking for a wonderful coconut milk to use? We like this one.
- Use any flour you desire! I've used white wheat, whole wheat, and rye. Wardee has used spelt and einkorn. I do question the use of rice flour -- but perhaps it would work in combination with another flour.
- If using ground flax seed or poppy or caraway seeds as add-ins, mix in during souring stage so they can sour along with the rest of the dough.
- To make these English muffins compliant for the Low Vitamin A Diet, use water or almond, macadamia, or oat milk as the liquid and organic, unfortified white wheat, spelt, or einkorn as the flour.

Will you try these sourdough English muffins?
This post was featured in 90 Nourishing Egg-Free Breakfasts, 12 Yummy Snacks Using Sourdough, 47 Trim Healthy Mama E Meals & Snacks With Traditional Foods, 60 Easy & Nourishing Picnic Recipes, and 92 Nourishing Grill & Barbecue Dishes, Drinks, & Desserts.
Looking for More Sourdough Recipes? Try These!
- Whole Grain Sourdough Bread
- Sourdough Sandwich Bread
- No-Knead Sourdough Einkorn Bread
- Einkorn Sourdough Bagels
- Homemade Sourdough Pancakes
- Soft & Chewy Sourdough Pretzels
- Einkorn Sourdough Chapatis {Indian Flatbread}
- Homemade Sourdough Tortillas {no rolling required!}!
- Sourdough Pizza Crust (thick or thin crust!)
- Sourdough Apple Cinnamon Rolls w/Cream Cheese Frosting
- Pumpkin Sourdough Cinnamon Rolls w/Cream Cheese Frosting
- Sourdough Chocolate Cake With Chocolate Frosting
- Gluten-Free Sourdough Bread (with FREE Video)
- 30+ Sourdough Dessert Recipes
This post was originally published and written by Erin Vander Lugt on 12/3/14. It was updated and republished on 3/13/20.
...without giving up the foods you love or spending all day in the kitchen!

2 free books:
Eat God's Way
Ditch the Standard American Diet, get healthier & happier, and save money on groceries...
We only recommend products and services we wholeheartedly endorse. This post may contain special links through which we earn a small commission if you make a purchase (though your price is the same).


Ow wow, I cannot wait to try this recipe!
YUM. They look delicious. And fairly easy. Thank you!
.-= Millie @ Homespun Oasis´s last blog post… Tuesday Twister March 30 =-.
I have been wanting to make English muffins for sometime now — thanks for making the directions so easy!
Mmm . . . they look good! And what a cute little family you have!
I absolutely LOVE LOVE these muffins. So easy to make and amazingly good. Toast with peanut butter and honey in the morning … oh, I’m wanting one again right now!!!
Thank you for the recipe! Are they hard to cut cleanly? Do they travel well if made into a sandwhich? I am going to have to try these.
Hi Kelli,
These definitely travel well. And as far as cutting cleanly, I recommend doing a partial cut all the way around the muffin and then twisting it open. Enjoy!
And Bethany, thanks for the compliment on my family! 🙂
Thanks Erin, i like the recipe and the pictures are great, can i know the type of camera you’re using because photography is one of my hobbies.
Can’t wait to try these!
What part of Alaska do you live in?
My husband lived in Anchorage from 1984-88.
DUH! I just noticed at the top that you live in Anchorage!
How long have you been there?
The muffins look great! I killed my first attempt at sourdough starter, but once I get one going, I’m looking forward to trying these.
I made these english muffins this morning. They are delicious!! They turned out perfect!
Thanks for sharing the recipe!
Hi Pampy,
The camera I use is a Canon Digital Rebel EOS. I think that is how you say it! Shows how much I know about cameras! 🙂
Yeah Tiffany! So glad you enjoyed your muffins! 🙂 We’ve lived in Anchorage since 2001. Such a great place to call home!
And Martha,
Good luck getting your sourdough starter going again! I have found it so valuable in the kitchen and use it for nearly all of my baking. 🙂
Oh, Erin!!!! Your family is absolutely adorable!!!! AND, your recipe sounds FABULOUS!!!! I can’t wait to try it, OK, so I won’t wait!! I’ll be making these today, or at least starting them. Thank you, thank you, thank you for this recipe………
Hi Connie,
I’d love to hear how they turn out! I’ve got a batch soaking as I type. Thanks for the family compliment. 🙂 Such gifts!
Erin, how far do you live from the town Sara Palin is from? My stepdaughter lives there. I just can’t think of the name of it……..getting old, I guess…….and the english muffin dough looks and smells GREAT!!!!!
Hi Connie,
We live about 45 minutes from Wasilla. 🙂 Glad you have a good start on your muffins. Mine turned out delish! Had them with lentil stew tonight. 🙂
Hi Erin: First, those English Muffins!! WOW! They are fabulous!! Yummm! Second, if you’re near Wasilla, there is a hospital there. My son-in-law is on of the emergency room doctors there and my stepdaughter will have her RN in June! Oh yes, and YIPPEE I’m going to be a grandma again!
I have been wanting a sourdough english muffin (soaked) recipe for such a long time! I am SO EXCITED to try this!! Thank you so, so much for sharing! Now I can finally have something to put my eggs benedict on!
Kylie- from little New Zealand 🙂
Erin, you mentioned that rice flour might work in a mix. Do you think using an entirely gluten free mis (with a gluten free starter) would be successful? Wardee, I know you do a fair amount of gluten free stuff…have you ever tried gluten free sourdough? Anby suggestions?
Connie- So glad you are enjoying your delicious english muffins! And congratulations on the coming of your new grandchild! Very exciting! 🙂
Kylie- Enjoy the recipe! I would love to hear how it goes for you. An eggs benedict would be proud to sit atop this muffin, I must say! 🙂
Michelle- I will let Wardee shine her gluten free wisdom here! The only thing that I will say is that the partial rice flour turned out fine for me. But if you are trying to stay away from gluten, what good is a partial… It’s definitely worth a try! 🙂
Oh, WOW! Wardee, can we skip to the sourdough portion of the ecourse next week!?
Just kidding… but I can’t WAIT to try these!
Michelle – I just don’t know if using a gf mix would be successful. 🙁 I’m sorry, I wish I had some experience with gf and sourdough, but I have not done any experimenting with that.
These are amazing. I made them this morning, they are so easy to make. I ate 4 on the spot, with butter they are mouth watering. Thank you for sharing this recipe its definitely going to be a regular.
Fabulous! Made them yesterday and will be making again!
Miro and Tara- Yeah! So glad you enjoyed your muffins! I made a batch the other day with my homemade yogurt as the liquid and they were the softest most delicious muffins yet!
OK, I am going to try these gluten free. I will report on my success (or othersie!!) Just wondering how many muffins this recipe produces. You said to divide the dough into 8 portions…but there’s definitely more than 8 muffins in your photos.
Michelle – It does only make 8 muffins, at least for me. I’m pretty sure Erin has doubled (or tripled) the batch for those pictures. I really hope it works doing it gluten-free!
I have yet to make these muffins with a single batch!! They freeze so magnificently. Last batch I used my maple kefir and rye flour and I think they were the best yet. Living in Vermont I lots of maple!!
Connie – Wonderful idea to use the maple syrup instead of honey. What a blessing to have Vermont maple! 🙂
Michelle- The batch you see in the photos is a double batch. 🙂 Look forward to hearing about your results!
Connie- I am so glad you are enjoying the muffins. The maple rye version sounds delicious!
Maybe a silly question, but is this active, bubbly starter we’re using, or fed and rested? Thanks! Cant’ wait to try these.
Megan, that’s not silly! I personally use a bubbly, active starter for this recipe. I feed my starter and wait for it to be bubbly and domed, then I use it in this recipe.
Wardee, I have heard others talk about the starter being “domed” or higher in the middle, but I have not noticed mine doing that. It will more than double in size and is bubbly, but no dome. My container is wider than it is tall. Could that be the reason? Also, by any chance is there a video of these english muffins being made? They did not come out correctly for me, but I am not a super experienced baker. But, I am trying to learn how to make more things that come out correctly each time. I am going to try these again. ?
I made a double batch of these English Muffins and wow, they were the best! Thank you so much for sharing! Do you have a good sourdough recipe for pizza crust? I thought that would be good to share next. 🙂 I am so thankful that these recipes are family tried and true!
Blessings.
Hi Megan- I feed my sourdough 1-2 times a day and leave it on the counter at all times. (I use it nearly every day!) So, for these muffins, I’ve made them with a happy bubbly active starter and with an I-didn’t-get-my-feeding-yet-today-and-it-shows starter. I have found that it doesn’t seem to matter because by stirring in the liquid and flour you are feeding it and allowing it to rest.
Karen- Yeah! Such joy in sharing this recipe! I am so glad you enjoyed the muffins. 🙂 We actually had pizza with soaked sourdough pizza crust last night! Imagine that! Next time I’ll get out my camera. Thanks for the post idea!
Well, reporting back on these muffins and they were DELICOUS! I had a few problems with the muffins sticking to the grease proof paper, next time I’ll try something different. I loved how easy these were to prepare! Mine lasted only 2 days before I had ate them all ! I enjoyed them with butter and honey which was definately my favourite, but also had them with sliced cheese on top, and as a base for a ‘tuna-melt’ These were so good I am in fact making them again tomorrow! Can’t thank you enough for this recipe!!
Just finished cooking these and ‘sampled’ one. I’m wondering why in the world I did not double (or triple) the recipe! They are delicious. Thanks so much for sharing such a great and useful recipe.
.-= Millie @ Homespun Oasis´s last blog post… Tuesday Twister May 11 =-.
Yeah Kylie and Millie! Thanks for letting me know of your success! They are a surprisingly easy (and impressive) treat. So glad you enjoyed them! 🙂
Mmmmm, these are tasty! The kids are using elderberry syrup on theirs. Me- plain is yummy!
.-= Michaela´s last blog post… My how they reproduce!!! =-.
Michaela, So glad you are all enjoying the muffins! I have a batch soaking right now. I ran out of milk, so I am using coconut milk instead. We’ll see how that tastes! 🙂
Just curious, two questions:
1. When you say “soaking,” do you mean “proofing?” I just want to make sure because I’m still new to sourdough baking.
2. Have you tried baking sooner than 24 hours? What is the temperature in your kitchen? I’m wondering if the proofing time will be quicker in warmer climates….
Last, that pic of your family sure is darling! “A picture is worth a thousand words” comes to mind…makes my mouth water at the thought of eating your muffins I will be trying out to day.
Jade —
1. By soaking, this is the time when the starter is mixed with the flour and the mixture sours or ferments — I would call this souring or the sponge. Proofing more refers to the time for bread to rise. The dough rises during this time, but that’s not its purpose. I hope this makes sense.
2. I have made these muffins after 8 hours of souring. The range is flexible – in warmer temperatures, the souring will occur more quickly, so you would be fine to cook them earlier.
I’m sure Erin will have more to add. 🙂
Hi Jade! So glad you are going to give the english muffins a try.
These muffins are incredibly flexible depending on your situation (time and weather!).
Let us know if you have any more questions! And, I’d love to hear how your muffins turn out.
Thanks for the family compliment. Such encouraging little taste testers! 🙂
Is there anyway I can bake these instead of fry? I’m having problems and I don’t like how they are turning out. 🙁 They taste great! But not cooking properly.
.-= Marg´s last blog post… Meeting neighbours =-.
Marg- Thanks so much for writing. I’d love to know what is not working for you. Is the dough too sticky? Do they not rise in the pan? Let me know, and we will try to figure something out. I made a batch last night (in hot California) that turned out very different from the batches I make at home (in not hot Alaska). Everything was different. Do you live somewhere very warm? What kind of flours did you use (to feed your starter and make your muffins)? I look forward to hearing back from you! 🙂
Well, certainly not as complicated as that. 🙂 I went ahead and baked them. They turned out more evenly cooked and less burnt. I guess I’m just not used to this kind of dough and wouldn’t have thought to fry it. Hard to teach an old dog new tricks but I’m trying. I just wish the results were more encouraging.
Marg, I have really had to play with my temperature and stove to get it just right. I keep my big burner at about 4 to 4.5 and my small burner at 4.5 to 5. I end up cooking 4 minutes on at least the first side of each muffin, perhaps 2 to 3 on the second side. And I use a cover on each pan to keep the heat in. It bakes them while they’re browning/frying. It isn’t hard, it is just a matter of playing with your situation to get it working. But if baking works for you, that’s good too!
Thanks for that tip Wardee about the cover! That is just what I needed to get mine to cook more evenly.
Marg- Glad baking worked for you. Without knowing exactly what’s going wrong, I wonder if it would help to turn the heat down a little bit, check them after a short time if you think they are getting too dark, and flip gently so as not to loose any rise. Keep me posted, OK? 🙂 And, be sure to let me know if you have any more thoughts or questions.
Ok, I am long overdue in posting how my gf free muffins worked. I have been waiting for a RESOUNDING success story, which I haven’t really reached yet. But I will post where I have gotten to and perhaps someone with more experience in gluten free baking and sourdough baking can take it from here!
The good news is that, yes, it works! If you don’t have a GF Sourdough Starter, the best information I found for starting one comes from a lady names Sharon Kane. She has a number of different websites, but a good summary of her info iand how to make the starter s on the Weston a Price site at this link:http://www.westonaprice.org/food-features/1668-gluten-free-sourdough-starters.html
Sharon also has several e-books with her recipes. I am trying to figure things out on my won as I can’t afford all the recipe books I would like!! If you can get it I would because GF and allergen free baking can be so fussy!!
Anyhow using this starter I have made several batches of these with different flour mixes. So far I can’t quite get the combination right of good taste AND good texture. I have done these all with coconut milk as my liquid. I have found a thicker starter is more effective, so the last feeding I try to do a little less water than I normally would, so it is nice and thick. I did all of these mixes in equal proportions (1/2 c each type of flour) except where indicated. I did these in my covered skillet at 250 degrees. I needed at least 10 minutes per side.
* Buckwheat, rice, arrowroot, chickpea….perfect texture but the taste…..I find Buckwheat (I use the dark) is very strong tasting and only works in some things….this was not one of them. Keep on going.
* Rice, Arrowroot, Rolled Oats, Coconut. Really nice mild flavor but quite crumbly. I used dessciated coconut without running it through food processor to make it flour, so I used 3/4 c where I would normally use 1/2.
Rice, Arrowroot, Rolled Qunioa, Rolled Oats….Good flavor but even more crumbly than the last batch.
(I also did a batch with teff that tasted horrible, but I think I allowed my starter to get too sour. As I said I am new to all this.)
Anyhow, hopefully this info is helpful to some other brave soul who can give it a try!! hanks Erin for the recipe and motivation to give it a try.
Thanks, Michelle! I have heard good things about Sharon, so it is good to hear that you’re using some of her methods and making progress. I know this is going to be helpful for some – thanks!
Michelle- What a wonderfully informative response! Thank you for taking the time to write!
I’m sure many will find the link helpful. Thanks for passing that on. And I must say, you get an A+ for effort and persistence! 🙂
I also agree with you wholeheartedly concerning the thickness of the sourdough starter making a difference. I just recently made a batch of english muffins in the oh-so-hot location of southern CA. Because of the heat, my starter was runnier than normal (even though I fed it the same), and for the first time, I had to add flour (AP) to my muffin dough. I felt like I was kneading stretchy mozzarella cheese (if that makes sense). Mercy! I realized I need to feed the starter more flour and less water to get the consistency I am used to having when I am home in my not-so-hot state of AK. Good learning experience!
Has anyone else tried a GF sourdough starter or experimented with other GF flour blends? If so, do share! Let’s be the first to perfect a GF sourdough english muffin
recipe! 🙂
Thanks for the help. I’m sure the dough was fine, just not what I’m used to. Sourdough has proved to be a huge learning curve for me. I kept turning the stove down and down. It was on 2 and still making them too dark. I didn’t mean to cause this much fuss. I just wanted to know if they could be baked, I thought that might be a solution to my problem, and I discovered that. Sorry for bothering. 🙂
Marg,
I know this comment is much delayed, but if someone reading could tell me a good temperature and time for oven baking these English muffins, I would appreciate it! ???? I have the sponge souring tonight. Thanks!
Marg- You are funny! Absolutely no bother at all. Fun to brainstorm with you. I’m glad you asked your question as I’m sure others found it helpful. Plus, I appreciate knowing how the recipe works for those who give it a try. Really. 🙂
Hi! So, I just made these today. And I love them. But I have questions for next time!
1. My dough was extremely wet – I put oil on my counter & hands and the dough was *still* sticking to everything. I did my best, though, & when the dough was ready to be cut, I found that cutting it didn’t even make a difference because it all just kind of melted back into itself. In the end, I just pulled pieces off and rolled them in flour in my hand (but even then, I had to be quick because they kept sticking to me!). So…my question: to avoid this problem in the future, should I use less liquid (or more flour) in the first step of the recipe? Or do you have another suggestion?
2. Due to the wet dough, it was really difficult to transfer the muffins (after they rested for an hour) to my skillet. Actually, I ended up ripping the wax paper around each muffin, and attempted to gently flip it over onto the skillet, and then peeled the wax paper from the upward-facing part of each muffin. (Does that make sense?) Because of this, my muffins were really lopsided. Some parts were thicker than others, and so they didn’t cook evenly (some of the insides were doughy while other parts were soft, springy and very English-muffiny). How do *you* transfer your muffins from their resting place to the skillet/griddle?
Sorry if my questions are super complicated. I just *really* want to master this. I only got my sourdough starter last week, and these muffins were the second thing I’ve made (after my first batch of bread which was UH-may-zing!). I will for sure be making the muffins again next week because my mom will be visiting us! 🙂 Thanks for your help!
Mama Rissa – I’d suggest adding more flour. I noticed that in the winter, I used just about 2 cups of flour for this recipe. In warmer weather, the dough is much more wet. So I’ve been adding at least 2-1/2 cups when mixing up the dough – and perhaps more when shaping. I think just that will improve your experience with the muffins dramatically! I’d like to hear more about your Uh-may-zing bread. 🙂
You have about a gazillion comments, so I hope I’m not repeating anything already stated! 🙂 I have made these muffins twice so far and found a couple of helpful tricks. 1) After I knead the salt and baking soda into the dough for a few minutes and then divide them into muffin sizes (about 2.5 oz each), I place the little balls to rise on my pastry cloth. It’s already well-floured deep into the fibers so it prevents sticking w/o needing more flour in the dough. 2) I use my Lodge biscuit pan to fry the muffins. http://www.amazon.com/Lodge-L7B3-Pre-Seasoned-Drop-Biscuit/dp/B00063RX7O/ref=sr_1_1?ie=UTF8&qid=1395335192&sr=8-1&keywords=lodge+biscuit+pan Half an hour into the last rising time, I place the pan in the oven to heat up. I take the pan out of the oven and put it on my largest burner set on Med-low and sprinkled with half a dash of cornmeal. It’s really easy to lift each muffin dough from the pastry cloth with a brownie/cookie spatula and flip it into a biscuit impression. They fry for six minutes on each side and come out perfectly round and buxom. Thanks for the recipe.
~Melisa
I’m wondering if I couldn’t put the muffins straight into the Lodge biscuit pan instead of putting on pastry cloth and transferring to biscuit pan. I haven’t tried the muffins yet but plan on in the next few days. Also would it be possible to just go ahead and bake in this Lodge biscuit pan. Thanks for recipe.
Faye
Hi Faye- I’d go ahead and give the Lodge biscuit pan a try. I’ve often baked them as drop biscuits in the oven. It’s a pretty flexible recipe. Enjoy, and I’d love to hear how it works for you. 🙂
Mama Rissa- I definitely agree with Wardee on this one! I made the muffins with my sister in CA and ended up with a significantly wetter dough than when I make them in Alaska! I should make a note in the recipe. So, I would do as Wardee recommended. Use more flour initially, and that should make the rest of the process much less complicated. I’m so glad you are willing to give it another try! I am confident that the end result will be well worth your time and effort. And, I’d love to hear about your bread! 🙂
Can I make this recipe without sourdough but using the soaking method? How should I alter the recipe?
Angela – That’s a good question. It would take some trial and error to get the consistency right. What I would do at first (to get the consistency right) is mix equal parts flour and water. Use 1/2 cup of that in place of the starter. (Eventually you could figure out just how much flour and water are needed to make 1/2 cup – and just use those amounts.) Then add the milk and flour. Add 1 tablespoon of acid per cup of milk. Then let the soaking happen. Then proceed with the recipe. You might need to add about a 1 to 1-1/2 teaspoons of baking powder, too. The baking soda reacts with the sourdough starter to puff nicely. Lacking sourdough starter you might need to mimic this with baking powder. During summer months, you’ll need more flour in this recipe. Have fun and let us know!
These were awesome!!!!!! I did end up adding about 1 cup of flour to stiffen up the batter so I could work with it. They are light and fluffy and have an excellent flavor. I used spelt flour.
Erin – I LOVED these! Thank you so much. I think I might have a problem with baking powder (some kind of sensitivity and yes, I get the aluminum free one). Do you think these would rise as well with baking soda?
Thank you again. Wonderful recipe!
Wardee & Erin,
Thanks for getting back to me! I’m going to try making the muffins again tomorrow, I think. I’ll add more flour and I’ll let you know what happens! 🙂
As for my uh-may-zing (hehe) bread – well, I used the recipe that came with my starter (from King Arthur – the recipe was for an extra-tangy sourdough) and it turned out reaaaallly well the first time. The second and third time, I liked it okay, but I decided that the tang was a bit overwhelming, especially when I was sharing my bread with company (non-traditional food eaters don’t necessarily always love that sour flavor!). The recipe had me proofing the bread for a really, really, really long time. SO, I tried your recipe, Wardee! And we LOVED it! It was much more mild than the previous recipe, but still tangy enough to please us! So…now that’s the recipe for my *new* UH-MAY-ZING bread. 😉
I have truly always wanted a recipe for these. Sourdough is my favorite english muffin! I like onion or ‘everything’ bagels but i would so love sourdough too, with the real stuff that is, I am sure!
I did it! I added 1/2 cup more flour & they came out marvelously! Thanks for this incredible recipe!
Oh my, how embarrassing! I just realized the recipe does not call for baking powder, rather baking SODA. Ignore that earlier post of mine referring to the baking powder. Whoops…
I am going to make these again tomorrow. I believe I am going to be hooked on them once I get the right cooking time down.
Thanks again for the recipe Erin!
Maureen
Terri- So glad you enjoyed the muffins! I think with the summer heat, most of us will have to add a little more flour to the dough. And I’m not sure when you added the extra flour, but it’s best to add it before the dough sours. 🙂
Maureen- I’d love to hear how your second attempt goes! So glad I didn’t type up the recipe wrong! 🙂 For a moment there, I thought I put powder! 🙂
Mama Rissa- Yeah! So glad you enjoy the muffins! Thanks for letting me know. 🙂
Teri- Sourdough bagels are one of the next things on my list to conquer! Hope you enjoy the muffins. They truly are a treat! 🙂
Mama Rissa – I’m really happy you liked my sourdough bread recipe! 😀
I made these today and my family loved them! Yay! My husband said he would be happy to have these every morning! He was diagnosed with Crohn’s disease and we have been on an amazing journey to find foods he can eat that will provide nutrients without aggravating his symptoms. This website has been a tremendous blessing. Thank you! God bless you for what you are doing.
Mandy- Oh, how wonderful! I am so glad you all find these english muffins a blessing! I’ve not updated this post yet, but I want you to know, if your dough seems too sticky, feel free to add a bit more than 2 cups of flour at the beginning. It works with a very wet dough and a drier dough. Sometimes adding more than 2 cups initially makes kneading after souring easier! Enjoy, enjoy!
These were SO good! We used spelt flour and raw goat’s milk and honey (yep, the cheap Wal-mart kind…) and ended up having to add quite a bit of sprouted kamut flour after souring since the dough was really sticky and wet. But… that might have to do with me letting it sour for umm.. 29 hours or so? 🙂 Such is life when you work 12 hr night shifts and you try to do too much in the hour before/after work. But I was still so pleased that these turned out! My husband actually cooked them up on our cast iron skillet for me while I slept the other day 🙂 I brought one to work last night and toasted it and then heated it up in our little “pizza oven” (since we don’t have a toaster oven at work and I hate using the microwave) with some roasted chicken and a slice of cheddar cheese and OH YUM! Did I say yum enough? Ok, sorry, it’s my time for bed, I am a little kooky after working last night!
Hi Carrie- I should update my post. You will end up using different amounts of flour depending on what kind of flour you choose to use! I am glad your english muffins turned out for you. Next time you make them, try adding more flour for the initial souring time. Look for a somewhat sticky dough, but not wet. After the souring, it should be much easier to knead. So glad you enjoyed them! 🙂
I Googled Tef Flour and your article came up due to your mentioning of Tef flour. I lived in Ethiopia (Eritrea actually) and I loved the injera bread and I am trying to find some Tef flour so I can make some to go along with my Zigni. My question to you is this; Is there some place where I might buy some of this flour locally in Anchorage or even the surrounding area? Any help you can give me would be most appreciated. Thank you
Ralph — I suggest you try the health food store. Or, through Azure Standard ( http://azurestandard.com ). They are a natural food warehouse co-op and that’s where I get teff.
Thanks for the reply….as it stands I actually found some locally at the Natural Pantry on Old Seward.
I think you can buy almost anything on Amazon, and amazingly, tef flour also came up. When I am unable to find things locally, I always go to the internet–and have often founds things are much less expensive when mail-ordered than are available locally anyway! I don’t know if Azure Standard delivers up where you are (they barely deliver here in Colorado, and charge more than our tax rate as a “shipping surcharge,”), but even if they do, you have to place a pretty big order to avoid extra fees.
Hi Ralph- Sorry I didn’t see your comment sooner! I would’ve recommended Natural Pantry. Just returned home from there actually! Enjoy your injera bread! 🙂
I just made these this morning for the first time. I used whole wheat flour. Oh my goodness!! They are wonderful and SO easy! Thank you.
I made these today to help use up some starter – never made English muffins before and can’t remember when I last had one.
Now, my dough did wind up being WAAAY TOO WET – I added about another cup of flour while kneading – I use Dakota Maid stone ground whole wheat, and added some whole golden flaxseeds as a mix in.
Hubby just loved them – the batch may or may not make it till Saturday morning and there are only two of us!
I made this recipe exactly as written, with rice milk and about 3 gracious tablespoons of flax, and it was WONDERFUL! It is actually the first thing I have made from my sourdough starter that I liked. My family loved them! Big hit here. So thank you for this blessing of a recipe. Thanks for sharing 🙂
Take care,
Mary
Hi Mary! I’m so glad they worked out for you and your family! On to your next sourdough adventure! What will it be? 🙂
Erin, Just wanted to say thank you for the recipe. We love it! I am new to sourdough and decided to feed my starter daily, instead of putting it in the fridge and feeding weekly. I read that you do too. What do you typically do with your excess starter? Just looking for some suggestions.
Hi Shannon- So glad you enjoy the english muffin recipe! Thanks for letting me know. As far as what I do with my starter? Tortillas, pancakes, cake, muffins, crackers, cookies, bread, crepes, cinnamon rolls and gingerbread… Such fun! You should check out the GNOWFGLINS Sourdough E-course! Wardee and I had such a great time making it, and the recipes for each of those treats (plus more) are included. Let us know if you have any questions. Enjoy your starter! 🙂
Along these lines, I have a question too. So, where the blog recipes differ slightly from the Sourdough A to Z e-book, which one is best to use? Are the e-book ones the “final” version?
Hi Mindy- Yes, I’d say the directions in the e-book would be the easiest ones to follow. Both work, but one has been tweaked a bit. I should update the post on Wardee’s blog! Thanks for the reminder!
I just made these using sprouted whole wheat flour and a whole wheat sourdough and they are absolutely amazing and wonderful and may well become my new favorite food. They were so quick and easy, too. When I have a little more time I’m going to sign up for your e-course because you are now my sourdough goddess!
Hi Jan- Thanks for your comment! So glad the english muffins worked out for you. I’m eating one right now as I type your note. Delish! We look forward to seeing you in the e-course. 🙂
I just made these and they turned out great! I only just started my sourdough starter a little over a week ago. I did let them sour for about 18 hours because I got busy and they are a little sour for my family. I love them though and I think my family will get more used to the sour taste as I use it more. Next time I will cook after 8-12 hours of souring to be on the safe side.
I made these over the weekend, and they turned out great! My husband loves them (I am gluten free at the moment).
I was confused, though, because I made them using the recipe in the sourdough A to Z book, which seems to skip the second resting step. In the e-book, the recipe goes straight from mixing in the baking soda/salt/honey to cook them on the griddle. But the online version contains a second rest/rise.
Mine turned out fine, but I wondered if there’s a reason the book version is different.
Hi Leah- Both methods work. I prefer the e-book method now because it works just as well and saves time! I’ve got to update the blog post. I’m glad you asked about it, and I’m glad your husband enjoyed the english muffins! 🙂
Thanks for responding, Erin! That’s very helpful. I’ve had to freeze the extras so that he won’t eat them all in a day! That man loves his sourdough, I guess. I had fun making them, even though I can’t eat them right now.
Any suggestions on how to bake them without a cast iron skillet or stove top griddle? Can I make them in a reg. old saucepan? Or, do you suggest I try to bake them. . . . I want them to get that ‘English Muffin’ top to them, ad I suppose baking them in the oven will not give you that. I hope to start soaking them tonight! =) thanks!
Hi Annalise- I would go ahead and try putting them on whatever skillet you have available. If you think the muffins might stick, you could lightly grease them before hand. Members of the forum have also had success baking them. If you find they are cooking unevenly, you could try covering the frying pan with a lid. Let us know if you have any more questions, and we’d love to hear how they turn out! 🙂
Erin, it’s just a little over a year now since you gave us this recipe, and I’ve made them several times a month since. Thank you so very much for this recipe. I’m in Vermont but will be visiting in your neck of the woods, as my daughter lives in Wasilla……..My family and friends also appreciate the recipe for the English Muffins, and I’ve passed it on to some of my friends. I’ve found that when I use a fermented (kefir) milk product, the muffins get more “rise” on the griddle………just thought I would mention that………
In Him,
Connie
Thank you Connie for you kind comment! I am so glad you enjoy the muffins, and thank you for the kefir tip. I just love the flexibleness of the recipe! 🙂 Have a great time in Alaska!
Hi Erin!!!
Well, it’s been awhile since I got this wonderful recipe of yours, and my friends and family STILL love it!! I’m making them again this morning!!! Just to let you know…we DID end up visiting Alaska….and OH MY!!! I have NEVER seen such magnificent beauty!! My middle step daughter noted that there are a significant number of churches in Alaska and she couldn’t figure out how that could be. I noted that as well, but I also noted that (and I’m quite sure of this) God must live in Alaska……it’s soooooo beautiful…..so no wonder folks have so many churches!!! They get it!! He’s all around them!!!
If I were younger, I would move to Alaska in a New York minute!!!! Thanks for sharing your wonderful recipe and your wonderful state!!
Blessings,
Connie Fletcher
Hi Connie- Thank you for your note this morning! I am so glad you enjoyed your time in Alaska. You are right, there is much beauty to be seen up here. I feel very fortunate to be surrounded by it every day. It’s been the clouds lately that have had me singing praises to our awesome Creator! And, I’m glad to hear about the english muffins. I still make them weekly as well. 🙂 Thanks again Connie!
I’ve got to say, I love, love, love Vermont…but Alaska had my heart screaming out praises to our Awesome Creator!!!! It still amazes me at just HOW awesome our Creator is……and I look forward to singing praises with you at my side in Heaven!!! I know this probably sounds pretty nerdy…but in my immedate circle, I am the only Christian, so when I get to talk (or write) to another Believer…I can get kinda carried away. I hope you understand……and God Bless you girl, and your adorable family.i
Is there anyway to make the dough, form the muffins, let it rise and put them in the fridge to make later?
Hi Nicole- You’ve reminded me that I need to update this post! The easiest way to make these would be to sour the dough over night and then add the rest of the ingredients, knead to combine, shape and place on the fry pan. I no longer give them the rest time in between shaping and griddling. You may, but it’s not necessary. The baking soda helps give the muffins a nice rise so to add it early on and let them sit… I just don’t think that’s a good idea. Does it help you to know you don’t need to let them rest before cooking? I know the english muffins have also been successful with the refrigerated bucket dough method. It’s covered in the sourdough e-course, if you are interested! 🙂 Let me know if you have any more questions. Thanks!
Ok first off we live in AZ….second I added more flour…and third…no matter what I tried they would not cook on the inside….am so disappointed …so I need a bit of brainstorming here so that when I try them again they are as good as everyone else’s. In the interim I will be sitting here crying cause I was so very hungry for a good english muffin
If the outside is done and the inside is not done, you probably have your griddle too hot.
Hi Katje- Here are some things to try… You could turn down the heat of your griddle a little bit. You could try covering them with a lid as they cook. You could try using a bit more of a wet dough the next time. I also find that letting them cool completely before eating gives them a chance to finish up on the inside. If you cut into them shortly after cooking, they may seem a bit doughier on the inside. So, if I do that, I usually toast them first… even though they are already warm inside. Let me know how your next attempt goes. What kind of flour did you use by the way?
Just made my first batch, need to get the hang of flipping them carefully as one or two are a bit lopsided, but they are DELICIOUS! In fact there is still a batch finishing off in the oven as I type.
Hi Aisling- So glad you are enjoying the english muffins! Thanks for letting me know. 🙂
My family loves the sourdough english muffins. So the last time I was making english muffins and crackers at the same time plus talking to a friend, I added the herbs for the crackers to the english muffins. What a great surprise! Herbed english muffins are great with morning eggs and make great open faced grilled cheese muffins.
Thanks for offering the sourdough course, Alice
I have these soaking right now using a mixture of whole spelt flour and whole wheat flour and using home-cultured kefir as the liquid. I have been wanting to try using my sourdough starter and my kefir together in a recipe but I wasn’t sure if the two different kinds of cultures would somehow react with eachother. But, since your recipe specifically said cultured milk, I thought I’d give it a whirl. I plan to cook them tomorrow morning after they’ve soaked all night 🙂 Thanks for the great recipe!
This was the first time I’ve made English muffins and I love the flavor of the sourdough I have right now…these were great! And, I was hoping for an enclosed breakfast or to-go sandwich. So I flattened these into oblong shapes and filled them with cooked sausage, spinach, crushed hard boiled egg, feta, and tomato sauce, folded them and pinched the edges to seal–calzones! But they would be perfect all the ways you use English muffins, Wardee, and for egg, cheddar, ham, etc. etc. Thank you!
Hi Sandi- What a great idea! Glad you enjoyed the english muffins! I’m going to have to give the calzone idea a try. 🙂
I had GREAT success with these -and my starter is less than a week old! Many thanks for the recipe 🙂 I cooked mine in a regular frying pan, and used a 50/50 mix of white and wheat flour. My preference is to bake only with wheat, but why waste white flour that I already have? The next batch will be 100% wheat or a wheat/spelt mix. Alternative flours here in Germany are extremely easy to find and very inexpensive (organic spelt flour is available in bargain grocery stores in my area for just 10 cents more than whole wheat!). What a blessing to have all these ingredients so readily available!
Hi Emma- Thanks so much for your comment! I’m so glad you enjoy the english muffins. 🙂 And yes, what a blessing to have these ingredients so readily available to you. Wonderful!
I USED SPROUTED WHEAT FLOUR, plus 2 tablespoons ground flax seed – NO Sourdough STARTER– Instead of starter, I used 1 and 1/2 cups kefir, (the extra 1/2 C kefir replaced the milk) AND THIS WORKED! Additionally, I used Stevia, no honey…. what a blessing to share with my family! THOUGH, it was waaay tooo liquid, so it was mandatory that I add about one-half cup more sprouted flour during the final kneading process — still so thin, they would not hold a shape. I would think that was too thin. They were the consistency of a pudding. I cooked them anyway on my beloved cast iron skillet(s), and YUMMY!
I wonder if this would work as a loaf-bread, baked in the oven?! I’m gunna try it. :o) Thank you for the wonderful recipe. I am growing wheat grass now, and just ground up more sprouted wheat grains into flour. I hope to start another batch of these delicious sourdough muffins tonight. Great, Easy recipe.
Please advise on the thinness of my dough.
Hi Merryann- Glad you and your family are enjoying the muffins. My advice concerning the thinness of your dough? I’d say add more flour or cut down on the liquid. Maybe leave out the extra 1/2 cup of kefir. Add only as much as you need after that initial 1 cup. Or, add flour until it is a consistency that works for you. Enjoy and thanks for the comment!
I should have read the comments section before I made these. My dough was very wet and I was able to work with it only because of the oil on the counter. I had to wet my hands to pick them up off the mat, because I didn’t read here about skipping the rising step either. I also had trouble with the heat. I think my stove cooks hot. I had my cast iron skillet down to 2 on one burner and they were still burning by 2 1/2 minutes! I may try my electric griddle next time.
I’m not giving up. I’m sure these will get eaten anyway knowing my boys. I was just so excited to find something to make with my starter. I finally got one to work and I just keep feeding it, waiting for a great recipe to use it with. I will add more flour next time, skip rising, and start on a really low heat.
Thanks for the recipe. The freebies are nice for those of us who can’t afford the e-course!
These turned out SO GOOD!! This was actually my st sourdough endeavor, and I am glad I started with this-very little work by me & such wonderful results! My kids & husband love them–I am making mini-pizzas with them now! I don’t know if this batch can be doubled, but next time I am definitely going to make more than batch because 8 muffins is definitely not enough for our family!! :)Thanks for such clear directions that even a beginner can follow! 🙂
Hi Steph- Oh yeah! I am so glad you found the directions clear and enjoyed your results! The recipe can most definitely be doubled (or even more). Just keep in mind your preferred consistency and all should work fine. For quite some time I have eliminated the resting period. Now, after letting the dough sour and after kneading in the 3 ingredients, I let the dough rest for a few minutes on the counter and jump straight into forming my muffins on the griddle top. Works great. One of these days I am hoping to update the post. Soon, soon! Thanks for your comment!
Tried these for the first time today and they were wonderful! I needed to add a lot more flour after the initial soak, I’ll know for next time though to add more at the beginning. Thanks for such a yummy recipe!
I’ve been following the recipe from kjknits on thefreshloaf.com, and am trying this wet dough method to see the differences in my results (aside from not using up all my flour!).
Yesterday’s muffins started going in the skillet just as my boyfriend’s brother showed up (exceptional timing)–he loved them; more importantly, because of his exceptionally refined taste buds, the few crumbs I fed to Sampson (my beloved duck) turned him into an instant fan. The rest of my last batch just went out the door as a birthday present, and this morning I got a request for muffins “with holes in them” from my mother’s friend. These are getting quite popular. I’m excited to see how this “wet batch” turns out.
Thanks so much,
Jennie Alice
Erin, thank you for this recipe (and thank you Wardeh for posting it!) I love the versatility of this recipe. I’ve been making yeasted gluten free English muffins entirely from home-sprouted and ground gf grains for a while now, and Ithey were spectacularly delicious. The problem was that they were SO time consuming, and over the summer, my sprouts were molding, I guess from the high humidity. So after a week of fooling around with babying the sprouts, we were left with mold, and know bread/English muffins. I have four children 5 and under, and I don’t have time to mess with a recipe for a week and not have an end product. I was reading the benefits of sourdough and was able to make my own starter from cabbage leaves and gluten free grains. I can’t believe how easy these muffins are. I mix them up the night before and sour them in the dehydrator (I’ve been reading that the higher heat really reduces phytates) and we have English muffins the next day! I changed it up a little…I use all GF grains (sorghum, brown rice, millet, etc), added an egg when I add the soda, etc, and I bake mine in the oven in English muffin rings that I already had. I’ve also added cinnamon and raisins. My babies love, love, love them. Even my in-laws who eat SAD, thought they were tasty! Thanks so much for contributing to the easy nourishing feeding of my family!
Hi Lisa- I am so glad you and your family are enjoying the english muffins! I love how you tweaked them to fit your needs. Thanks for sharing your enthusiasm. You brought me a smile this morning! 🙂
Wow!!! These are super easy and SO incredibly awesome. Thank you for this recipe. It’s nice to find a bread recipe that is made out of sourdough, thus making it SO much healthier than any other bread product, AND being a husband-who-loves-his-bread favorite. Please continue to share other such recipes. It’s a challenge to make both healthy, nutritious and tasty foods for our spouses and families. Thanks again.
Oh my gosh! these were delicious! my family loves them!! my first try at soaking flour for baking. excellent!
yeah ashley! so glad you and your family are lovin’ the english muffins! thanks for your comment this morning. 🙂
any chance this blog post will be updated to omit the rest period? 🙂
before i read the comments, i saved my too wet dough (it was more like batter) by spooning it directly onto my heated cast iron pan. i didn’t have sprouted flour and didn’t want to add any without it being soured. the muffins still turned out beautifully! and saved even more time (and mess!) by not having to knead, shape, or use my hands and oil.
this recipe really is adaptable. it’s definitely one of our favorite things to make with sourdough. i used rye flour and added poppyseeds, dehydrated garlic pieces, and granulated onion – yum!
thanks for sharing!
Lexee — I skip the rest period all the time. Consider this an update. 🙂
Hi there Lexee- So glad you’ve discovered the flexibility of this recipe! Just love it! And thanks for the gentle reminder and the friendly smile after. 🙂 Yes, for some time I’ve been wanting to update this post. Now maybe I’ll actually get to it! Enjoy your sourdough!
It sounds like your batter was like mine, only I don’t end up with English muffins. I get English pancakes 🙁 I’ve tried twice and now have two batches of these pancakes in my freezer. I’m going to try again tonight but I’m getting frustrated! Not sure why my dough is turning out so wet. Tonight I will try adding less milk. I’ve tried with fresh-ground red fife and whole spelt. Tonight I will be trying with whole rye instead. Hopefully they keep their shape better…would love to be able to split them!
Kara — Try more flour. I often add up to an additional cup more (total of 3 cups per batch).
Hi Kara~ I’m glad to hear you are persevering with the english muffins! They are worth it.
Different kinds of flours, starter thicknesses, and room temperatures all play a role in how much flour we need to add. I always start with the 1/2 cup starter, 1 cup milk, and 2 cups flour ratio, and then add more from there to get the consistency that works best for me. Also, when I knead in the baking soda and sea salt, I no longer add honey. I just don’t find it necessary. Tasty enough as is!
I’d try adding more flour initially, as Wardeh mentioned, and then you could also try forgetting the honey. Rye flour can be tricky if that is the only flour you are using. When I make rye english muffins I usually only use a half cup or so and incorporate a heaping tablespoon or 2 of caraway seeds.
Keep me posted, okay?! We’ll figure this out. I want you to be able to enjoy a proper sourdough english muffin! Thanks for your comment! 🙂
Hi there, thanks for the tips and encouragement 🙂 The batch I made after posting the comment stayed together and didn’t flatten out like the others did, so that was a step in the right direction. They did turn out a bit dense though. I bought the sourdough e-book so I saw the video, and I just do not know how to get them to be like the springy dough in the video! My dough was not kneadable at all, I just scooped it straight from the bowl into the pan. Will keep experimenting!
Kara,
how long do you let your dough sour? I always let mine sour for 24 hours, and I noticed that it gets thinner/wetter with time. I like the benefits of souring longer, so I think it is a matter of adding more flour (or less liquid) and starting out with a dough that is pretty stiff. I’ve totally had the pancake issue 🙂
I also notice better results when I stir really well after adding in the baking soda. it gets so fluffy right after adding it, and if I drop it right into the pan, they flatten out and are very thin. now I add the baking soda and give it a good stir, then let it rest a few minutes (it always bubbles back up again) and then stir it again before spooning it into the cast iron. 🙂
I hope that helps!
lexee
Hi, I was wondering if you could use buttermilk or leftover whey as the liquid for soaking the sourdough starter and flour mixture?
I have a similar question. Teresa, did you ever experiment with the buttermilk/whey? We make our own yogurt, which often includes Greek, so we have a lot of whey sitting around begging to be used.
I saw that someone tried rice milk, but has anyone attempted using a nut milk like almond? Thanks!
Hello Heather (and Teresa!)~ Really, you may use whatever liquid you prefer. I’ve even used yogurt (watered down or not). The texture may change a bit and there might be very subtle taste differences, but it’ll all work… including water!
Most of the recipes I use come from blogs, yet I have never commented before today on…anything. These sourdough english muffins are taking me out of silence and have me singing their praises! They are SO, SO good, just like you said. I was eating one in the kitchen thinking to myself how I hoped my husband would later in the day, continue to praise me for making these muffins. Seconds later he walked back in the door, asking for another muffin before heading off to work because they were so, so good. YES! These need to become their own food group
Hi Elizabeth-How fun to wake up to such enthusiasm this morning! Thanks for your comment. I’m so glad you are loving the english muffins. I’ve been wanting to update the post for a while now because I’ve made a few changes in how I make them. Next time you give them a go, feel free to omit the honey and the wait time on the counter. Right after I knead the dough, I take a bit in my hand, roll it into a ball, and then pat it down on my griddle to about a half inch thick. Works for me, and I save a bit of time. Let me know if you give that a try! 🙂
I was wondering if you’ve ever tried converting this recipe to an english muffin BREAD? I’ve used this recipe for years(and love it!) but was thinking it could save time if I made it into a loaf instead of individual muffins. Any experience with this? Thanks!
Hi Susanna~ Stay tuned!
I LOVE making these! So easy! And I can be lazy with it at the same time!
Hi Cassie~ So glad you are enjoying the muffins! I agree… so tasty and so easy! 🙂
I’ve been eying this recipe for a while and finally made them. They will definitely not last long around here – oh my SOUL! Exactly what I grew up on! Delicious!
Yeah! I am so happy to hear you finally gave them a try and enjoyed them as much as I still do!
Thanks for letting me know, Jennifer. 🙂
We have been enjoying these for 2-3 years now for our morning breakfast and sandwiches. I have yet to get a sour dough loaf of bread that is not brick like and so these are the main stay of our bread eating because they are almost fail proof!
I had bronchitis for a moth here lately and was not able to make any. My poor family was eating store bought hearted bread. My husband lost weight because of it (and didn’t need to!) obviously these are much more nutritious! He was SO happy to see them this morning and so was my 18 month old!
I’ve found that soft wheat of any sort makes the dough more slack. Sometimes resulting in a dough that will do nothing but pour out no matter how much flour you use. Hard red wheat always holds it together.
We also roll ours out and use a wide mouth canning kid to cut them like biscuits. My dough is usually quite thick, sometimes not if I grab the wrong flour or if it’s warmer. I never did the rest period…. Somehow I missed that in the video and directions! I have found if the dough is a bit slack that a rest helps. Just make sure they don’t stick to your surface by putting some flour under them while they rest. I may have to try the rest period and see what it does to them.
I was wondering if anyone has had issues with thier baking soda incorporating? It seems sometimes we get these muffins with yellow interiors and a metallic smell. Most of the time they taste fine. I mix it in my kitchen aide instead of kneading it. (We quadruple the batch every 2-3 days for our family of 6) It would be nice not to have that metallic taste! I usually sprinkle in the salt over the top, then the b. Soda, then the honey. I’m wondering if the honey on top keeps it from mixing in properly. May try a different order or mix in the be soda then add the honey and mix again. Would love ideas!
We LOVE our sour dough muffins! Thanks for the great recipe Erin! Our tummies and insides thank you as well! A great recipe for sour dough beginners or people like me who just can’t get out a non brick loaf of bread! Lol
Due to arthritis in my hands I use a bread machine to mix my dough. In my excitement to make these wonderful muffins I put all of the ingredients in at once and mixed the dough, placed it in a bowl, covered it and then realized what I had done. I decided to wait and see what would happen. To my surprise when I went to make the muffins the next day the dough was perfect and do easy to handle! My muffins turned out perfect, using one step mixing! The second time I made the recipe as directed and found it to be much harder and challenging. Either way it’s a great recipe! Thanks for sharing!
Hi Maryanne~ One thing I love about this recipe (and there are many), is the flexibility. Since writing this post, I have even fine tuned my own method. I’m glad you’ve found a way that works best for you. Thanks so much for sharing! Enjoy!
I first want to start out by saying thanks for this recipe… It was delicious. I have a gluten free starter. I was surprised at how well my sponge rose. Next time due to my starter I’ll need to add more flour. It was wayyyyyy to wet when I went to knead, so I added flour until it could be handled and let rest and cooked them up. It is nice to have something “normal” in the bread world for a change. My starter is completely brown rice and my flour that I added is a gluten free blend. Again thanks.
Greetings!
I am anxious to try these. I am curious (and I hope I am not repeating a questions) about high altitude. We live at about 6,000 ft and was wondering if anyone had made adjustments or if it is even necessary.
Thank you!
Hi Toni~ I’d go ahead and make it “as is”. Feel free to eliminate the honey if you like, and make sure your dough is thick enough before the souring time. I have a feeling if you keep your eye on the heat and the muffins as they cook, your elevation shouldn’t make a difference. Good luck, and enjoy!!
I love this recipe and made a double batch! I just am wondering how can I freeze this without using toxic zip lock freezer bags?
Hi Sarah~ Cool the muffins on the counter, slice, and then pop in a sealable glass container. Freeze! Enjoy!
Hi Sarah~ Cool the muffins on the counter, slice, and then pop in a sealable glass container. Freeze! Enjoy!
My first time baking with a sourdough starter (it’s a few days old) and these turned out amazing! I’m so encouraged, my hubs and I downed half the muffins already!
My dough was extremely wet and I instinctively added more flour (at about the 24h mark) and gave it a few more hours after then. It turned out perfect! Thank you!
Made these for the first time. Everything was so hard I felt beat up afterward! After reading the posts I will not abandon this recipe, but try again. My dough was so wet, really, really hard to work with. Also had to cut around sticky dough just to get it in the fry pan, never rose much like a real English muffin. My daughter said “How do we cut these?” Used an Einkorn starter, milk kefir and freshly ground spelt for the flour. Soured overnight, let sit 45min. after attempting miserably to shape them. Stayed a bit doughy in the center and not a great flavor. They will be eaten and I will try again. Thank you for all the helps, suggestions and recipes you all share. Blessings!
Hi Debbie- So sorry to hear of your muffin troubles! Next time you make them, use more flour. Add as much flour as you need to achieve a stiff dough. Also, if your kitchen is very warm, sour it for a shorter amount of time or keep your dough in a cooler area. Lately, I’ve been really enjoying the english muffin bread that is made from this very same dough. You might want to give that a try as well. Good luck and good job giving it another go. It’ll be worth it in the end!
I just posted that my dough is often too wet to handle in the morning so I have just been scooping out the portion with a muffin scoop and plopping it on the hot griddle. Use oiled fingers to spread it into a round shape. It works SO well I won’t go back to trying to cut them and shape them while having to add so much extra flour. Just thought I’d share. I love my muffin scoop method!
I ran into the common stickiness problem when mixing the starter because it was so soupy; I added extra flour; still had a foreboding of sticky problems; so added a good bit of dessicated coconut. But ran into the stickiness problem anyway the next morning. With no time to figure it out, they sat spreading on their paper covered shallow roasting pan. The roasting idea lent itself to me so I baked them as is. They turned out perfect. Thanks for the recipe:)
This recipe looks fabulous! Always great to find a new recipe to use with my sourdough starter. Has anyone added grated cheddar in the dough? I have it in the fridge now and thought I would grate some and add tomorrow. Thoughts or suggestions would be helpful.
I got started almost 2 years ago with the purchase of your ebook on sourdough baking. I have really enjoyed my adaptations of your recipes for cinnamon rolls, crackers and bread. I’ve tweaked the English muffin recipe by: using agave instead of honey (it is easier to work in to the dough), use a small amount of oil if you need to rather than flour so the cornmeal will stick, use a scale to accurately divide into 8 equal portions. I like to let them rise overnight in the refrigerator.
I’ve been making these muffins since watching the Sourdough e-course many years ago with my children. I make them often to use up discard starter. I wanted to comment that my dough is often a little too wet to handle and I hate to add so much extra flour in the morning. I found that just scooping out the dough with a muffin scoop makes the perfect size english muffin and no work to form them. I just plop the dough on the griddle and use oiled fingers to spread them out to a round shape. They are so much easier this way!
I’m not sure if you still answer these comments but I made these today and they were so wet I couldnt work with them without adding about 1/2 c more of spelt flour! They were still pretty sticky with oiled hands but I made it worked and they looked great afterwards. Just wondering if I might have done something wrong?
Hi Traci. I have a couple recommendations for you…
Make sure you start with a pretty stiff dough. The flour you choose (and how you happen to measure your flour) and the wetness of your sourdough will make a fiffetence. You decide how much flour is right for you… And, if you have a very warm kitchen, shorten the souring time. Give it another go! And you could always try the English muffin sourdough soda bread. Very similar and very tasty, as well! Keep me posted!?
Hi,
If I tried using einkorn flour, would whole wheat/grain einkorn work, or would I need to alter the liquid a bit?
Thanks!
Hi Pepper. I wouldn’t worry So much about altering the liquid… just add as much flour as you need to get a pretty stiff but still sticky dough. Good luck!
First off, these turned out really good! They were soft on the inside with a slight crust on the outside; I made them with 100% whole grain, freshly ground einkorn flour + einkorn sourdough starter and almond milk…. ate them for breakfast with butter and jelly and with lunch as a sandwich. However….. the dough was.so.sticky….. like SUPER GLUE!! I couldn’t shape them at all so I just did my best to dump balls of the dough on the sheet and then in the pan. I had even added about a 1/4 cup more flour to the dough after it had soured, but it didn’t even make a dent in the stickiness…. maybe I should add like a 1/2 – 3/4 cup more flour before the souring process? (and I let the dough sour for about 7 hours… my kitchen is very warm).
Hi Pepper~ I have 2 recommendations for you.
First, add as much flour as you need to achieve a stiff dough before the souring process. Different flours and different sourdough starter consistencies require different amounts of flour.
Second, if your kitchen is very warm, feel free to shorten the souring time.
Enjoy tweaking the recipe and making it your own. That’s half the fun!?
Update: I tried adjusting the flour and water a couple different times, but it’s still extremely sticky and gluey each time…… BUT, I’ve learned to just touch the dough as little as possible, and basically spoon the dough into the pan rather than shape them with my hands. And most importantly, I’ve made these 4-5 times now, and even though it doesn’t look like they’ll turn out right at first, somehow they always do! They taste great, and have a really good texture/crumb, so this recipe is definitely a keeper! ?
*scratch the ? Off of my last comment, haha typo
I doubled the batch and made breakfast sandwiches for my husband for the week and the rest we ate regular. I used one cup kefir and one cup milk and I think they are my favorite recipe for sourdough English muffins I’ve made before (I’ve done three or four different recipes) and my husband said the breakfast sandwiches were especially good this batch.
Hi, I am complete noob at baking and tried these english muffins. The biggest problem I was having was stickiness and inability to shape or handle these at all. I tried not adding any flour but literally had to throw out some because if how bad it was sticking. Although I was able to make several, they were severely misshapen and sad excuse of a muffin :(. When I tried removing them from the parchment paper they all stuck very bad and had to throw some out too. Can you please shed some light on my difficulties? Thanks! Those that did turn out were tasty!
now that i read through the comments I see my question already answered…thanks!!!
Great recipe! I’ve made these several times with einkorn flour, and I’ve got my first batch of spelt English muffins rising right now. I can’t wait to try them, though I’m sure they’ll be great!
Could this recipe be made into a loaf instead of individual muffins? If yes, what temp would you bake, and for approx how long?
Thank you!
How can I make these more sour? The last batch was perfect except for I prefer them more sour. I let them do their initial rise for 24hrs. Nooks and crannies and texture was perfect and they didn’t last long in my house!
Since this recipe uses sourdough with an ample processing time, why do you also use the soaking method where additional ingredients are added the next day? My preference would be to add it all at the beginning and just use the sourdough processing time.
WOW! This recipe was easy to follow and easy to complete. My husband commented that they looked like “real English muffins” (um, that’s what I made…)
The family loved them, I couldn’t believe how easy they were to make, and hubby has requested more! My son in law wants a batch for his freezer as well.
Of course you have the perfect recipe, Wardee, all of your recipes are wonderful!