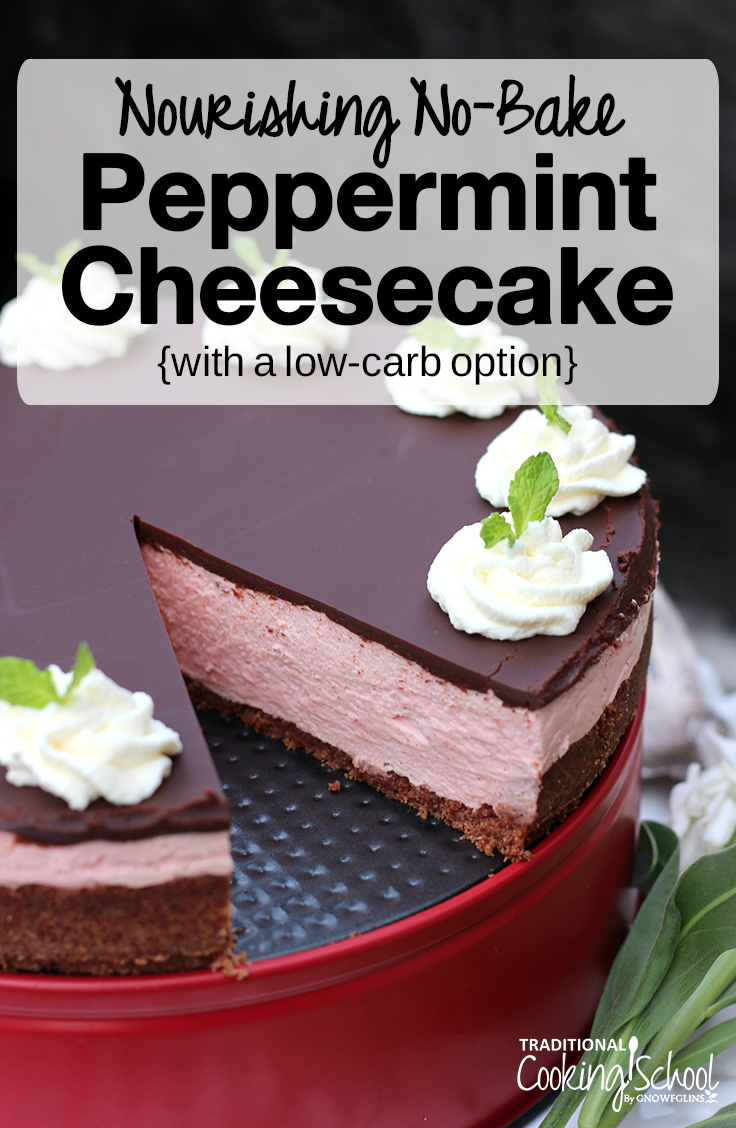
Are you looking for the best winter holiday cheesecake recipe? This is it!
In the interest of full disclosure, you may even find yourself dreaming about it next July, too… 😉
It’s light, yet rich and satisfying, with an easy chocolate ganache topping. Whether snow-lined window panes or hot sunshine, this dessert brings year-round bliss!
While the crust does require a short baking time, otherwise this cheesecake whips up quickly without monopolizing the oven on Christmas Day, or heating up the house (just in case you decide you can’t live without it come July). Try chocolate cheesecake pie and pumpkin cheesecake mousse pie no-bake options too.
Organic beet powder lends this cheesecake its pretty pink color. If you’d prefer, leave the filling white, or try out nutrient-dense spirulina for green!
This cheesecake is egg-free, grain-free, gluten-free, refined sugar-free, with a low-carb option. Perfect for allergy-friendly folks as long as you can have dairy! (If you can’t, my New York Instant Pot Cheesecake has options for lactose-intolerant and cow’s dairy-intolerant readers.)

No-Bake Peppermint Cheesecake
Need the perfect winter or holiday dessert? This Nourishing No-Bake Peppermint Cheesecake with chocolate ganache is IT! Allergy-friendly and low-carb, too!
Ingredients
For the crust:
- 1 cup blanched almond flour
- 1/4 cup lard butter, or coconut oil
- 1/4 cup coconut sugar or a healthy, low-carb alternative sweetener
- 2 tablespoons cocoa powder
- 1/4 teaspoon sea salt
For the cheesecake filling:
- 1/4 cup pure water
- 2 teaspoons sustainably-sourced gelatin (certified glyphosate-free)
- 1/2 cup maple syrup or a healthy, low-carb alternative sweetener
- 2 teaspoons organic beet root powder optional, or use 1/2 teaspoon spirulina for green mint color
- 1-1/4 teaspoons peppermint extract
- 1/4 teaspoon liquid stevia extract or to taste
- 16 ounces organic cream cheese room temperature
- 1 cup heavy cream
For the whipped cream topping:
- 1 tablespoon pure water
- 1/2 teaspoon sustainably-sourced gelatin (certified glyphosate-free)
- 1 cup cream pastured or raw
For the chocolate ganache topping:
- 1/2 cup lard butter or coconut oil are probably fine, too
- 1/2 cup cocoa powder
- 1/4 cup maple syrup or stevia, to taste
- dried peppermint fresh, for garnish
Instructions
To make the crust:
-
Preheat oven to 350 degrees Fahrenheit.
-
Melt lard or fat of choice in small saucepan, then remove pan from heat. Add remaining ingredients, stirring well to combine.
-
Press crust into cheesecake pan, going up about 1 inch on the sides. Bake crust 10 minutes. Set aside to cool while you make the filling.
-
Now, make the filling.
To make the cheesecake filling:
-
Place 1/4 cup water in small saucepan. Sprinkle 2 teaspoons gelatin over surface and allow to bloom for 1 minute.
-
Stir in gelatin and turn heat to medium.
-
Stir gelatin until it melts and there is foam on the surface, about 1 to 2 minutes.
-
Remove from heat.
-
Stir in maple syrup, optional beet powder (or spirulina), peppermint oil, and stevia. Don't worry if the beet powder clumps.
-
Set aside. The mixture will congeal a bit.
-
Using a medium size bowl, whip 1 cup cream until stiff peaks form. (Do not over-beat or you'll make butter.)
-
Set aside.
-
In large bowl, beat cream cheese until smooth and slightly fluffy, about 30 seconds.
-
Add sweetened gelatin mixture, one large spoonful at a time, fully incorporating the mixture as it’s beaten in. Continue until all the sweet gelatin is added.
-
Fold the plain, room temperature whipped cream into the sweetened gelatin cream cheese mixture with a rubber spatula.
-
Pour this filling into the cooled crust, smoothing out the surface.
-
Refrigerate 3 hours or overnight.
To make the whipped cream topping:
-
Place 1 tablespoon water in small saucepan.
-
Sprinkle 1/2 teaspoon gelatin over its surface and allow to bloom for 1 minute.
-
Once bloomed, stir in gelatin, then keep stirring constantly over medium heat. The gelatin will dissolve in about 30 seconds.
-
Remove from heat.
-
Whip 1 cup cream until soft peaks form.
-
Add gelatin and water mixture, and beat until stiff peaks form. (Do not over-beat.)
-
Refrigerate. This will become the topping later on.
To make the chocolate ganache topping:
-
When the cheesecake is set and you're ready to assemble, gently melt lard over low heat in small saucepan.
-
Remove from heat. Be sure no water comes in contact with the lard or inside of the pot.
-
Add cocoa powder and maple syrup.
-
Stir well, until thoroughly mixed. Set aside to cool.
To assemble:
-
Remove cheesecake from the fridge.
-
Pour cooled chocolate topping over its surface, spreading out evenly to the edges of the pan.
-
Chill 1 hour.
-
Remove the cheesecake and reserved whipped cream from fridge.
-
Place the whipped cream into piping bag, preferably fitted with a large, pretty, star tip.
-
Pipe whipped cream around the circumference of the cheesecake decoratively. You will have some leftover -- use for topping festive hot chocolate!
-
To garnish, add fresh mint. Refrigerate 6 hours or overnight. Serve and enjoy!
Recipe Notes
- While the crust does require a short baking time, otherwise this cheesecake whips up quickly without monopolizing the oven or heating up the house. A perfect indulgence any time of the year!
Looking for more nourishing, gut-healing, sugar-free foods that your family will love to eat?
Be sure to check my cookbook: Eat Beautiful: Grain-Free, Sugar-Free and Loving It (softcover version as well).
It contains all the recipes I’ve perfected through my family’s years on a gut-healing diet.
My eBook and video package is currently 50% off. One of the bonus videos you’ll get explains the grain-free baking technique I use to make amazing panini sandwiches for our gut-healing cafe in Eugene, Oregon! And there are lots of yummy, refined sugar-free dessert recipes!
Love no-bake holiday cheesecakes? Here’s another special one: No-Bake Eggnog Cheesecake!
...without giving up the foods you love or spending all day in the kitchen!

2 free books:
Eat God's Way
Ditch the Standard American Diet, get healthier & happier, and save money on groceries...
We only recommend products and services we wholeheartedly endorse. This post may contain special links through which we earn a small commission if you make a purchase (though your price is the same).


Looks beautiful and tasty. Please, what size cake pan to you recommend?
Hi Donna, I used a 9-inch cheesecake pan. One that is slightly smaller or larger will also work. 🙂
Unable to eat almond flour what would be a good substitute? Thank you for your help.
Hi G, this (link below) is the recipe I use more often for my own family. It’s made from cassava flour, so it’s grain-free. We LOVE it, and if you don’t already use Otto’s cassava flour it’s worth having, in my opinion. The crust I link to has just a 9 minute baking time, and then you can proceed with this recipe. I hope that helps! https://traditionalcookingschool.com/food-preparation/instant-pot-new-york-cheesecake/
what is sustainably-sourced gelatin? can we use another ingredient instead it?
I think we need lots of time for making this delicious recipe.
Thank you for sharing this interesting and sweet recipe.
looks really so beautiful. I want to taste it. I making this delicious cake, surely. Thank you for sharing this recipe.
What is the difference between the heavy cream listed in the cheesecake filling and the pastured cream in the whipped cream topping. Are they the same thing? Thanks.
Yes, they are the same thing. 🙂
No where do I find the size of cheese cake pan. I have 3 and I don’t think any of them will work. One is to big, and the other two are two small. So what size should I use for this recipe.
What a wonderful collection of romantic menu ideas! Perfect for Valentine’s Day menu planning!
Thanks for a great recipe! We all loved it! Based on the length of ingredients and directions, I was expecting it to take quite a bit of time to make this cheesecake. But I was pleasantly surprised at how quickly and easily it all came together. I followed the recipe as stated, except I substituted 24 drops of peppermint oil for the extract, and added just a few drops of vanilla stevia to the whipped topping. Thanks so much!