
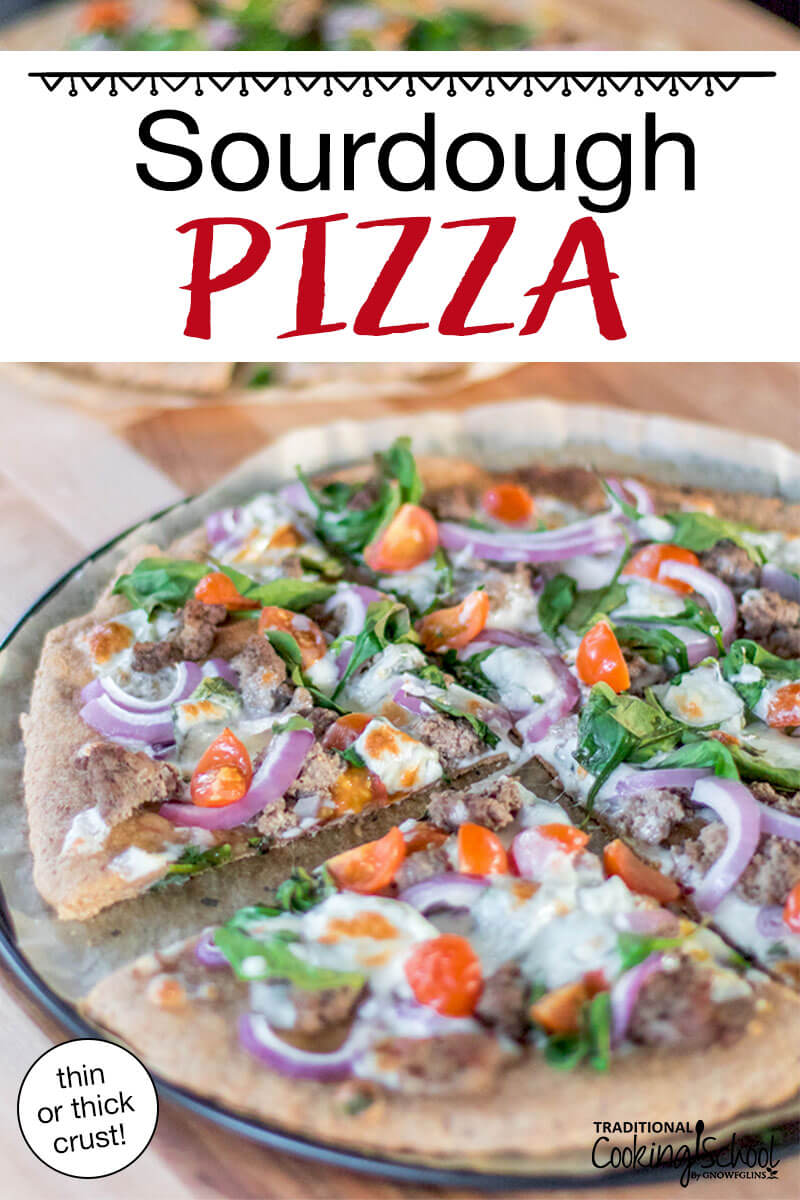
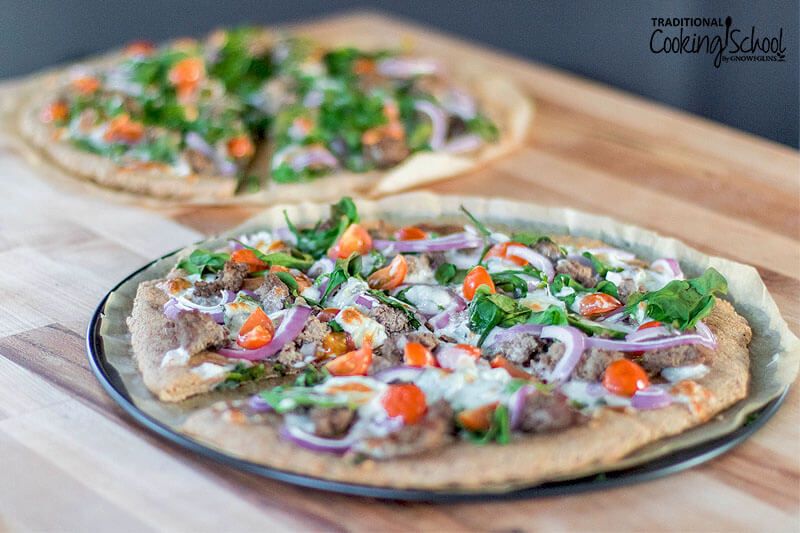
Thick or thin crust, delightfully flavorful and crispy, this homemade sourdough pizza crust is easy to make and loaded with your favorite toppings! Plus, you can freeze it for a make-ahead dinner on busy weeknights!
Pizza and sourdough… Two of our favorite things!
Whether cooked in an outdoor pizza oven or on the grill, pizza night is our favorite. My husband and 3-year-old like to call it a “gourmet feast”. 😉
This recipe requires very little hands-on time. It’s nourishing and simply delicious.
Pizza Crust Ingredients
- Sourdough starter – Your starter doesn’t have to be in its active, bubbly state for this recipe, but it should have been fed sometime within the last 12 hours. Don’t worry too much about how thick or thin it is, either. You’ll adapt the recipe by adjusting flour or water amounts to get a dough with the right consistency.
- Pure water — Choose filtered water free of contaminants. Warm water is best!
- Oil – I use olive oil in the recipe below, but you can use any liquid oil such as melted coconut oil or grass-fed butter!
- Flour of choice – I used whole grain spelt flour in the pizza pictured. Feel free to use your favorite whole grain or all-purpose flour such as wheat or einkorn.
Pizza Topping Options
- Pepperoni – Grated mozzarella cheese with tomato sauce and pepperoni.
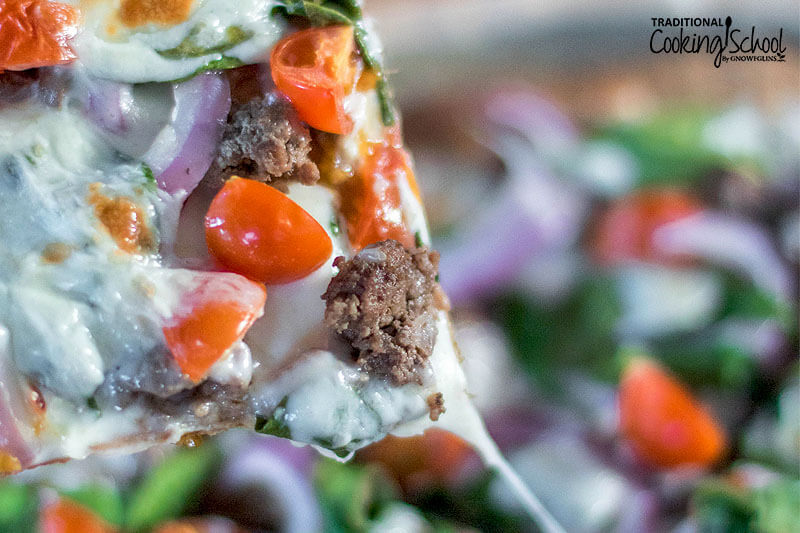
- Meat-lover’s – All the meats you can think of — ground beef, sausage, pepperoni, bacon bits plus tomato sauce and mozzarella.
- Hawaiian – Sliced ham with mozzarella and pineapple chunks.
- Herbed Chicken – Shredded chicken sautéed in bacon drippings, grated mozzarella, bite-sized kale or spinach pieces, red onion, minced garlic, grape tomatoes, artichoke hearts, crumbled bacon, and a sprinkling of salt and pepper topped with fresh parsley when it comes out of the oven.
- Mediterranean – Dried thyme and oregano with mozzarella and feta cheese, topped with black pepper, red onion, grape tomatoes, black olives, bell pepper, and artichoke hearts.
- Middle Eastern – Olive oil and za’atar spice blend topped with fresh cheese.
Sourdough Pizza Crust Directions
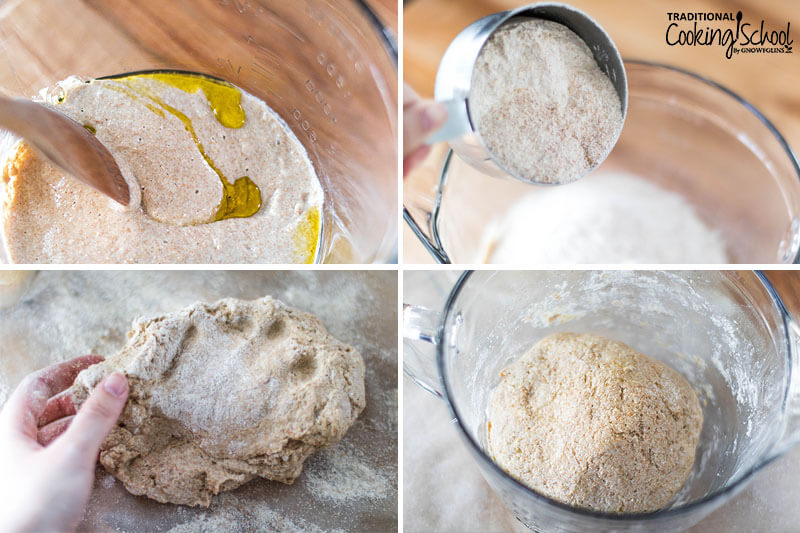
- The morning of the evening you’d like pizza, combine sourdough starter, water, oil, and salt in a mixing bowl. Stir.
- Add flour to the mixture. Mix well.
- Sprinkle your counter with flour or lay down a sheet of parchment paper. Place dough mixture on top and begin kneading, adding flour as necessary.
- Knead until you have a dough that is soft and not sticky. If you find your dough is too wet, add more flour. If it is too dry, add more water or sourdough starter.
- Once dough is soft and smooth, place it into a lightly greased mixing bowl (we use oil to prevent dough from sticking to the bowl). Then cover the bowl with a tea towel or plate, and leave to sour till the evening (this is the bulk fermentation process).
- Or, let dough rest for 30 minutes, then roll it out, shaping the dough, and leaving it to sour as an unbaked crust ready to go. Cover it with plastic wrap to keep it from drying out.
Sourdough Pizza Directions
- Once the souring time is over, preheat the oven to 450 degrees Fahrenheit. (If you have a pizza stone, preheat it here!)
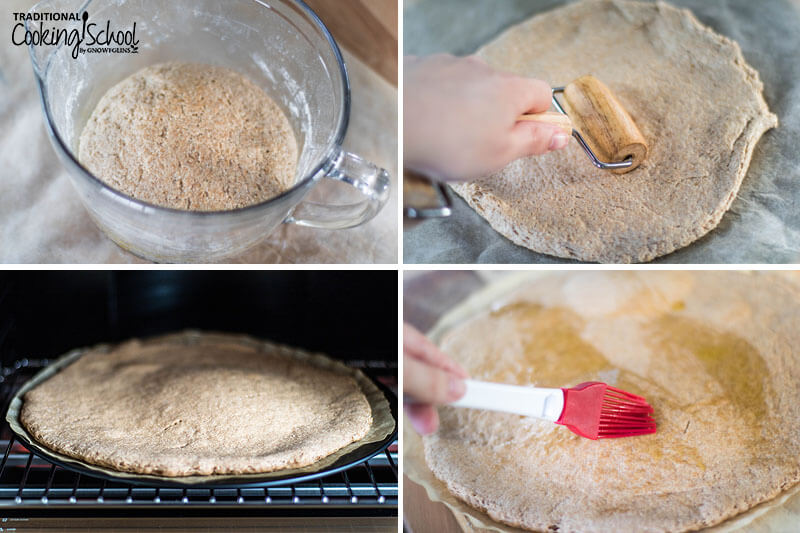
- If you haven’t already, remove the dough from the bowl and roll it out, stretching the dough to form your crust. Either keep it as one ball for a thick crust pizza or divide the dough in half and roll the smaller dough balls out for two thin-crust pizzas.
- Next, poke rolled-out dough several times with a fork to keep dough from bubbling up while baking.
- Pop crust(s) in the oven for about 5 minutes while keeping an eye on it. Don’t let it get too dark. This is just the pre-bake.
- Take the pizza out of the oven (using something like a pizza peel is helpful here).
- Brush with olive oil (this helps keep the sauce from making the dough soggy).
- Add your favorite sauce and toppings!
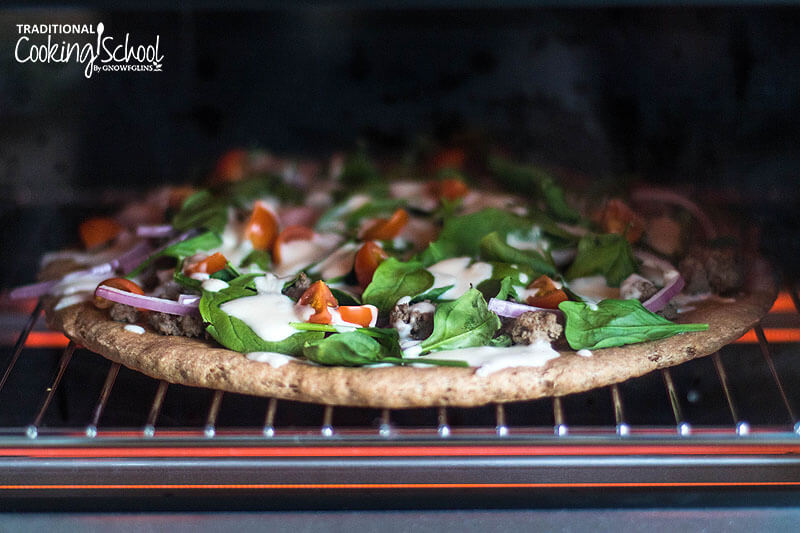
- Place back in the oven for 10 to 25 minutes, until cheese is browned and bubbly. I like to do this bake directly on the oven rack to create an extra crispy crust!
- Remove and slice. For a special touch, sprinkle with fresh herbs. Enjoy!
Tips And Tricks
I feed my starter the night before the morning I want to prepare the pizza dough. This ensures that I will have enough happy ready-to-go starter for the recipe and some left-over for future sourdough adventures.
I usually feed my sourdough starter a ratio close to 1:1 (flour/water). Depending on what I am making, I may use more flour for a thicker starter. For this recipe, it doesn’t matter how you feed your starter. You will correct any consistency deficiencies while kneading.
I like to do my second bake directly on the oven rack (I might turn down the heat depending on the number of toppings). This creates a deliciously crispy crust. Because the crust is pre-baked, it slides easily off the cookie sheet and onto the oven rack. Once the pizza is finished, I slide it back onto the cookie sheet for easy cutting.
How To Make Thin Crust Pizza With This Recipe
This recipe will work for thick or thin crust. What’s your preference? Roll out your dough accordingly… either as one dough ball for thick crust or split in half for two thin crusts!
Can You Freeze Sourdough Pizza Dough?
After pre-baking your crust(s), you may opt to cool and freeze them to enjoy later for a quick weeknight dinner!
How to Make Dough Ahead of Time
For ready-to-use dough, follow steps 1-5 above. Transfer the dough to a zip-top bag, or store in the same bowl, covered with plastic wrap, in the refrigerator until a few hours before baking. Remove the dough from the fridge, allow the dough to come back up to room temperature, then stretch or roll the dough out and proceed.
How To Store Leftover Pizza
Store in an airtight container in the fridge. Eat within a few days.
How To Reheat Pizza
To best mimic that freshly-baked, crispy sourdough crust, I recommend popping your leftover pizza back in the oven on a baking sheet. Bake at 350 degrees Fahrenheit for 20 minutes or so until pizza is warmed through and cheese is melty again.
Other Sourdough Recipes
- Gluten-Free Sourdough Pizza
- Whole Grain Sourdough Bread (einkorn, spelt, or whole wheat)
- Sourdough Waffles With Fermented Strawberries & Yogurt Cheese
- Whole Grain Sourdough Waffles
- Sourdough Lavash: A Traditional Armenian Flatbread
- Sourdough Pesto Pizza
Did you make this sourdough pizza crust recipe? If so, please give us a rating on the recipe card below. Then snap a photo and tag us on social media so we can see your pizza and topping variations!
Sourdough Pizza
Thick or thin crust, delightfully flavorful and crispy, this homemade sourdough pizza crust is easy to make and loaded with your favorite toppings! Plus, you can freeze it for a make-ahead dinner on busy weeknights!
Ingredients
- 1 cup sourdough starter fed 12 hours before
- 1/2 cup pure water
- 1-1/2 tablespoons extra virgin olive oil
- 1 teaspoon sea salt
- 1 to 1-1/2 cups flour of choice einkorn, spelt, whole wheat, etc.
- toppings of choice meat, cheese, veggies, etc
Instructions
The morning of the evening you’d like your pizza...
-
Combine sourdough starter and water into a medium-sized mixing bowl. Stir.
-
Add oil and salt. Stir.
-
Then add 1 to 1-1/2 cups of flour to the mixture.
-
Mix well.
-
Next, sprinkle your counter with flour.
-
Place dough mixture on top and begin kneading.
-
Add flour as necessary.
-
Then knead dough until all ingredients are happily combined.
-
Remember, you are looking for a dough that is soft and not sticky. If you find your dough is too wet, add more flour. If it is too dry, add more water, starter, or whey.
-
Once dough is complete, place dough ball back in the (lightly-greased) bowl, cover with a plate, and leave to sour till the evening.
Or...
-
Let dough rest for 30 minutes, then roll it out, and leave it to sour as an unbaked crust ready to go. Cover it with plastic wrap to keep it from drying out.
Once it's time to bake the pizza...
-
Preheat oven to 450 degrees Fahrenheit or hotter for the pre-bake. (If you have a pizza stone, preheat it here!)
-
While the oven is preheating, if you haven't already, roll out your dough.
-
Poke rolled-out dough several times with a fork.
-
Then pop it in the oven for about 5 minutes while keeping an eye on it. Don't let it get too dark. This is just the pre-bake.
-
Take the pizza out of the oven.
-
Cool and freeze for not-immediate baking or brush with olive oil and add your favorite toppings!
-
Bake your decorated sourdough pizza for 10 to 25 minutes depending on oven temperature, toppings and crust thickness.
-
Enjoy!
Recipe Notes
*I feed my starter the night before the morning I want to prepare the pizza dough. This ensures that I will have enough happy ready-to-go starter for the recipe and some left-over for future sourdough adventures.
*I usually feed my sourdough starter a ratio close to 1:1 (flour/water). Depending on what I am making, I may use more flour for a thicker starter. For this recipe, it doesn't matter how you feed your starter. You will correct any consistency deficiencies while kneading.
*This recipe will work for thick or thin crust. What's your preference? Roll out your dough accordingly.
*I like to do my second bake directly on the oven rack (I might turn down the heat depending on amount of toppings). This creates a deliciously crispy crust. Because the crust is pre-baked, it slides easily off the cookie sheet and onto the oven rack. Once the pizza is finished, I slide it back onto the cookie sheet for easy cutting.
This post was originally published and written by Erin Vander Lugt on 6/10/10. It was updated and republished on 3/10/21.
...without giving up the foods you love or spending all day in the kitchen!

2 free books:
Eat God's Way
Ditch the Standard American Diet, get healthier & happier, and save money on groceries...
We only recommend products and services we wholeheartedly endorse. This post may contain special links through which we earn a small commission if you make a purchase (though your price is the same).

I love the fact you can freeze the pre-baked pizza crust for an instant week-night dinner! Would you let it defrost before putting toppings on and baking, or do you put it directly into the oven frozen?
Can’t wait to try this!
I just made a gluten free crust the other night, and once again – it just doesn’t have that same crunch I crave with pizza. I’m not celiac, I just test GF recipes often for clients…so I can’t wait to try yours. The toppings we used were Fatted Calf fennel sausage, tomatoes (San Marzano from can), garlic, mushrooms and first-of-the-season zucchini, oregano, parsley plus Bufala mozzarella and feta. Heaven in a pie:)
I’m not a celiac but I do try to stay as close to a gluten free eating regime as possible most of the time because I’ve found it takes my joint pain (from arthritis) completely away when I remove gluten…I have a pizza crust that I came up with that has the crunch of real pizza and you’re welcome to check it out and try it. It’s on my fb page https://www.facebook.com/photo.php?fbid=10201244783388763&set=pb.1446921839.-2207520000.1391054702.&type=3&theater. If you have a problem using that link just search for me Barb Childers. I used the instructions here to create a gf starter using brown rice flour and it was pretty darn good!
I’m so excited – I’ve got my pizza crust ball “souring” for pizza night tomorrow night! Erin, about how long do you usually knead? I used my Bosch mixer and kneaded for about 8 minutes. The dough felt soft and stretchy, so I called it good. 🙂
Kylie- Thanks for your comment. 🙂 A couple thoughts for you… You could par-bake the crust, cool, freeze, top with goodies, and refreeze. For a quick meal, place the completed frozen pizza directly in your preheated oven and bake until crust is browned and cheese is melted. You could also have your frozen crust sitting out while you prepare your toppings and preheat the oven. The crust will be partially thawed by the time you are ready to bake it.
Enjoy!
Hello,
I was wondering if I could freeze the dough before rolling it out and pre baking it?
Thanks much
Most definitely! Enjoy your pizza!
Karen- Your comment made my mouth water! Just the sound of Fatted Calf fennel sausage… Mercy! 🙂 I think the splash of olive oil, the pre-bake, and the thinner crust baked on the rack for the second baking all work together for a deliciously crisp crust. I’d love to hear what you put on this one! Thanks for the comment!
Wardee- Look forward to hearing how you like your pizza! I have yet to sour the dough for 24 hours, so I would like to hear if your crust has a strong sour or more mild taste. As far as how long I knead… I’m never very mindful about timing those kinds of things. I know it is not as long as 8 minutes. Maybe 4-5? But, I think stopping when the look and feel of the dough seems right is good enough. Or maybe you will let us know otherwise! 🙂
Do you use the “Mike’s Way” starter? I’ve done the NT rye starter for loaf bread with mixed results. Perhaps I’m not patient enough… ?
Kirsten- I used Mike Avery’s method (pretty much) for creating our own sourdough starter. Very satisfying, I must say! 🙂 Are you having a hard time creating a starter, maintaining a starter, or using your starter for baked goods like bread?
Do you think you could just freeze the dough ball after it has ‘soured’ for 8 hours or so? Just wrap in plastic wrap and freeze for a later pizza?
Tara – I did that last night with two dough balls. I’ve done it with other pizza dough, so I figured it would work for this. I am looking forward to easy-peasy pizza on the weekend!
Tara- I think that is a great idea and definitely worth a try. Just leave the dough ball out to thaw the day you want to make your pizza, roll, top, and bake! I could save myself a lot of time if I prepared foods that way. Make more, and freeze for later! Thanks for the inspiration! 🙂
I decided to make two today after seeing how much starter I had. I think I’ll make one tonight, although I’m going to make more as a focaccia bread than a pizza. The other dough ball will be wrapped and put in the freezer for an already soaked and ready to go pizza or focaccia.
.-= Tara´s last blog post… Soft Raw Goat Cheese =-.
Erin, thank you for posting your sourdough pizza crust! You know I have been waiting for this! 🙂 I made a double batch over the weekend which made about 3 medium to small pizzas. Everyone enjoyed them and the leftovers were warmed and tasted even better.
We put sausage, peppers, onions and mushrooms on our pizza. So delicious. Thanks for
sharing! Keep up the good work. Maybe you could share a few pictures of Anchorage
with us. I live in PA and will never probably get to Alaska.
Karen- Thanks for your kind comment! So glad you and your family enjoyed the pizza. Your topping choices sound delicious.
And I would love to share pics of AK sometime. We do feel very blessed to be living here. We’ll be driving through PA this summer and are looking forward to the road trip! 🙂
I made pizza tonight and thought I’d do a little report back. 🙂 Well, I forgot to prebake the crust, and I thought all hope for a crisp crust was lost. Not so! I baked it for awhile on a greased cookie sheet at about 400 degrees and moved it onto the oven rack for the final minutes of baking. Crispy and delicious!
I also made a kind of pizza new to me. No sauce. I missed the sauciness, but this turned out pretty good. On half of the pizza I spread kefir cheese and topped it with smoked salmon, sauteed broccoli, green onion, and fresh chopped dill. The second half I spread with olive oil and topped it with smoked salmon, broccoli, green onion, mozzarella cheese and the dill. The recipe that inspired this idea included a hard boiled egg and used cream cheese for the base. Delicious, and best of all, I used what I had in the house! 🙂
Erin – That sounds really good. I was wondering about no sauce, because there’s one person in my family who doesn’t like soggy bread – which sauce usually does to the crust, even with a crisp crust. I like the idea to brush with olive oil and will try that next!
I have really enjoyed your crust! The second time I did what you suggested and baked right on the oven rack and it worked great. Very crisp, very delicious, and best of all – no mess. 🙂
I was hoping to make calzones with this recipe later in the week. Any recommendations on baking this recipe into a calzone instead of pizza? Will pre-baking the dough make it too firm and crispy to then remold into the pockets needed for calzones? Thanks!!
Charis — Check out this post on Pizza Pockets, where I used this sourdough crust recipe. The only thing is that if you over-sour the dough, it won’t roll out well but will break instead. So in warm weather, sour it for less than 8 hours. Sometimes 8 hours is too much.
https://traditionalcookingschool.com/2010/06/14/pizza-pockets/
Made the pizza crust and the Basic Sourdough Bread today. The bread did not rise, very much a fail. BUT, the pizza crust was highly successful. I topped it with basil pesto, sausage, red onion, red & green tomatoes, and a little 3-cheese blend I had. All toppings local & organic–we know the farmers that raised everything I put on there–and we scarfed it down!! Looking forward to leftovers tomorrow!
Molly- Yeah! Thanks for the smile! So glad you enjoyed your pizza. Your toppings make my mouth water! 🙂
Erin,I have a pizza stone, but not the fancy paddle thing that you push it onto the stone with. I am just afraid it wouldn’t want to come off! So what I do is preheat my stone, and roll my dough out on parchment paper. Then I use a baking sheet turned upside down to push my pizza onto the stone with, parchment paper and all. Sometimes I remove the parchment paper after the crust has had time to crisp up some.
Wardee, are you going to show us how you do your big batch cooking with sourdough? I would like to know how you do this, because once I am already in the kitchen dealing with flour, I might as well cook in quantity.
Kelli- Sounds like a great idea. Using a greased cookie sheet has never given me a problem. The other day I let my dough sour on a greased pizza stone. After the 5 minute prebake, I took my spatula and released the dough from the stone before piling on my toppings. That worked, too. Thanks for the tip! 🙂
Do you put the pizza on the lowest rack in the oven? I wasn’t sure which rack to put it on.
I cooked my pizza at 450 degrees for five minutes, added the toppings, and cooked for 20 more minutes. It tasted yummy; however, the crust was not crispy all the way through. The dough seemed to be crisp on the edge, on top and on bottom, but seemed raw in the middle between the top and bottom of the crust (not the middle of the pizza). I used a 12 inch round aluminum pizza pan. Should I have used a larger pan so that it would be thinner, and then maybe the crust wouldn’t have been raw in the middle?
Thanks for all the great recipes! I’m a beginner to all of this and am having a blast!!!
I just noticed that this recipe is different than the one in the ecourse. Is there any reason for that? Wondering which one to go with… assuming the ecourse one is more recent. 🙂 Thanks!!
Hi Carrie- Go with the e-course one. I decreased the amount of sourdough just a bit to prevent possible over-souring. Both work, though. 🙂
As far as using a hot stone. We roll out and “decorate” our pizza dough on parchment paper, then together (you need a second set of hands) move the parchment to the stone and put it in. Also, because our oven doesn’t get very hot, we usually use our propane grill outside… with the two outside burners on and the middle two off so it doesn’t break the stone.
Thanks for the recipe… can’t wait to try it!
We loved this! It was my third sourdough creation and I was surprised that it rised quite a bit while it was soaking. I used spelt flour and plan to make this weekly.
Hi Shannon- Glad you enjoy the pizza dough! It makes great calzones and bread sticks, too! Thanks for letting us know! 🙂
You asked where I was going from the sourdough English muffins…I guess here. I will be making pizza dough in the morning! Wish me luck! 😉 I know it will be great because I trust you and the fine people who share here. 😉
Thanks;)
Mary
You asked where I was going from the sourdough English muffins…I guess here. I will be making pizza dough in the morning! Wish me luck! 😉 I know it will be great because I trust you and the fine people who share here. 😉
Thanks;)
Mary
So how terrible do you think it will taste if I didn’t add salt…because as I am cleaning up I see I am putting away my sea salt that I never used! Aaaaahhhh! I do not have enough starter to do another batch, do you think it will make a BIG difference?
Afraid,
Mary
Hi Mary- Not a problem. Sprinkle some salt on the dough after you roll it out if you are concerned. I believe all will be well! 🙂
That’s what I figured, so that is what I did and they are eating it right now. My dairy free pizza pre crust is baking as we speak! They all love it!!! <3
Mary
Why does the crust have to be prebaked?
Hi Toni- It’s not necessary. I do it to assure a crispy, non-doughy, non-soggy crust. I’ve done it without pre-baking, though, and it was still delicious. I think the trick to a crispy crust is to slide the pizza directly onto the oven rack a few minutes before taking it out. Enjoy!
Thanks so much Erin for your quick answer. I just received 25 lbs of fresh sprouted whole spelt flour and I’ve got a wonderful active sourdough going that I can’t wait to try out. I do really like the idea of being able to par bake a crust and have it ready in my freezer for dinner on busy days. I’ve also started making a water kefir soda that is so wonderful! I’ve never had anything so tasty and good for me at the same time.I’ve had a life long struggle with candida that is finally healed to the point that I can eat many things I could only dream of before. I’m so excited to start baking again. Thank you all for your wonderful post on healthy eating. I’m learning so much about cultured foods. These foods are changing my life for the better and I can’t say enough good things about this blog! Thanks again.
Toni
Hi Toni- How absolutely wonderful! Thank you so much for sharing. Wardee does a fabulous job with this blog, and I feel privileged to be a part of it in my small way. One thing I’d like to mention concerning your flour… If it’s sprouted, there is no need to sour it. The sprouting has already taken care of the anti-nutrients. Feel free to bake with it as you would normal flour! Let us know if you have any other questions! 🙂
Thanks so much Erin!
Quick question: does one start this recipe with cold starter, or active starter?
Hi Mindy- My guess is that it will work fine with a cold starter. But, I think I would only suggest it in a pinch. Feels better to think of this recipe (most recipes, actually) using a starter that has been fed the night before or maybe 8 hours before… Unlike bread, you aren’t looking for a large rise. You also feed it enough flour until you get the right consistency, and you do let it sit for several hours… so, for those reasons, your cold starter will probably work. Let me know how it goes if you give it a try! 🙂
Actually, the starter I had ready was active, I just wasn’t positive that this was what the recipe required. Several of the pizza crust recipes I had looked at called for cold starter. Anyway, I went with my instincts and prepared it with active starter…wonderful! This is my new favorite crust. Thanks so much, Erin!
I loved this recipe! I usually don’t pre cook the crust though. It comes out great. I have done it and removed it to freeze though, and that reheated well. Much better then those store bought ones looked. I love having company over for lunch to do a make your own pizza. It’s so easy entertaining by just doing up a big batch the night before, and putting it in the fridge until needed.
Yeah Angela! Thanks for your comment. Glad to hear you enjoy the crust! 🙂
Hi Wardeh and Erin! I notice that the recipe calls for adding salt before setting the dough to sour. I typically don’t add spices/salt to souring dough because of the antiseptic/antibacterial qualities of salt and some spices. I was afraid the enzyme and bacterial activity would be inhibited. Am I wrong in thinking this way? Is it really not a concern? Thank you!
I forgot to add that I made a double batch of this crust this morning. I made it gluten free with sorghum and arrowroot (my starter is predominantly buckwheat). This made a beautiful dough using your exact measurements of flour. It was slightly sticky, but GF dough typically is. It still had a lovely elasticity and was easy to work with. I pressed it out gently on my seasoned pizza stones to sour. We haven’t eaten it yet, but I’m quite sure we’ll love it. Easy to work with is nearly as big a deal in my book as the taste! Thanks for another great, nourishing, easy recipe.
Hi Erin,
I have been looking forward to making sourdough pizza for a long while but have been reluctant to start ONE more thing when I was already struggling keeping up with all the other things I have going on. From they busyness of four teenagers at home to carpooling school plus sports seasons, to kombucha and vegetable ferments, to chickens and farm runs, to my own stumbling health (adrenal/thyroid and all that can entail) I am having to accept limitations that are uncomfortable.
But.
I did finally open my Camaldoli Italian heirloom sourdough starter and get it started, just a few days ago, and in looking for ideas of what to do with my throwaway portion twice a day I thought I might start with pancakes… until I saw your post. Ah yes, sourdough pizza crust, my long lost love.
So, I mixed up your recipe and had every intention of making one smallish pizza tonight as a sampler for the family (7 of us here, one pizza is an appetizer!) but then… Kate, over at Modern Alternative Mama, posted today with a recipe for soaked tortillas and I had an epiphany!
Your dough makes great tortillas. Super easy to work with. I used coconut flour for the rolling part because I am fairly sensitive to untreated gluten flours. I used spelt flour and coconut oil for the dough. If I can eat these with reacting I will be a happy woman…
Hi Bebe- So glad you are making the sourdough pizza crust work for you! There are several delicious sourdough recipes on Wardeh’s site, but I encourage you to also check out the Sourdough E-book. Tasty sourdough recipes galore… including one for sourdough tortillas! Thanks for your comment and for sharing your enthusiasm! Made me smile!
And Wardeh… thanks for inviting Erin to do a guest post!
How would I modify the recipe for Sourdough Pizza Crust using freshly milled Red Whole Wheat Flour?
DeAnna — You would use additional flour, during the part of the recipe where it tells you to add more until you get the right dough consistency.
I love this pizza crust….I have made several other GF/CF crusts and they were hardly edible…I am excited I finally have one that I enjoy and it so easy…..Thank you for sharing this recipe.
Yeah Frances! I am so glad this pizza crust works for you! Thanks for your comment, and enjoy your pizza! 🙂
I roll my dough out on oiled parchment paper and that slides on and off of the pizza stone easily, especially using a pizza peel (giant spatula), though the oven temp. must not be over 450 to use parchment paper. I’ve not used sourdough before though, look forward to working with it.
Hi Nancy- Glad you are finding a method that works for you! We still enjoy this crust and eat homemade pizza every couple of weeks if not more. Our favorite toppings at the moment are sauteed onion, crispy bacon, and kale. Yum! Enjoy… 🙂
Try using parchment paper to roll your pizza dough out onto and bake on the pizza stone with the parchment paper underneath the crust. Be sure to trim the edges of the paper close to the edge of the dough as it tends to burn otherwise. I use parchment under my gf sourdough crust because it’s far too delicate to move around after rolling out. I use a 500 degree oven with the stone preheated and while I pre-bake the gf crust, I don’t the regular crust.
looks very yummy! Can not wait to try it!
This is a great recipe, and I love the par-baking option. I doubled the recipe and made 4, 9×13-sized pizzas, each diugh ball weighing 12 ounces. Next time, I’m going to par-bake and freeze for later use. This is such a great way to use up lots if starter!
I wish I could see the actual crust in the photo.
I have been making standard (non sourdough) pizza crust for years now, and my trick to getting the crust off of the peel and onto the preheated stone is to sprinkle the peel with organic corn meal before putting the rolled out crust on it. The corn meal acts like tiny ball bearings to roll the pizza off the peel. The peel does have to be dry for this to work. When children spill sauce over the edge of their pizza, it tends to catch and not slide so easily. I think I will try this recipe tomorrow for our regular pizza night. Thank you so much!
Could I freeze the dough before its rolled out and pre baked?
No problem, Logan. Enjoy!
We had this last night and it was lovely! I had a tiny bit of dough leftover (I rolled my crust super thin and had to cut it to fit it on my pan). I rolled the extra dough super thin, brushed with olive oil and sprinkled with salt and dried thyme. They turned out to be some of the best crackers! My sourdough was super sour and it made them taste cheesy! (Like I remember “Cheez Itz” tasting! I haven’t had a Cheez it in forever!) Thanks for this recipe!
I just started making this recipe again with a new starter. I have made several times before, but probably took a year+ break after ruining my original starter (rusty whisk!) and of course is took quarantine to get me to start a new starter.
I like how easy this recipe is and how soft the dough is to work with, but I feel like even back with my original the end result is maybe a little too tough/chewy to my liking. I wish I could obtain a softer crust.
I use einkorn flour – any ideas of what I could be doing wrong/or improve my crust?
Hi Rachel~ Good job getting your sourdough up and running again! We’ve been making pizzas weekly these days, so let’s see if I can think of a few tips to throw your way…
•make sure your dough isn’t too stiff before souring…
•add a splash more olive oil
•try adding a few tablespoons flax meal to the souring dough
•maybe bake for a shorter time? Or decrease the oven temp. a bit?
•maybe roll the dough less thin?
Let me know if any of these ideas work or if you come up with something else. Making a recipe your own is half the fun! Good luck!?
How would you modify this for using einkorn flour?? Looking forward to trying our first sourdough pizza!
In the recipe from the sourdough E-course the recipe calls for 1/2 cup water (which I always reduced to 1/4 when using spelt). In this version the water is omitted. Is this an update or was the water inadvertently left off the ingredient list? Thanks so much!
Hi Tami, thank you for catching that! It was a mistake and I have updated the post to include water as one of the ingredients.
I am currently enrolled in the Sourdough A-Z Masterclass, and wanted to use my 1 week old sourdough starter and today is National Pizza Day, which, of course called for homemade pizza. One of my goals that I want to reach in this course is to be able to provide healthy WHOLE GRAIN sourdough baked goods for my husband, our adult children and their families…. I have 3 sons in love that are a little bit picky about food. Today I made this sourdough pizza crust and it was delicious! And my son in love (who was here for dinner tonight) enjoyed it! I was so happy to have achieved my first success! I’ve made several sourdough recipes in the past with an organic unbleached flour starter, and mostly organic unbleached flour in my breads…. This is my first time to be successful with whole grains. THANK YOU Erin for this recipe!